Category: Guides

Explore our complete guide to app development. Learn the process, tools, and best practices. Designed for agencies and businesses looking to build apps with confidence

  • What Is The Diffrence Between React Native vs ReactJS?

    What Is The Diffrence Between React Native vs ReactJS?

    Key Takeaways

    • ReactJS is perfect for building dynamic and high-performing web interfaces with its Virtual DOM and extensive ecosystem.
    • React Native enables the creation of native-like mobile applications across iOS and Android using a single codebase.
    • Choosing between cross-platform and web development depends on your project’s specific needs and target audience.
    • Understanding the technical differences between ReactJS and React Native is crucial for selecting the right technology stack for your project.

    Introduction

    When it comes to developing applications today, understanding the difference between React Native and ReactJS is paramount for choosing the right technology stack. Both ReactJS, a robust JavaScript library for crafting dynamic web interfaces, and React Native, a powerful framework for creating cross-platform mobile apps, are popular choices in the tech community. This post aims to dissect their pros and cons and guide on cross-platform vs web development, helping you make informed decisions for your upcoming software projects.

    Understanding ReactJS

    ReactJS: Essential for Dynamic Web Interfaces

    ReactJS helps you build fast and dynamic web interfaces. Its core feature, the Virtual DOM, allows for efficient updates, which is crucial for high-performing web applications. This makes it ideal for single-page applications (SPAs), interactive dashboards, and web portals that require frequent UI updates.

    • Fast Rendering: The Virtual DOM enables updates to be made efficiently without refreshing the entire view.
    • Cross-Browser Compatibility: ReactJS ensures your application looks consistent across all web browsers.
    • Rich Ecosystem: With an extensive library and community support, ReactJS offers tools and plugins that are invaluable for modern web development.

    Common use cases include platforms like the web versions of Facebook and Instagram, where rapid UI refreshes are frequent.

    References:

    React Native App company agency

    Understanding React Native

    React Native: A Gateway to Cross-Platform Mobile Applications

    React Native is more than just a framework; it’s a solution for building native-like apps across iOS and Android with a single codebase. By compiling JavaScript code into native mobile components, React Native allows for a seamless user experience akin to native apps.

    • Code Sharing Across Platforms: Write once and use the same code for both iOS and Android, saving time and resources.
    • Native UI and Performance: React Native applies platform-specific UI components, achieving a native look and feel.
    • Hot Reloading: View changes instantly without losing your application state, which speeds up development.
    • Access to Device APIs: It integrates with native modules, offering full use of the phone’s hardware and features.

    Projects like Discord and Bloomberg utilise React Native for its efficiency in managing one codebase for both platforms.

    References:

    Cross-Platform Development vs Web Development

    Navigating the choice between cross-platform vs web development is crucial for modern software projects.

    • Cross-Platform Development: By utilising a single codebase to deploy on multiple platforms, tools like React Native reduce both development and maintenance time.
    • Web Development: Focuses on creating experiences directly in web browsers without concerns about specific device platforms. ReactJS enables smooth, interactive web experiences that are highly accessible and SEO-friendly due to server-rendered capability.

    Choosing ReactJS is best for projects that require strong online visibility and broad accessibility, while React Native is optimal for applications needing a native presence on both iOS and Android.

    References:

    Key Comparison Points for Agencies

    Feature ReactJS (Web) React Native (Mobile/Desktop)
    Output Renders HTML, CSS, and JavaScript, which run in a web browser. Renders native UI components like <View> and <Text>, which run directly on the device’s operating system.
    Performance Highly performant for web applications due to the use of a Virtual DOM to optimize UI updates. Delivers near-native performance because it uses the platform’s native rendering APIs. There is no web-based rendering engine involved.
    Styling Uses standard web technologies like CSS, SCSS, or CSS-in-JS libraries. Uses a JavaScript-based styling API (StyleSheet.create()), which is similar to CSS but with a focus on mobile layout properties.
    Platform APIs Limited to what is available in a web browser (e.g., HTML5 Geolocation API, WebSockets). Can access native device features like the camera, accelerometer, GPS, and push notifications, all through a JavaScript bridge.
    Use Cases Web apps, e-commerce platforms, complex single-page applications, and interactive websites. Mobile apps (iOS & Android), cross-platform desktop applications (Windows & macOS), and Minimum Viable Products (MVPs) that need to reach multiple mobile platforms quickly.
    Development Relies on a web browser and developer tools for debugging. The development cycle is very fast with hot reloading. Requires a more complex setup with native IDEs like Xcode (for iOS) and Android Studio (for Android). Debugging on physical devices can be more involved.

    Differences Between React Native and ReactJS

    Understanding the technicalities can better inform your platform choice:

    • Technical Architecture: ReactJS operates in the browser using a Virtual DOM, while React Native uses a bridge to convert JS into native mobile code.
    • Platform: ReactJS is crafted for web browsers; React Native is for mobile devices.
    • Performance: ReactJS is optimised for quick web updates; React Native offers robust mobile performance but can have overhead due to the bridge.
    • Development Workflow: Different tools are needed for each; ReactJS uses Webpack and npm, whereas React Native works with Metro and native IDEs.

    Evaluate these differences to choose the technology that aligns with your project needs.

    Aspect React JS React Native
    Platform Web browsers Mobile (iOS, Android) can be extended to desktop
    Base Language JavaScript, JSX JavaScript, JSX
    Rendering Uses the Virtual DOM to render HTML in browsers Uses native components instead of HTML; bridges JS to native APIs
    Styling CSS, SCSS, styled-components Stylesheets in JavaScript (React Native style objects)

    References:

    Development Environment

    Feature React JS React Native
    IDE Any code editor (VS Code, WebStorm, etc.) Same editors + platform-specific emulators
    Testing Browser-based testing Requires mobile simulators/emulators or real devices
    Deployment Deployed on web servers Published via App Store (iOS) or Play Store (Android)
    react native without expo developer

    Quick Pros & Cons

    React JS Pros React JS Cons
    Mature ecosystem for web Not mobile-focused
    Easy SEO optimisation Needs separate tech for mobile
    Great for SPAs and PWAs Browser limitations for performance
     
    React Native Pros React Native Cons
    Cross-platform mobile development Not ideal for heavy 3D graphics apps
    Native performance Requires native code knowledge for some features
    Large community More setup complexity than web

    Conclusion

    In conclusion, both React Native and ReactJS offer unique advantages and can be pivotal in the success of your software projects. They share a foundational architecture but diverge significantly in targets and execution. Whether you opt for ReactJS with its web-centric approach and SEO advantages or React Native’s cross-platform efficiency and native performance, assessing your project’s scope, target audience, and necessary functionalities will guide your decision.

    Remember, the right choice aligns technology with strategic business objectives to ensure project scalability, performance, and maintainability.

    Additional Resources

    Explore further with these resources to deepen your understanding and aid your development journey:

    Frequently Asked Questions

    1. If we build our app in ReactJS, can we convert it to React Native later?

    No, not directly. While both use React’s syntax, their core components are different. A ReactJS web component (e.g., <p> or <div>) cannot be directly used in a React Native app. However, much of the business logic and state management code can be shared and reused, which significantly saves time during a subsequent mobile development phase.

    2. Which one is faster to develop in?

    For an experienced developer, both are very fast. However, a ReactJS web app generally has a faster development cycle because the build process is less complex. A React Native app requires compilation for each native platform, which can be more time-consuming.

    3. Does React Native use web technologies like HTML and CSS?

    No. React Native’s components are not HTML elements. Instead of using a web browser to render, it communicates with the native UI components of the device’s operating system. Styling is done using a JavaScript-based API that is very similar to CSS, but the underlying rendering is completely native.

    4. Why can’t we just use a web app on a mobile browser instead of a native app?

    While a web app works on a mobile browser, it won’t be able to access native device features like the camera, GPS, or push notifications as seamlessly as a native app. The user experience can also feel different, as native apps are designed to be integrated with the device’s specific interface and gestures.

    5. Can we have both a web app and a native app that share the same backend and a lot of the same code?

    Yes, this is a very common and efficient strategy. By building your app’s core business logic, state management, and backend communication in a modular way, you can reuse this code across both your ReactJS web app and your React Native mobile app, saving time and ensuring consistency.

  • Why Build React Native for Windows in 2025?

    Why Build React Native for Windows in 2025?

    React Native has revolutionised the way developers build mobile applications, combining the best aspects of native performance with the agility of JavaScript development. Now, this versatile framework is expanding its horizons beyond mobile, offering robust solutions for desktop application development on Windows and macOS platforms. In this post, we will delve into the technical feasibility of using Windows apps with React Native and explore React Native macOS applications, highlighting the growing trend towards unified codebases that transcend individual platforms. Overview of React Native

    Overview of React Native

    React Native is an open-source JavaScript framework developed by Facebook, enabling developers to create native applications for multiple platforms using a single codebase of React and JavaScript. Originally targeted at iOS and Android, its capabilities have extended thanks to a vibrant community contributing to its expansion. The key advantages of React Native include:

    • Unified development workflow that promotes code reuse across iOS, Android, and now desktop platforms
    • A large open-source community that drives continuous innovation and extension of the framework

    React Native’s adaptability now includes support for desktop environments, paving the way for applications that run seamlessly across mobile devices and desktop computers. More information about React Native’s core features can be found on the Creole Studios website. Additionally, for a comprehensive understanding of multi-platform development with React Native, visit Harnessing React Native App Development Services for Seamless Multi-Platform Mobile Apps.

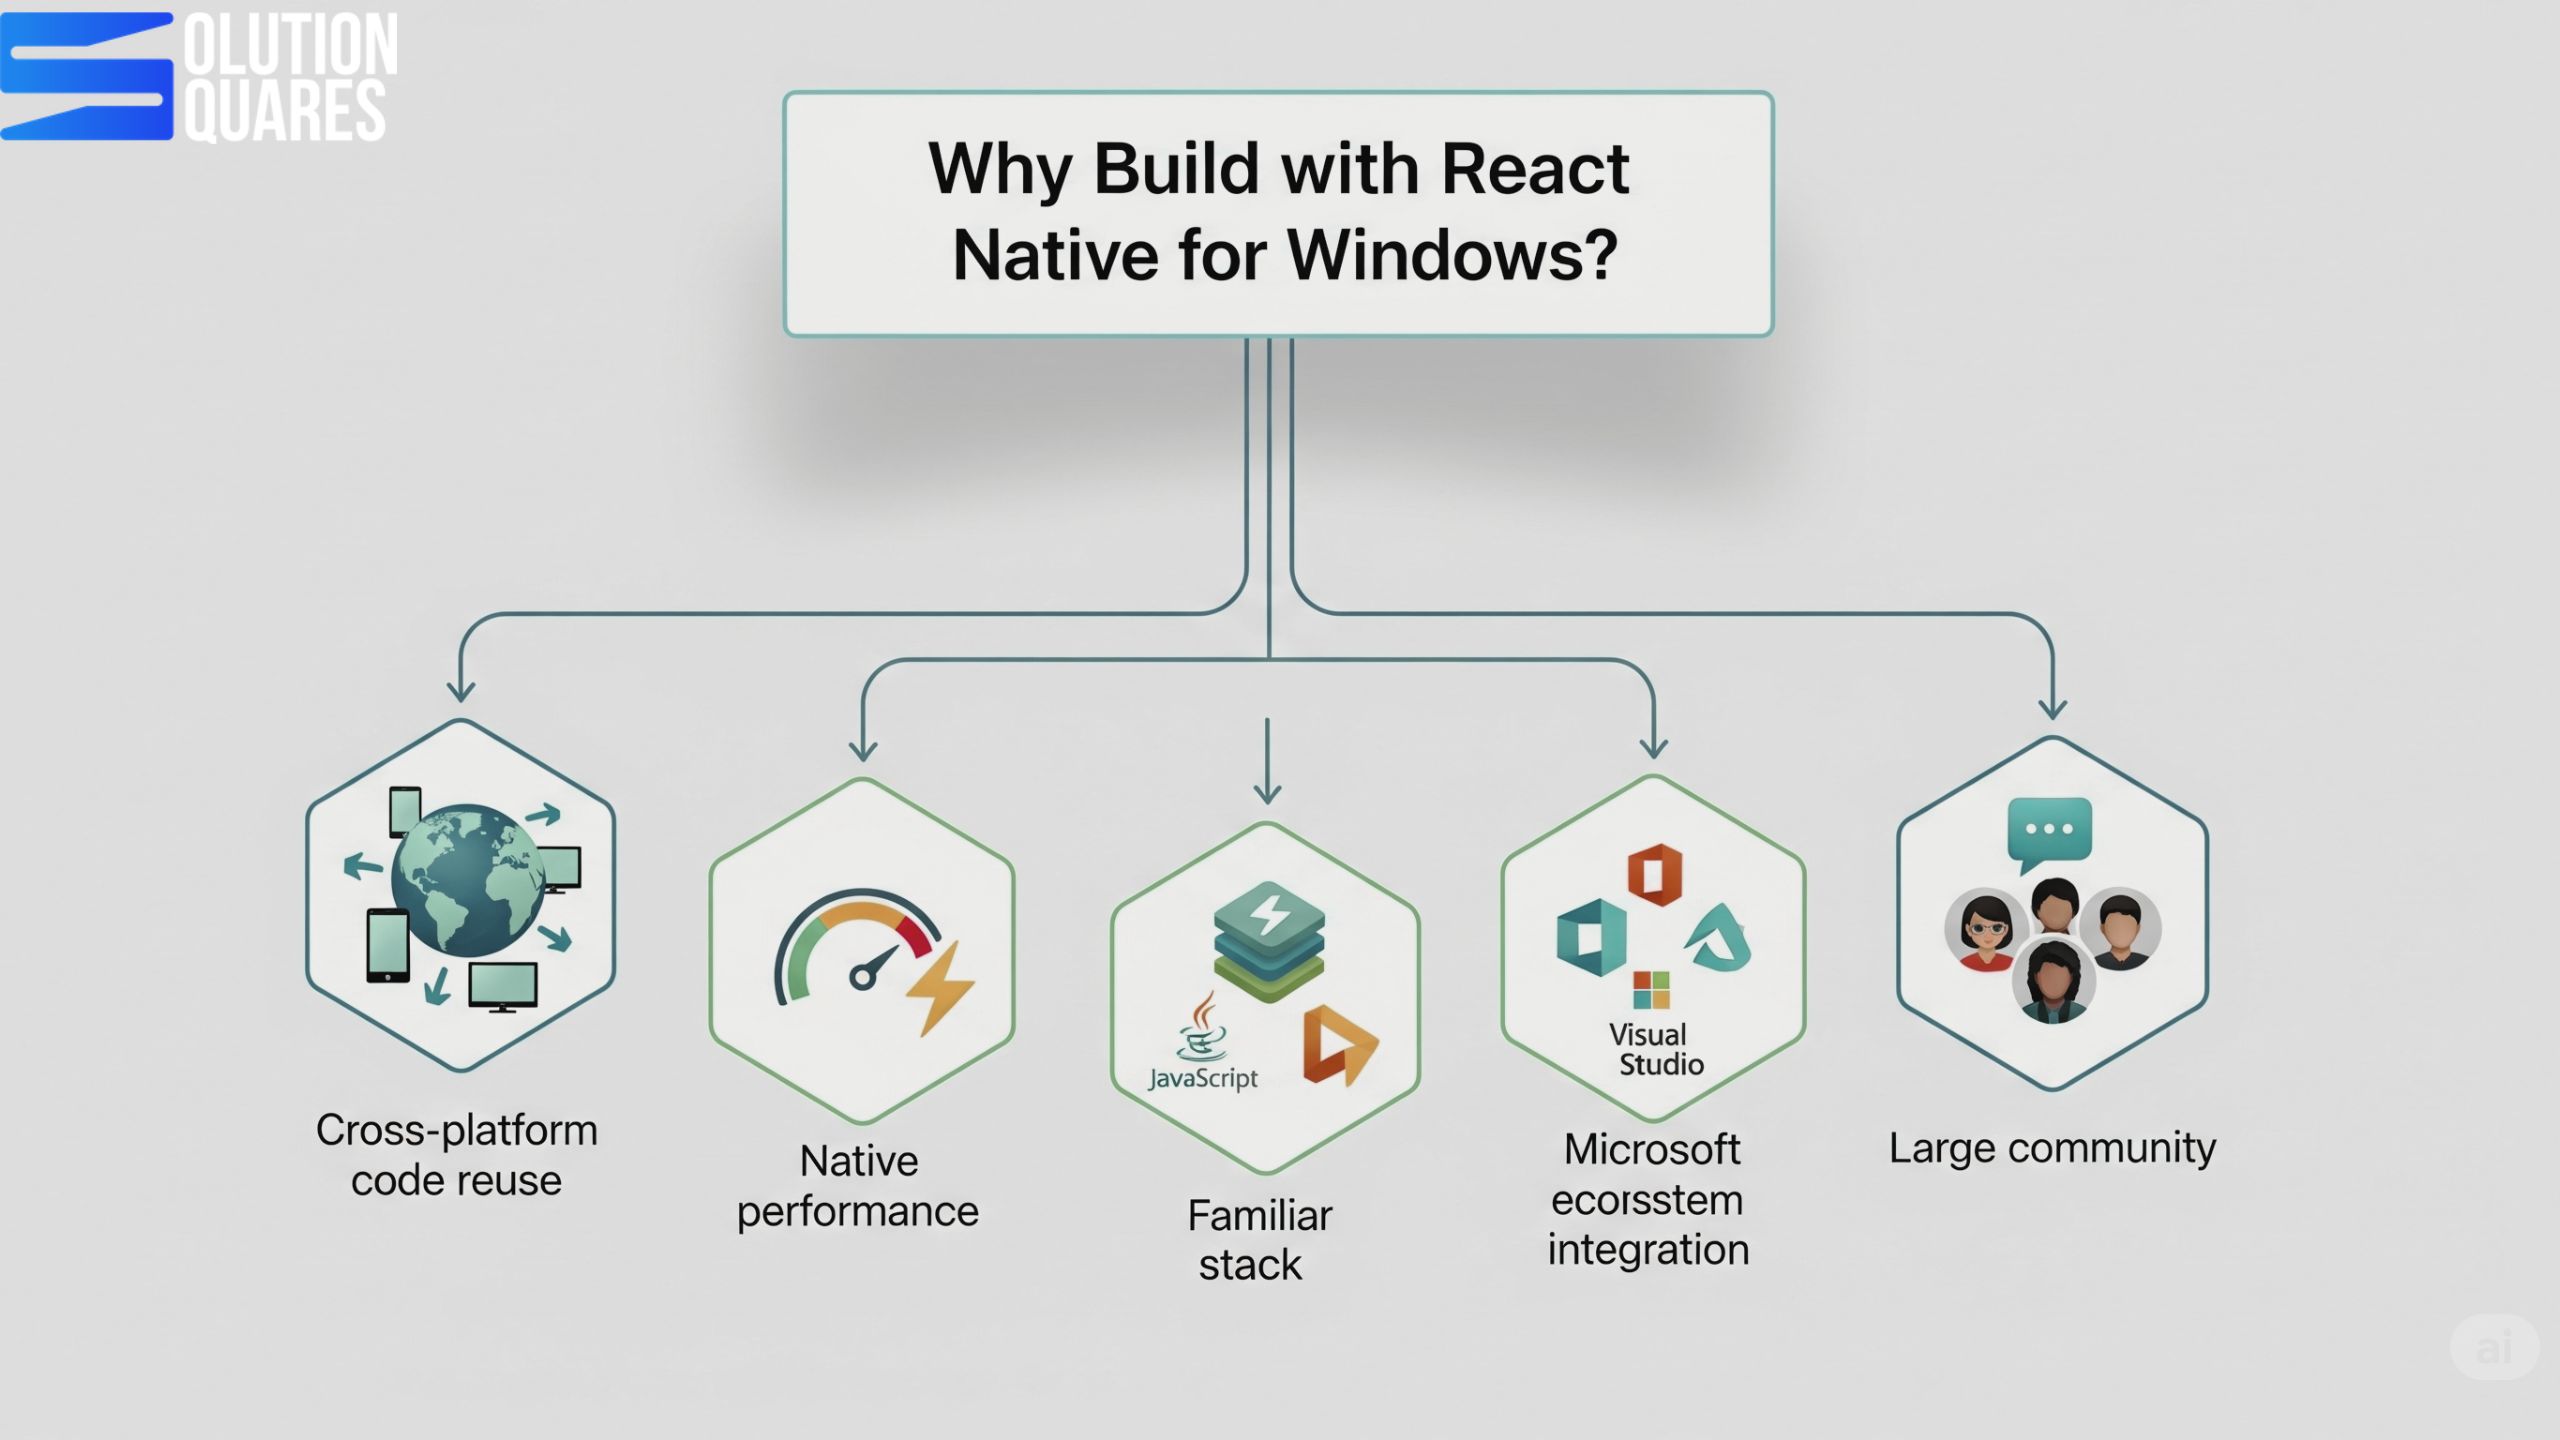
    Why Build with React Native for Windows?

    Advantages of React Native App for Windows

    AdvantageBenefit
    Cross-platform code reuseShare logic & UI components across mobile and desktop
    Native performanceUses native Windows APIs for smooth rendering
    Familiar tech stackJavaScript, TypeScript, React
    Microsoft ecosystem integrationAccess Windows-specific APIs (file system, notifications, etc.)
    Large communityBacked by Microsoft + React Native community

    React Native for Windows

    Windows apps with React Native are developed through React Native Windows, a Microsoft-supported extension. This allows developers to adapt their existing React Native code for the Universal Windows Platform (UWP) and Win32 applications, making it possible to maintain a unified codebase. Essential tools for setting up a React Native for Windows project include:

    • Node.js and the React Native CLI
    • Visual Studio 2022, equipped with the necessary workloads for Windows and C++ development

    Developers are provided the tools to build applications compatible with both recent versions of Windows 10 and Windows 11, leveraging the latest Windows APIs. Examples of successful implementations include Microsoft’s own products and numerous enterprise applications that take advantage of this cross-platform approach. Learn more about this from Shivlab and the detailed guides on React Native for Windows Documentation. For an ultimate guide on building cross-platform desktop applications, refer to Solution Squares.

    Build Windows App with React Native

    React Native for macOS

    Similarly, React Native macOS extends the framework’s capabilities to Apple desktop environments. With tools such as Xcode and the react-native-macos CLI developers can bring their applications to macOS, supported by active community projects and Microsoft’s support initiatives. Compatible with the latest macOS versions, this extension allows the development of native macOS applications using the familiar React Native components and APIs. For implementation examples and further info, check Creole Studios.

    Prerequisites

    Before starting, make sure you have:

    RequirementNotes
    Windows 10 or 1164-bit, Version 1809 (Build 17763) or later
    Node.jsLTS version (e.g., 18.x)
    YarnOptional but recommended
    Visual Studio 2022With Desktop development with a C++ workload
    React Native CLIFor project creation
    Windows SDKComes with Visual Studio

    Developing Windows Apps with React Native

    Building Windows applications with React Native involves specific setup steps:

    1. Install Node.js and the React Native CLI.
    2. Set up the development environment in Visual Studio with the necessary workloads.
    3. Initialise your React Native project and add Windows compatibility with specific commands designed to streamline the process.
    4. Extensive testing across different Windows versions ensures compatibility and optimises performance.

    This process, detailed React Native for Windows Documentation, underscores the adaptability and potential of React Native in creating desktop applications. For additional optimisation and deployment strategies, visit Solution Squares.

    Comparing React Native Windows and React Native macOS

    Both extensions offer tailored experiences for their respective platforms, but they share a unified approach to React Native development. Key differences lie in supported platforms, toolchains, community support, and the specific use cases they cater to, as demonstrated in the following table:

    AspectReact Native WindowsReact Native macOS
    Supported PlatformWindows 10, 11, UWP, Win32Current macOS releases
    ToolchainVisual Studio 2022, Windows Build ToolsXcode, macOS CLI
    Community SupportStrong (Microsoft-backed, official docs)Growing (community-driven, some Microsoft support)
    Platform APIsWindows APIs, C++, UWP componentsmacOS APIs, Swift/Obj-C native modules
    Use CasesEnterprise desktops, utilities, and productivity toolsCreative tools, utilities, and cross-device apps
    LimitationsMobile APIs not mapped to desktop equivalentsAdditional Apple platform restrictions

    For a deeper comparison between React Native and other frameworks, explore React Native vs ReactJS: Navigating the Differences for Your Next Project.

    Why React Native for Desktop Matters

    Traditionally, businesses had to develop separate applications for Windows, macOS, and mobile platforms—a process that was costly, time-consuming, and complex. With React Native for Desktop, agencies can:

    • Use a single codebase → Develop apps that work across mobile, web, and desktop.

    • Reduce costs → Faster development cycles lower project budgets.

    • Ensure consistent UX → Unified interfaces across all platforms.

    • Tap into a growing ecosystem → Backed by Microsoft (React Native Windows + macOS) and community-driven efforts.

    Useful Libraries for Windows Development

    LibraryPurpose
    react-native-windowsCore Windows integration
    react-native-fsFile system access
    react-native-vector-iconsIcons
    react-navigationRouting/navigation
    react-native-device-infoSystem info
    Technical Feasibility Analysis

    Building desktop applications with React Native is technically feasible if developers possess proficiency in React Native and JavaScript/TypeScript, along with access to platform-specific build tools like Xcode for macOS and Visual Studio for Windows. The performance of apps can be akin to native applications for several use cases, especially when employing optimisation techniques like the Hermes JavaScript engine.

    Future of React Native in Desktop Development

    React Native has long been the go-to framework for building high-quality cross-platform mobile apps. But in recent years, it has evolved beyond mobile—expanding into desktop development for Windows, macOS, and even Linux. For agencies, this evolution opens the door to faster delivery, broader reach, and cost savings for clients who want multi-platform solutions with a single codebase. So, what does the future of React Native in desktop development look like, and why should agencies care?

    Cross-Platform Strategy

    You can target:

    • Android + iOS → Mobile

    • Windows + macOS → Desktop

    • Web → Browser (using React Native for Web)

    By structuring your app with shared logic + platform-specific components, you can cover all platforms with a single codebase.

    React Native application Agency
    React Native application Agency

    Conclusion

    The potential for building feature-rich, native desktop applications with React Native is immense. With strong community and official support, the framework is well-positioned to become a staple in the toolbox of developers aiming to leverage a unified codebase for mobile and desktop environments. As the ecosystem continues to expand, React Native appears increasingly capable of meeting the intricate demands of modern software development.

    Additional Resources

    For developers eager to dive deeper, the following resources are invaluable:

    • Official Documentation: Comprehensive guides and updates are available at React Native Windows and related Microsoft documentation.
    • Community Tutorials and Forums: Engage with other developers and find solutions through community-driven resources and forums.
    • Essential Tools and Plugins: Node.js, Visual Studio, Xcode, plus various React Native packages, are essential for developing robust applications.

     Whether you’re planning a new project or scaling an existing one, React Native offers a compelling framework for creating seamless and efficient cross-platform applications.

    Frequently Asked Questions

    1. What are the main benefits of using React Native for desktop application development?

    React Native allows developers to use a unified codebase for both mobile and desktop applications, which reduces development time and maintenance efforts. Additionally, it leverages the performance of native applications while providing the flexibility and ease of JavaScript development.

    2. What tools are required to develop React Native applications for Windows?

    To develop React Native applications for Windows, you’ll need Node.js, the React Native CLI, and Visual Studio 2022 with the necessary workloads for Windows and C++ development.

    3. How does React Native ensure performance comparable to native desktop applications?

    React Native leverages native components and APIs, which allows applications to perform similarly to native desktop applications. Additionally, using optimisation techniques like the Hermes JavaScript engine can further enhance performance.

    4. Is it necessary to have separate codebases for Windows and macOS applications in React Native?

    One of the key advantages of using React Native for both Windows and macOS is the ability to maintain a unified codebase. This approach simplifies development and maintenance, allowing developers to reuse most of the code across both platforms.

    5. What are the limitations of using React Native for desktop applications?

    One limitation is that mobile APIs are not always mapped to their desktop equivalents, which can require additional custom implementations. Additionally, there may be platform-specific restrictions, especially on macOS, that developers need to navigate.

  • How To Master React Native for Android? : A Comprehensive Guide

    How To Master React Native for Android? : A Comprehensive Guide

    Key Takeaways

    • Code Reuse Across Platforms: React Native allows developers to write once and deploy on both Android and iOS, significantly reducing development time and costs.
    • Performance: Delivers smooth, native-like performance essential for user retention.
    • Hot Reloading: Enhances development efficiency by providing real-time feedback and quicker iterations.
    • Strong Community Support: A vibrant ecosystem with extensive documentation and active community resources.
    • Comprehensive Tooling: Includes tools for testing, debugging, and continuous integration to ensure app quality.

    Mastering React Native for Android: A Comprehensive Guide

    Introduction: Why React Native for Android is a Game-Changer?

    React Native for Android offers a powerful framework for developers looking to build high-quality Android apps efficiently. As a cross-platform solution that allows the use of JavaScript and React to create native Android applications, React Native stands out in the mobile development landscape.

    What is React Native?

    React Native is a framework developed by Meta that bridges the gap between web and mobile platforms, enabling developers to use JavaScript to build applications that run natively on Android and iOS. Its ability to reuse code across platforms not only speeds up the development process but also reduces the effort required for app maintenance.

    Advantages of React Native for Android Development

    Some of the top benefits of using React Native for Android include:

    • Code Reuse Across Platforms: Write once, run anywhere—this principle dramatically cuts down on development time and costs.
    • Performance: With React Native, your app will deliver smooth, native-like performance, which is crucial for user retention.

    For more insights into React Native’s popularity and effectiveness, visit Simplilearn and the React Native Official Docs.

    Why Choose React Native for Android Development

    Cross-Platform Capabilities and Code Reuse

    React Native is truly unique in how it handles cross-platform development. You can write your application’s code once and deploy it on both Android and iOS devices, which simplifies the development process and reduces maintenance.

    Reduction in Duplication: This approach minimises the need to duplicate code for different platforms, making your codebase cleaner and easier to manage.

    For more details, refer to Simplilearn and How to Build a React Native App: A Comprehensive Guide.

    Faster Development and Deployment Cycles

    Features such as Hot Reloading enhance the development process by allowing real-time feedback and quicker iterations. These capabilities ensure that updates and testing can happen swiftly and smoothly.

    Find more about rapid development features at React Native Tutorials and Optimising and Deploying Your React Native App: The Ultimate Guide to Successful App Deployment.

    Strong Community Support and Rich Ecosystem

    The ecosystem surrounding React Native is both vibrant and mature, with extensive documentation, myriad libraries, and an active community. This ecosystem is invaluable for both learning and troubleshooting.

    Explore community resources at Simplilearn and Top React Native App Development Companies for 2025.

    Getting Started with React Native for Android Phones

    Prerequisites for Setting Up the Development Environment

    Before diving into React Native, ensure you’re familiar with JavaScript, React basics, and essentials like HTML and CSS. You’ll also need Node.js and npm installed on your computer. This foundational knowledge will help streamline your setup process and move forward with creating apps more efficiently.

    Before you begin Android development with React Native, ensure the following are ready:

    Requirement Tools/Versions
    OS Windows, macOS, or Linux
    Node.js LTS version (e.g., 18.x)
    npm / yarn Comes with Node.js / or install Yarn
    Java Development Kit (JDK) Version 11 or 17 preferred
    Android Studio For emulator and Android SDK setup
    React Native CLI For native app builds (not Expo)
    VS Code / Code Editor Any code editor with JS support

    Read about the prerequisites at Simplilearn and A Complete Guide for Prerequisites for React Native Development.

    Installing Necessary Tools and Dependencies

    Setting up your development environment involves several steps:

    1. Install Android Studio: This will be your primary IDE for Android development.
    2. Set up Android SDK: Essential for building Android apps.
    3. Environment Variables Configuration: Ensures your tools function correctly across the system.

    Choose between React Native CLI and Expo CLI for your project scaffolding based on your project needs. The React Native CLI offers more control and customisation, while the Expo CLI provides a more managed environment.

    For a detailed setup guide, explore React Native Environment Setup and this YouTube Tutorial.

    Creating Your First React Native Android Project

    To start your project, use:

    npx react-native init MyProject
    npx create-expo-app MyProject
    

    These commands set up a new React Native project, which you can run on an emulator or a physical device. This practical approach allows you to see the results of your work immediately on an Android device.

    Learn more about project creation at React Native Environment Setup, How to Build a React Native App: A Comprehensive Guide, and Simplilearn.

    Key Features of React Native for Building Android Apps

    Hot Reloading for Efficient Development

    Hot Reloading is a standout feature in React Native, allowing developers to immediately see the result of the latest changes without restarting the app. This feature significantly speeds up development by simplifying the trial-and-error process.

    Further information is available on React Native Tutorials.

    Native Components and Modules Integration

    React Native provides a seamless integration with native Android components, enhancing the app’s performance and user experience. Whether it’s accessing the device’s camera or sending push notifications, React Native bridges JavaScript with native modules effortlessly.

    For examples and more details, visit Simplilearn and Building an Advanced React Native App Example: A Comprehensive Guide to Creating a Quiz App.

    Performance Optimisation Techniques

    To ensure your app runs smoothly, React Native offers several optimisation techniques, such as:

    • Image Optimization
    • Efficient List Rendering with FlatList
    • Minimising Unnecessary Renders

    These strategies help maintain a fluid experience comparable to native applications.

    Discover optimisation strategies at Simplilearn and Performance Optimisation Tips.

    Step-by-Step Guide to Building Android Apps with React Native

    Planning Your App’s Architecture and Design

    When building a React Native app, it’s crucial to structure your project correctly from the start. Organise your code into distinct layers:

    • UI Components
    • Navigation
    • Business Logic
    • Services

    This modular approach not only enhances maintainability but also simplifies scaling your app as it grows.

    Learn about best architectural practices on the Amazon Developers Guide.

    Implementing UI Components Using React Native

    React Native’s component-based structure makes it straightforward to build interactive user interfaces. Utilise core components like View, Text, and Button, and employ third-party UI libraries such as React Native Paper or React Native Elements to enrich your app’s design and functionality.

    Find UI implementation tips at Simplilearn and React Native Tutorials.

    Managing State and Navigation in Your Android App

    Effective state management and navigation setup are pivotal for creating functional, user-friendly mobile applications. Depending on your app’s complexity, you might choose from several options:

    • State Management: React’s useState, Redux, Zustand
    • Navigation: React Navigation provides a robust solution for implementing stack and tab navigators.

    For more guidance on state and navigation management, explore resources at the Amazon Developers Guide and Simplilearn.

    Testing and Debugging Your React Native Android Application

    Testing and debugging are essential phases in the app development process. React Native supports:

    • Just for unit testing
    • Detox for end-to-end tests
    • Chrome DevTools and Flipper for debugging

    These tools help ensure your app is robust and error-free before deployment.

    Detailed testing methodologies can be found at Simplilearn and Mastering Debugging Techniques for React Native App Development.

    Best Practices for Developing with React Native on Android

    Writing Clean and Maintainable Code

    It’s vital to write clean code and structure your projects efficiently when working with React Native. Using modular code that separates components, business logic, and utility classes makes your codebase easier to manage and scale.

    Moreover, adopting TypeScript or PropTypes ensures type safety and reduces the potential for runtime errors.

    For more on coding best practices, check out this Amazon Developers Guide.

    Optimising App Performance and Responsiveness

    Maintaining optimal performance is crucial for the success of your mobile app. Here are a few strategies:

    • Profiler Tools: Use React Native’s built-in or third-party tools to pinpoint performance issues.
    • Efficient Memory Management: Take proactive steps to manage memory usage and prevent leaks.
    • Responsive Design: Ensure your app looks and functions well across various device sizes and resolutions.

    For detailed strategies on enhancing app performance, visit Simplilearn and Website Speed Optimisation Tips.

    Ensuring Compatibility Across Different Android Devices

    Android devices vary significantly in screen size, resolution, and hardware capabilities. It’s important to design your app to be flexible and adaptable to these differences. Implement adaptive layouts and thoroughly test your app on multiple devices to ensure consistent user experiences across all platforms.

    Further tips can be found on Simplilearn.

    Tools and Libraries to Enhance React Native Android Development

    Popular Libraries for UI, State Management, and Networking

    To streamline your development process, integrate these widely used libraries:

    • UI Libraries: React Native Paper, React Native Elements enhance the look and user experience of your apps.
    • State Management Tools: Libraries like Redux, Zustand, or MobX offer advanced state management solutions.
    • Networking: Axios provides a robust framework for handling network requests.

    For an extensive list of tools and their applications, see Simplilearn.

    Tools for Testing and Continuous Integration

    Ensure the quality and stability of your React Native apps by employing tools such as:

    • Jest: For comprehensive unit testing.
    • Detox: For conducting end-to-end tests.
    • CI Services: GitHub Actions and CircleCI can automate your testing and deployment processes, ensuring that every build of your app meets quality standards.

    Comprehensive tooling options are discussed in the Amazon Developers Guide.

    Resources for Learning and Troubleshooting

    Continual learning and troubleshooting are part of the development process. Helpful resources include:

    • Official React Native Documentation
    • Expo Documentation
    • Community Forums like Stack Overflow

    You can also find valuable guidance through community tutorials available on platforms like YouTube.

    Check out these official React Native docs, Expo Docs, and Enhancing Mobile Apps: Comprehensive Guide to React Native with Firebase Integration for more information.

    Case Studies: Successful Android Apps Built with React Native

    Examples of High-Profile Apps Using React Native for Android

    Major apps like Facebook, Instagram, and Discord have leveraged React Native to enhance their performance and user engagement. These apps highlight React Native’s capability to handle large-scale applications efficiently.

    Explore the functionalities these apps achieve through React Native and their impacts on user satisfaction at Simplilearn.

    Lessons Learned and Tips from Real-World Projects

    Real-world examples provide invaluable insights and actionable tips. Key lessons include:

    • Modular Architecture: Keeps code organised and manageable.
    • Regular Testing: Ensures that your app performs well across all updates and changes.

    For more real-world insights, visit Simplilearn and Mastering Debugging Techniques for React Native App Development.

    Monetisation and Deployment Strategies

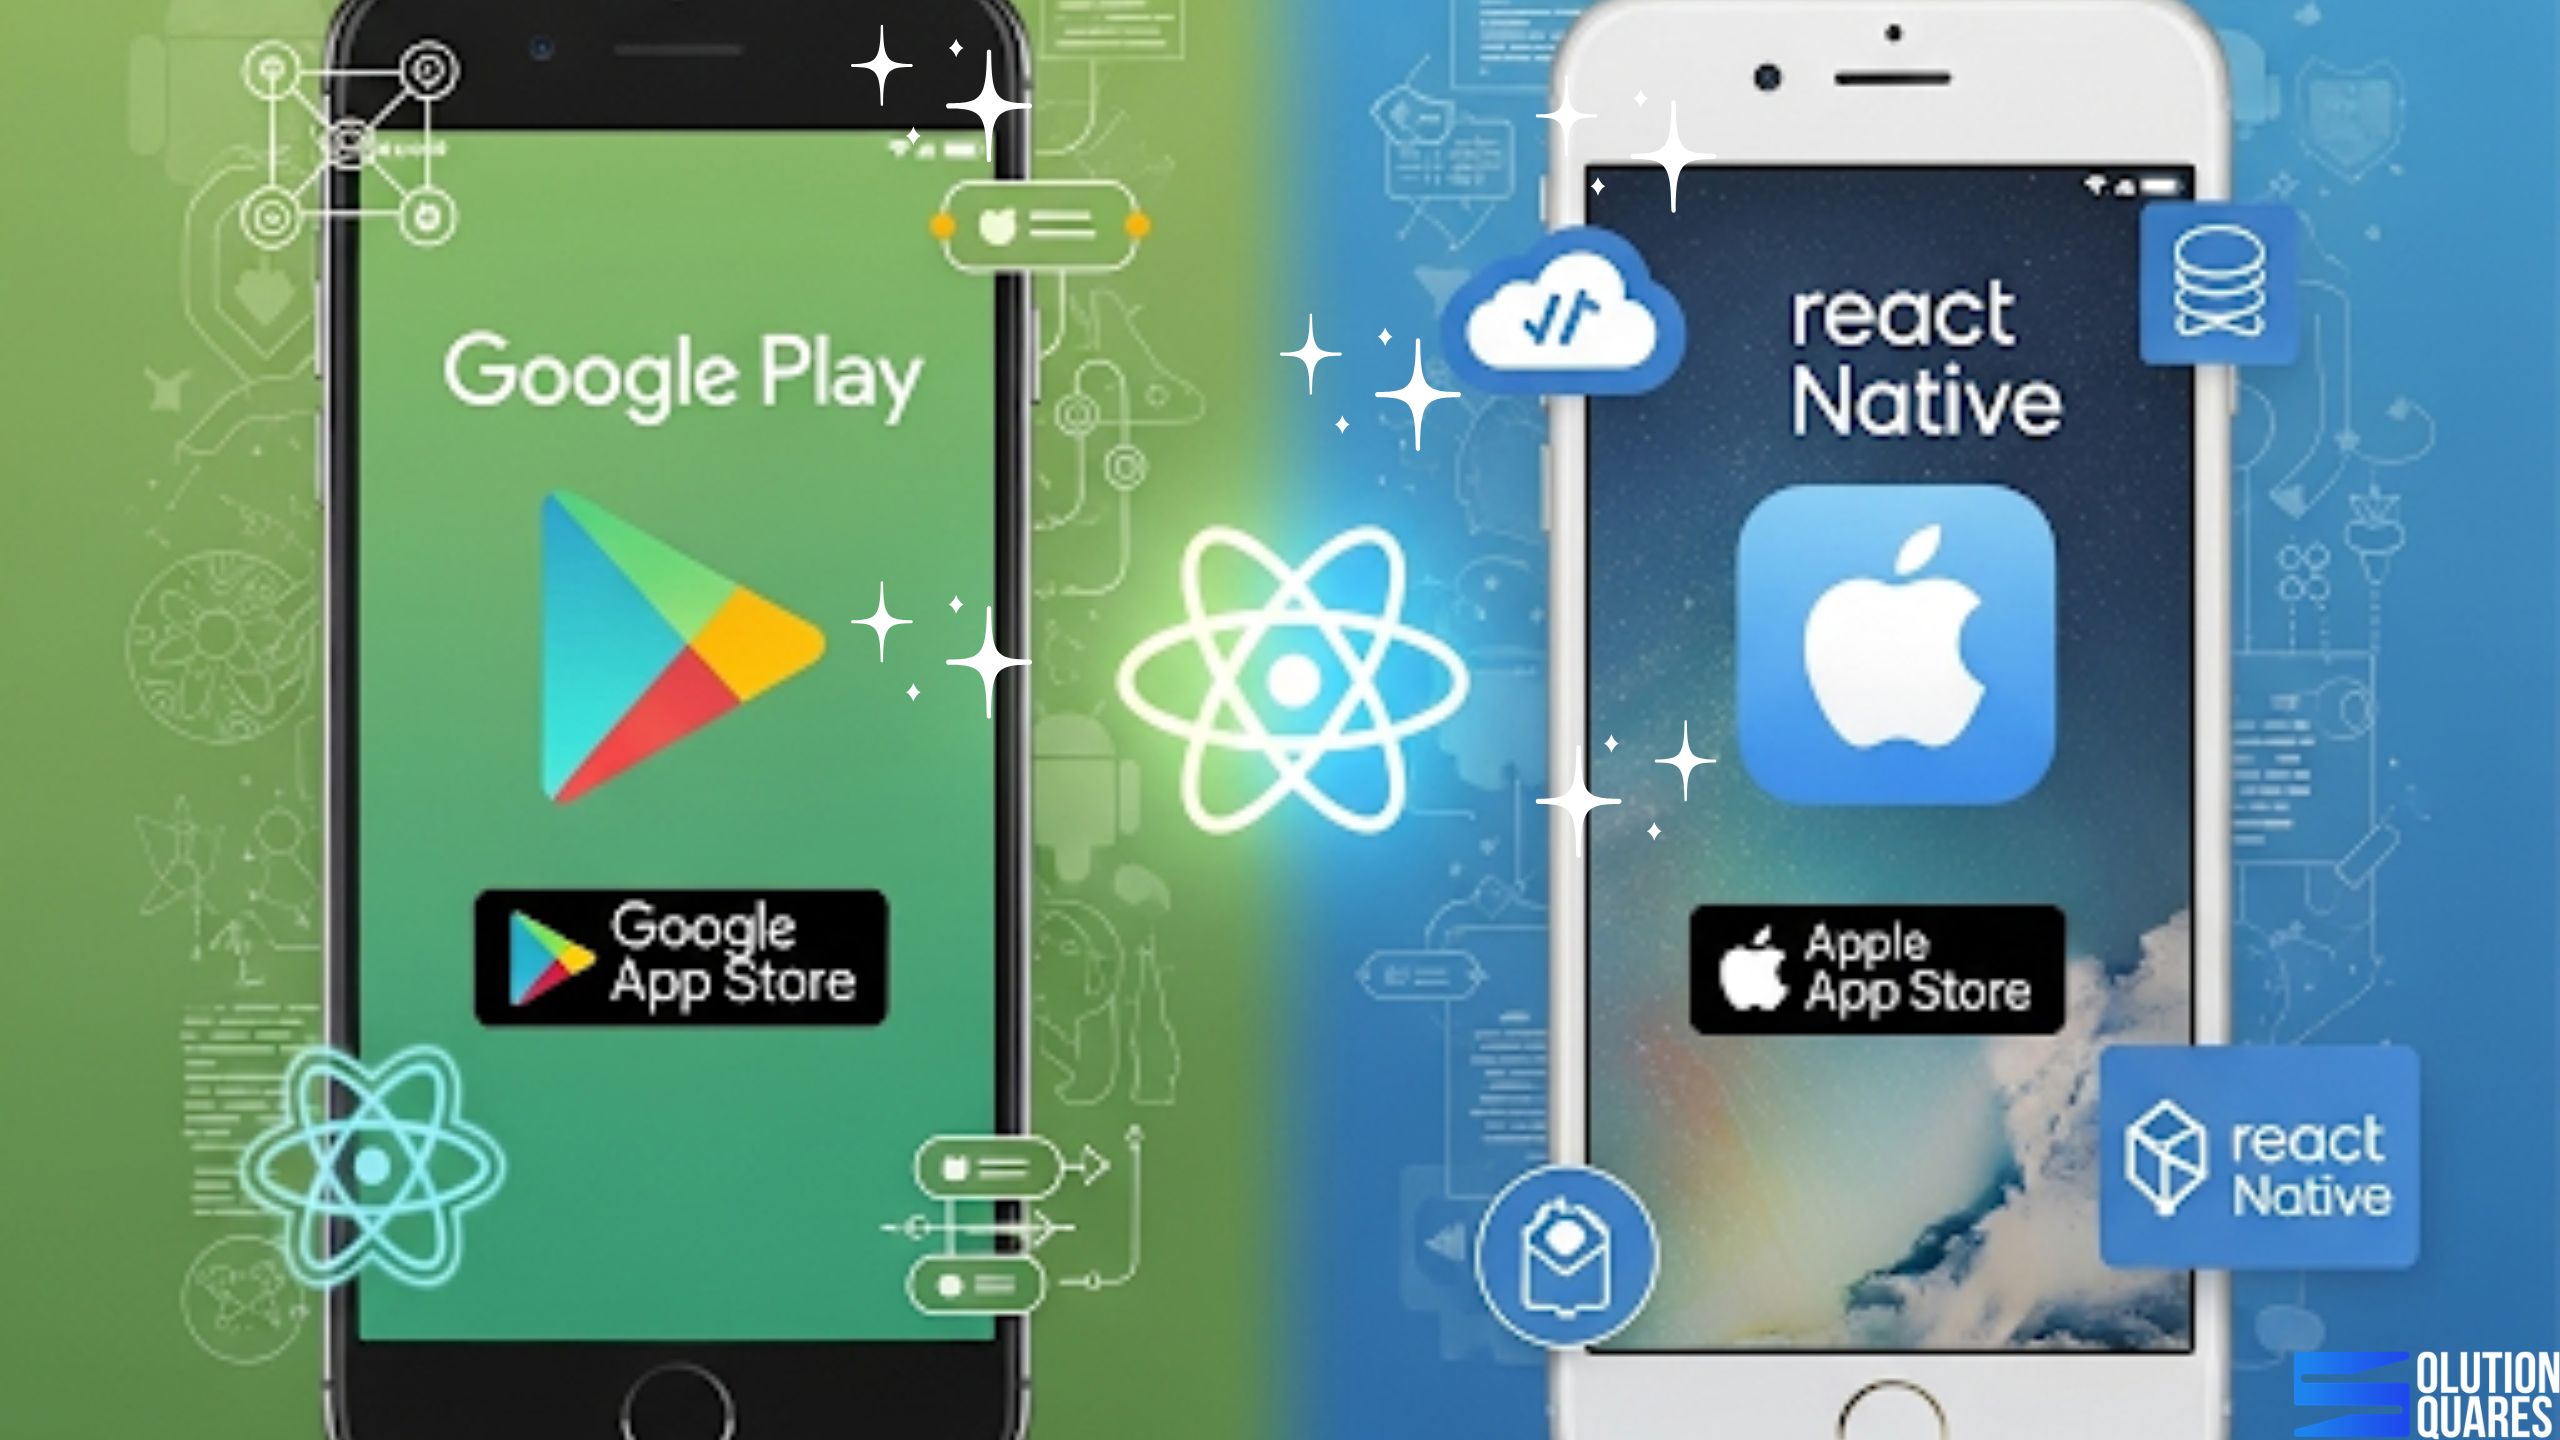
    Preparing Your React Native App for the Google Play Store

    Launch your app on the Google Play Store by following these steps:

    • Generate a Signed APK or AAB: This is essential for publishing your application.
    • Follow Google Play Store Submission Guidelines: Ensure your app meets all the required criteria for acceptance on the store.

    For a comprehensive guide to preparing for store submission, refer to React Native Environment Setup and Optimising and Deploying Your React Native App: The Ultimate Guide to Successful App Deployment.

    Strategies for App Monetisation and User Acquisition

    Explore various monetisation strategies such as in-app ads, purchases, or offering a paid version of your app. To effectively attract and retain users, implement solid marketing strategies and optimise your app’s presence on the app store.

    Learn more about monetisation and marketing strategies at Simplilearn.

    Maintaining and Updating Your Android App Post-Launch

    After launching your app, it’s important to continue maintaining and updating it based on user feedback and performance metrics. Keep your app fresh and engaging by:

    • Monitoring Performance: Use analytics to track how well your app is performing.
    • Updating Dependencies: Keep your app’s libraries and frameworks up to date.
    • Releasing New Features: Continuously improve the app’s functionality and user experience.

    For maintenance best practices, consult the detailed guides on Simplilearn and Optimising and Deploying Your React Native App: The Ultimate Guide to Successful App Deployment.

    Conclusion: Start Building Your Android App with React Native Today

    Recap of Benefits

    React Native for Android offers significant advantages, such as reduced development time, code reuse, and access to a vast community. Its robust capabilities enable you to build high-quality, performant apps efficiently.

    Encouragement to Get Started

    Kickstart your Android app development project by setting up your environment and diving into your first React Native project. Utilise the plethora of available learning resources and become part of the thriving React Native community to maximise your development skills.

    Discover more and get started with official resources at React Native Official Docs, and enhance your learning with tutorials such as this YouTube Tutorial and How to Build a React Native App: A Comprehensive Guide.

    Additional Resources

    For further exploration and deeper understanding, check out:

    These resources offer comprehensive tutorials and courses to help you learn more about React Native and start building your own Android apps with confidence.

    Call to Action: Join the React Native Community

    Starter Kit or Course Invitation

    Download a React Native starter kit or enrol in a dedicated course to accelerate your learning curve and start building powerful Android apps today.

    Engagement Encouragement

    We encourage you to share your React Native projects and experiences. Engage with the community through comments, forums, or social media to seek feedback and learn from fellow developers.

    Join us on this exciting journey and start creating your own innovative Android apps using React Native!

    Frequently Asked Questions


    1. How much does it typically cost to develop a mobile app?

    The cost can range from $5,000 for a simple app to over $300,000 for a highly complex app, depending on various factors like design complexity, features, and development platform.

  • Hosting React Native Apps: The Ultimate Guide to Optimal Setup and Cloud Solutions

    Hosting React Native Apps: The Ultimate Guide to Optimal Setup and Cloud Solutions

    Key Takeaways

    • Choosing the right cloud hosting options for React Native is crucial for app performance and scalability.
    • Understand the difference between frontend hosting and backend services to effectively manage your React Native app’s infrastructure.
    • Popular cloud providers like AWS, GCP, Microsoft Azure, and Heroku each offer unique benefits tailored to different project needs.
    • Consider factors such as scalability, cost, ease of deployment, performance, and support when selecting a hosting provider.
    • Implementing best practices like optimising performance, securing your app, and utilising CI/CD pipelines ensures a robust hosting environmet.

    Introduction

    When developing mobile applications with React Native, one crucial aspect often overlooked is hosting. Hosting a React Native app involves providing the necessary infrastructure for the app’s frontend and backend services. Selecting the right cloud hosting options for React Native is pivotal for optimising performance, scalability, and reliability. This guide delves into the best practices for hosting a React Native app, ensuring developers and businesses can build robust and cost-effective mobile applications.

    Understanding Hosting for React Native Apps

    Define Hosting for React Native Apps:

    Hosting a React Native app means setting up an environment where the app’s frontend code, backend APIs, and real-time user-to-server communications can thrive. Although React Native apps are primarily distributed through app stores as binaries, hosting effectively concerns backend services and potential web versions of these apps created via React Native Web. Learn more.

    Different Hosting Services:

    Unlike traditional web apps, React Native apps are packaged and deployed on app stores (Google Play Store, Apple App Store). However, hosting comes into play when handling:

    • Backend APIs (e.g., Node.js, Express, Django, Firebase)

    • Databases (SQL or NoSQL, like MongoDB, PostgreSQL, Firebase, Firestore)

    • Media & Static Assets (images, files, videos)

    • Real-Time Features (chat, notifications, location tracking)

    • CI/CD Pipelines (to automate builds, tests, and deployments)

    Agencies must ensure that all these services are hosted reliably to deliver fast, secure, and scalable client apps.

    Hosting services For react native

    Popular Cloud Hosting Options for React Native

    1. AWS (Amazon Web Services)
      • Overview of Services: Uses AWS Amplify for Backend as a Service, Amazon EC2 for custom APIs, and Amazon S3 for static storage, including additional services like AWS Lambda and AWS CloudFront.
      • Benefits and Features: Known for its reliability and scalability, AWS enables seamless integration of various services, which is crucial for comprehensive mobile app development.
      • Learn more about AWS services.
    2. Google Cloud Platform (GCP)
      • Key Services and Integrations: Offers Firebase for easy integration, supporting authentication, databases, cloud functions, and hosting.
      • Advantages of Using GCP: GCP is revered for strong tooling, integrated analytics, and its capability to enable fast, scalable deployments.
      • Discover GCP’s advantages.
    3. Microsoft Azure
      • Azure Services for React Native Deployment: Includes Azure App Service, Azure Functions, and Azure Cosmos DB, among other tools.
      • Pros of Choosing Azure: Provides enterprise-level security, compliance, and deep integration with Microsoft products.
      • Explore Azure for React Native.
    4. Heroku
      • Simplified Deployment Process: Ideal for managing complex infrastructure needs, perfect for MVPs and medium-sized apps.
      • Strengths and Limitations: Offers simplicity and automated scaling but might lack advanced features for larger setups.
      • Understand Heroku’s offerings.

    Factors to Consider When Choosing a Hosting Provider

    • Scalability: Important for handling growth; platforms like AWS, GCP, and Azure are leaders here.
    • Cost: Compare pricing models; AWS and GCP are great for detailed pricing, while Firebase and Heroku offer budget-friendly plans. Learn more.
    • Ease of Deployment: Platforms like Heroku and Firebase provide user-friendly setups, whereas AWS and Azure offer more tailored configurations.
    • Performance and Reliability: Ensure the provider offers excellent uptime, quick data delivery, and support for global reach.
    • Support and Documentation: Essential for ongoing maintenance and troubleshooting. Most major platforms provide extensive documentation and support options. Read more.

    Cost of Hosting a React Native App

    Component Estimated Monthly Cost
    Backend API Hosting $0 – $50 (depending on usage)
    Database (e.g., Firebase, MongoDB Atlas) $0 – $30
    CDN/Static Assets $0 – $10
    Cloud Functions Pay-as-you-go (~$0.40/million invocations)
    App Store Developer Accounts Apple: $99/year, Google: $25 one-time
    Crash Reporting & Monitoring Free–$20/month, depending on scale

    Many services offer free tiers, great for MVPs or testing.

    Top Hosting Providers for React Native App Needs

    Hosting Purpose Provider Options
    Backend APIs Firebase, Heroku, AWS, Render, Railway
    Databases Firebase, MongoDB Atlas, Supabase
    Static Assets (CDN) Amazon S3 + CloudFront, Cloudinary
    App Distribution Apple App Store, Google Play Store
    CI/CD + Monitoring App Centre, Bitrise, Fastlane, Sentry
    Expo Hosting Expo + EAS Hosting


    Step-by-Step Guide to Deploying a React Native App

    1. Preparation:
      • Set up your environment with tools like Node.js and React Native CLI.
      • Configure necessary environment variables and dependencies.
    2. Deployment on Selected Platforms:
      • AWS: Manage backend with Amplify, deploy using S3 and CloudFront, and set up custom servers if necessary.
      • GCP/Firebase: Set up Firebase projects, integrate SDKs, and deploy functions and hosting services.
      • Azure: Utilise Azure App Service for APIs and set up serverless functions as needed.
      • Heroku: Link your repository, set up environments, and deploy through Git.


    Best Practices for Hosting React Native Apps

    • Optimise App Performance: Utilise techniques like asset compression and CDN integration.
    • Implement Security Measures: Focus on robust authentication, data encryption, and regular security audits.
    • Maintain the Hosting Environment: Regular updates and security checks are crucial for sustainability.
    • Utilise CI/CD Pipelines: Automate your deployment processes to enhance reliability and efficiency. Learn how.

    Hosting services For react native

    Comparative Analysis of Hosting Providers

    Provider Key Features Pricing Model Best For
    AWS Amplify, Lambda, S3, CDN Pay-as-you-go High scalability, large apps
    GCP/Firebase RTDB, Functions, Hosting Generous free tier, pay-as-you-go Startups, MVPs, real-time apps
    Azure App Service, Functions Pay-as-you-go, dev plans Enterprise, Microsoft stack
    Heroku Simplicity, plugins, CI Free for hobby, paid dynos Prototyping, MVPs, and small teams
    DigitalOcean Simplicity, Droplets Flat monthly pricing Budget-focused projects
    Netlify Static web hosting Free + paid tiers Web projects with RN Web

    Conclusion

    To host a React Native app successfully:

    • Compile and publish the mobile app via the Play Store/App Store.

    • Host your backend and static assets with scalable cloud services.

    • Use monitoring and CI/CD tools to streamline operations.

    Choosing the right hosting solution for your React Native app can considerably impact its performance, scalability, and overall user satisfaction. Evaluate your specific needs against the detailed features and benefits of each hosting provider discussed to make an informed decision. Dive into the world of mobile app hosting and start with the chosen platform’s official resources to embark on a successful deployment. Join us to host your app successfully and seamlessly.

    Call to Action

    Explore further by checking out these resources: AWS Amplify, Firebase, and Heroku. Don’t hesitate to share your experiences or raise questions with us to help cultivate a supportive developer community.

    Frequently Asked Questions

    1. Is backend hosting mandatory?

    Only if your app needs server-side logic, user authentication, or a database. Purely static/local apps don’t require backend hosting.

    2. How long does it take to develop a mobile app?

    The development timeline can vary from a few months to over a year, depending on the app’s complexity and the development process.

    3. Can I host my React Native app on Firebase?

    Yes. Firebase can handle:

    • Backend (Cloud Functions)

    • Authentication

    • Realtime Database or Firestore

    • Hosting for assets or web dashboard (if any)

    4. Can I host React Native like a website?

    Not directly. React Native apps are native apps, not websites. However, if you’re using React Native for the Web, you can host it like a traditional website on Netlify, Vercel, etc.

    5. What’s the cheapest way to host a React Native app backend?

    For MVP or personal use:

    • Firebase Free Tier

    • Railway Free Tier

    • Render (Free instance)

    • Vercel/Netlify (for web-based APIs)

    Cloud optimised hosting react native
  • How to Run a React Native App in Android Studio?

    How to Run a React Native App in Android Studio?

    How to Run a React Native App in Android Studio

    Key Takeaways

    • React Native is a dynamic, open-source framework that allows developers to build high-performance, native mobile apps using JavaScript and React.
    • Android Studio serves as the recommended Integrated Development Environment (IDE) for Android app development, offering essential features for building, testing, and debugging.
    • Ensuring your system meets the prerequisites and installing necessary tools before running your React NAtive App in Android Studio, tools as Node.js, npm, and JDK, is crucial for a smooth development workflow.
    • Properly setting up and configuring the Android SDK and environment variables is vital for running React Native apps effectively in Android Studio.
    • Utilising the Android Emulator allows for efficient testing and debugging of your React Native applications without the need for physical devices.

    Introduction

    Overview of React Native

    React Native is a dynamic, open-source framework crafted to build high-performance, native mobile apps using JavaScript and React. It’s renowned for its ability to handle cross-platform app development with a single codebase, making it a popular choice among developers looking to streamline their development process across iOS and Android. Groove Technology

    Importance of Android Studio

    Android Studio is not just any Integrated Development Environment (IDE); it’s the recommended gear for Android app development, loaded with essential features to aid in building, testing, and debugging Android apps efficiently as part of the React Native development workflow. Groove Technology

    This guide explicates the process to run a React Native app in Android Studio, greatly enhancing your ability to develop and manage cross-platform applications. For a deeper understanding of the prerequisites needed before diving into React Native development, refer to Prerequisites for React Native Application Development: A Comprehensive Guide.

    Prerequisites

    Prerequisites are requirements before beginning a React Native App in Android Studio.

    System Requirements

    Before diving into the technicalities, ensure your system is primed with:

    Installation of Necessary Tools

    • React Native on Android Studio: Knowing how to integrate React Native with Android Studio is pivotal for seamless development.
    • Node.js and npm Installation: Begin by downloading Node.js from its official website, which automatically bundles npm needed for managing project dependencies.
    • Java Development Kit (JDK) Setup: Get JDK version 11 or later installed and configure the environment variables to get up and running. Dev. to

    Setting Up React Native in Android Studio

    Download and Install Android Studio

    Get started by downloading Android Studio from its official page. Follow step-by-step installation instructions pertinent to your operating system to ensure a correct setup. YouTube Tutorial

    Configure Android SDK and Environment Variables

    Next, configure the Android SDK:

    • Launch Android Studio and run the setup wizard.
    • Use the SDK Manager to check and install the necessary SDK platforms and tools.
    • Ensure the ANDROID_HOME environment variable is set to point to your SDK location. Dev. to

    Install Necessary Android SDK Packages

    Choose and install the required platform tools and build tools within Android Studio for a smooth operation. YouTube Tutorial

    Installing React Native on Android Studio

    Initialise a New React Native Project

    Open your terminal or command prompt and execute:

    npx react-native init MyReactNativeApp
    

    For detailed steps on building a React Native app, visit How to Build a React Native App: A Comprehensive Guide.

    Open Project in Android Studio

    Start Android Studio and select “Open an existing Android Studio project”, then proceed to the android directory within your new React Native project. This integrates your project with Android Studio.

    Install Project Dependencies

    In the project root directory, execute:

    npm install
    

    This will install all the necessary dependencies, ensuring your project is set up correctly. Ensure to build the project in Android Studio to verify that everything is configured properly. Alternatively, run:

    npx react-native run-android
    

    to see the app live on an emulator or connected device. Groove Technology, Dev. to

    Configuring the React Native Android Emulator

    Introduction to the Android Emulator

    An Android emulator plays a critical role in testing and debugging your React Native apps without the need for actual hardware.

    Set Up AVDs in Android Studio

    Navigate to the “Device Manager” or “AVD Manager” in Android Studio to create and configure your Android Virtual Device (AVD):

    Launch and Manage the Emulator

    Start your emulator using the green “play” button. Check for hardware acceleration features to ensure smooth emulation performance.

    Conclusion

    We’ve navigated through the crucial steps to run a React Native app in Android Studio, from setting up your development environment, configuring Android Studio and the emulator, to running your application. Harness the full potential of Android Studio to uplift your development skills and productivity. Groove Technology

    Additional Resources

    Keep exploring Android Studio’s features and stay updated with new releases and tools to continually refine your app development workflow.

    Frequently Asked Questions

    1.Do I need Android Studio to run a React Native app?

    Yes, Android Studio is required to set up the Android emulator and configure the Android SDK, which are necessary to run and test React Native apps on Android devices.

    2. Can I run a React Native app without Android Studio?

    Yes, you can run it on a physical Android device using USB debugging or use third-party emulators. However, Android Studio is the most reliable option for development and testing.

    3. How do I connect my physical Android device to run a React Native app?

    Enable USB Debugging from Developer Options on your device, connect it via USB, and then run npx react-native run-android. The app will install and launch on your device.

    4. What are the system requirements for running React Native in Android Studio? At minimum, you need:

    • Windows/macOS/Linux with at least 8GB RAM.
    • Node.js installed.
    • Java Development Kit (JDK).
    • Android Studio with SDK and emulator setup.

    5. Why does my React Native app run slowly on the Android emulator?

    This often happens due to low system resources or unoptimized emulator settings. Allocate more RAM/CPU to your emulator or test on a real device for better performance.

    6. How do I fix the error “SDK location not found” in Android Studio?

    Go to Android Studio > Preferences > Appearance & Behavior > System Settings > Android SDK and ensure the SDK path is correctly set. Then update your local.properties file with the correct path.

    7. Can I use VS Code instead of Android Studio for React Native development?

    Yes, you can use VS Code as your main editor, but you still need Android Studio installed for the Android SDK and emulator setup.

  • Optimiz and Deploying Your React Native App: The Ultimate Guide to Successful App Deployment

    Optimiz and Deploying Your React Native App: The Ultimate Guide to Successful App Deployment

    Key Takeaways

    • Unified Codebase: React Native allows developers to build high-performance mobile apps for both iOS and Android using a single JavaScript codebase.
    • Optimised Performance: Proper code optimisation, including minification and obfuscation, significantly enhances app responsiveness and reduces size.
    • Up-to-Date Dependencies: Keeping all dependencies current ensures compatibility and smooth runtime performance.
    • Environment Configuration: Correctly setting environment variables is crucial for platform-specific configurations.
    • Robust Deployment Process: Following a structured deployment process, including thorough testing, ensures a successful app launch.
    • CI/CD Integration: Implementing Continuous Integration and Continuous Deployment pipelines automates and streamlines the development workflow.
    • Post-Deployment Monitoring: Continuous monitoring and analytics are essential for maintaining app performance and reliability.

    Overview of React Native

    React Native is an influential open-source framework used globally. It empowers developers to create high-performance mobile apps for both iOS and Android from a unified JavaScript codebase. This feature catapults React Native to the forefront for developers interested in crafting apps with consistent user experiences across multiple platforms while diminishing development times significantly.

    Why Optimisation Matters Before Deployment

    A poorly optimised app can lead to:

    • Slow load times → Resulting in higher uninstall rates.

    • Memory leaks & crashes → Damaging client reputation.

    • App store rejections → Delaying project timelines.

    According to a Statista report (2024), 70% of users abandon apps if they take more than 3 seconds to load. For agencies, this means optimisation is not optional—it’s essential.

    Key Steps for Optimising a React Native App

    1. Reduce Bundle Size

      • Use tools like the Hermes engine to improve startup performance.

      • Remove unused packages and images.

    2. Improve Performance

      • Leverage FlatList instead of ScrollView for large datasets.

      • Use memoisation (React.memo, useCallback) for rendering efficiency.

    3. Enhance Security

      • Use environment variables for API keys.

      • Enable SSL pinning for sensitive apps.

    4. Test Across Devices

      • Simulate iOS and Android environments.

      • Automate testing with tools like Detox and Jest.

    Deployment Checklist for Agencies

    • Prepare the App Store & Play Store Accounts – Ensure your client has active developer accounts.
    • Configure App Icons & Splash Screens – A consistent brand experience is crucial.
    • Generate Release Builds – Use gradlew assembleRelease for Android and Xcode archive for iOS.
    • Code Signing & Certificates – Secure deployment with correct provisioning profiles.
    • Continuous Integration (CI/CD) – Automate build pipelines using GitHub Actions or Bitrise.
    • Post-Deployment Monitoring – Use tools like Firebase Crashlytics for error tracking.

    Importance of Deploying a React Native App

    Deploying your React Native app is pivotal. It enables your application to reach a vast audience, delivering the intended functionality and seamless user experience on their devices. The success of its deployment is closely tied to these goals, ensuring the app performs optimally in live environments. 

    Deployment of a React Native App refers to the process of:

    • Building your app into a final, production-ready version (APK for Android or IPA for iOS).

    • Uploading it to app stores like the Google Play Store or Apple App Store.

    • Making sure it runs properly on real devices.

    • Optionally, hosting backend services or APIs that your app depends on.

    In simple terms, deploying is the final step that takes your app from your computer to your users’ devices

    Preparing Your React Native App for Deployment

    After building your React Native App, it’s time to deploy it. You have built your application, developed and tested all features. Now it’s time for the next big milestone, Deployment. A React native application is a widely used framework as it offers a single code for cross-platform, such as iOS and Android

    Developing a React native application is easy, but deployment is a bit complex step to perform. Deployment is not about building and publishing your application. Deployment involves navigating platform-specific requirements, using the appropriate deployment tools, following app store guidelines, and meeting industry standards to avoid rejections or delays.

    Optimising Your Code for Production

    To start, it’s crucial to optimise your React Native app’s code before launching. Streamline your app by eliminating unused components and implementing techniques like minification and obfuscation. These steps significantly reduce your app’s size, making it quicker and more responsive for users.

    Ensuring All Dependencies Are Up-to-Date

    Ensure that your app’s dependencies are current to avoid any compatibility issues during runtime. Use package managers like npm or yarn to check and update your project dependencies as necessary.

    Configuring Environment Variables for Different Platforms

    Environment variables play a crucial role in setting up platform-specific configurations, such as API endpoints or credentials. For Android developers, make sure to set ANDROID_HOME and append platform-tools to your system PATH. For iOS, the configuration can be managed directly through Xcode settings.

    How React Native App Deployment Works?

    After coding your mobile application, deployment is the next crucial step to perform. Deployment includes steps such as packing, distributing, and publishing your app to end users via a platform like the Google Play Store or Apple App Store.

    The beauty of React Native is that a single JavaScript or TypeScript codebase can be deployed to multiple platforms such as Android, iOS, Web, Windows, and macOS. To deploy your application, you must navigate specific configurations and toolchains.

     Strategies for Deploying React Native Applications

    Deployment of a React Native App gives you two different approaches:

    1. Managed Workflow
    2. Bare Workflow

    Usually, a managed workflow is used with Expo. This key feature of realising your app with Expo without diving into  Android Studio, Gradle, or native dependencies, Xcode. This approach will allow you to build your applications without worrying about the development and deployment complexities.

    The bare workflow provides you with full access and control of your project details, platform-specific behaviour, third-party SDK integrations, and build optimisations. In this approach where you manage the entire native project yourself, without relying on managed services.

    react native app perfomance increace
    react native app perfomance increace

    Creating a Release Build for React Native

    • Step-by-Step Guide to Generate a Release Build

    Here is a step-by-step guide to generate a release build for a react native application:

    • For Android:

    Generate a signed APK or Android App Bundle (AAB) using CLI or Expo EAS Build. These files are essential for the next steps in deploying your app to the Google Play Store (Bugsee Guide).

    • For iOS:

    Utilise Xcode or CLI to archive and prepare your iOS app for release. This process includes the setup of necessary signing certificates and provisioning profiles (Comprehensive Guide to Building a React Native App for iOS).

    Differences Between Debug and Release Builds

    Release builds are optimised for your end-users, stripping away development tools and enabling performance enhancements not present in debug builds. Debug builds include additional tools to aid developers in testing and debugging during development phases.

    Testing the Release Build Locally Before Deployment

    It’s critical to test the release build on local or test devices. This helps catch any potential issues that could adversely affect user experience post-deployment (Bugsee Guide, React Native Publishing).

    Deployment Steps for React Native Apps

    After coding, developing features, building an application, and testing features, it’s now time for deployment. 

    Detailed Outline of the Deployment Steps

    Deploying a React Native app involves several key stages that need careful attention to detail. First, configure your environment and credentials accurately for the intended platform. Following this, utilise platform-specific tools such as Android Studio or Xcode for building the app. Final steps involve signing the app and ensuring all configurations are verified to be correct across platforms (Bugsee Guide, 30 Days Coding).

    Deploying a React Native App to the Google Play Store

    • Preparing Your App for the Play Store

    Prepare your app by generating a signed APK or AAB. Set up a developer account on Google Play and populate your app’s listing with all the necessary metadata, screenshots, and privacy policies (30 Days Coding).

    • Uploading the Release Build and Managing App Versions

    Upload your prepared release build via the Google Play Console. It’s vital to manage and adhere to your app versioning to avoid conflicts with future updates.

    • Reviewing and Publishing the App on the Play Store

    Once uploaded, your app will go through a review process. After approval, your app will be available to the public, marking the successful deployment of your React Native app to the Google Play Store.

    Implementing CI/CD for React Native

    • Importance of Continuous Integration and Continuous Deployment

    CI/CD introduces automation in building, testing, and deploying your app, which enhances both reliability and project velocity. Automating these steps reduces human error and streamlines the release process, making updates and maintenance more manageable and less risky.

    • Setting Up CI/CD Pipelines for Automated Building and Testing

    Tools like GitHub Actions, CircleCI, and Bitrise are great for setting up CI/CD pipelines. They handle automation for building, testing, and even deploying your app based on the latest codebase commits, providing a robust workflow that continuously checks integration and deployment stages for errors or conflicts. To leverage advanced integration techniques, explore Unleashing the Potential of React Native App GitHub Repositories for Developers.

    Best Practices for Deploying React Native Apps

    • Ensuring App Performance and Reliability Post-Deployment

    Monitor your app’s performance continually using tools like Sentry or Bugsee. These tools help in capturing real-time crash reports and performance bottlenecks, allowing you to respond swiftly to any issues that might impact user experiences (Bugsee Guide). For comprehensive security measures, refer to Mobile App Security Best Practices: Protecting User Data and Enhancing App Performance.

    • Monitoring and Analytics to Track App Usage and Issues

    Implementing analytical tools helps monitor user interactions and system performance, enabling proactive management of any identified issues. This approach helps in maintaining a smooth operational profile for your app post-launch.

    Common Challenges and Troubleshooting

    • Addressing Common Issues Faced During Deployment

    Common deployment issues can range from build failures to sign-in certificate problems. Thoroughly checking your app’s dependencies, environment setups, and testing outputs is essential for troubleshooting and clearing these hurdles effectively.

    • Tips for Debugging Deployment Problems

    Establish clear, concise, and documented guessing mechanisms. Use logging extensively to understand and pinpoint failures accurately. Community forums and official documentation are invaluable for finding solutions to tricky problems .

    react native expert advice
    react native expert advice

    Conclusion

    Deploying your React Native app successfully involves meticulous preparation, optimisation, and implementing a robust set of deployment strategies. It’s important to leverage CI/CD for maintaining ongoing quality, and post-deployment analytics will help in keeping your app relevant and functioning optimally. Following the guidelines and strategies mentioned here will aid in the smooth deployment of your React Native app, ensuring a wide reach and consistent user experiences across all platforms (Bugsee Guide, React Native Publishing, 30 Days Coding). Stay vigilant and proactive by integrating user feedback and updates to continuously improve and adapt your app to meet user needs.

    Frequently Asked Questions

    1. What are the main benefits of using React Native for mobile app development?

    React Native enables developers to build high-performance apps for both iOS and Android using a single codebase, reducing development time and ensuring a consistent user experience across platforms.

    2. How do I optimise my React Native app for better performance?

    Optimise your app by removing unused components, implementing code minification and obfuscation, and ensuring that all dependencies are up-to-date.

    3. What is the difference between a debug build and a release build in React Native?

    Release builds are optimised for end-users, removing development tools and enhancing performance, whereas debug builds include additional tools for testing and debugging during development.

    4. Why is Continuous Integration and Continuous Deployment important for React Native apps?

    CI/CD automates the building, testing, and deployment processes, increasing reliability, reducing human error, and speeding up the release cycle.

    5. How can I monitor my React Native app’s performance post-deployment?

    Use monitoring tools like Sentry or Bugsee to capture real-time crash reports and performance metrics, allowing you to address issues proactively.

  • Building React Native Apps with GitHub

    Building React Native Apps with GitHub

    .Key Takeaways

    • Leveraging React Native app GitHub repositories accelerates mobile app development.
    • GitHub hosts a vast array of open-source React Native apps that provide robust components and best practices.
    • Contributing to GitHub projects enhances developer skills and community recognition.
    • Choosing the right GitHub project involves assessing maturity, community support, and licensing.
    • React Native UI component libraries like React Native Paper and NativeBase streamline UI development.

    Github advance functionality react native

    Unleashing the Potential of React Native App GitHub Repositories for Developers

    In today’s mobile app landscape, using React Native GitHub repositories is a true game-changer. For developers aiming for efficiency and advanced functionality, GitHub offers ready-to-use source code, templates, and real-world examples. Moreover, it speeds up prototyping, encourages best practices, and allows easy customisation. In this guide, we’ll quickly walk you through how to build a React Native app while exploring top GitHub projects, UI components, and practical tools every developer should know.

    Overview of React Native and GitHub

    React Native excels by allowing developers to create native mobile apps using only JavaScript and React, making it a giant in cross-platform mobile development. Its popularity is not unearned; a thriving community and continuous enhancement solidify its standing. On the other hand, GitHub houses an extensive array of open-source React Native apps. This enables unparalleled collaborative possibilities and a repository of readymade components and applications that accelerate development while aligning with community-endorsed standards. This domain of shared knowledge and resources dramatically enriches the developer experience and project outcomes. Prerequisite for React Native Application Development.

    Why React Naive Github?

    There are many advantages of using React Native with GitHub, particularly for agencies. Using GitHub with React Native is more than just version control; it’s a foundation for a professional, efficient, and collaborative development workflow.

    Advantages for Professional Agencies

    • Version Control and Collaboration: GitHub allows your team to manage and track every change made to the codebase. Multiple developers can work on the same project simultaneously without overwriting each other’s work. Features like branching, pull requests (PRs), and code reviews are crucial for maintaining code quality, ensuring bug fixes are thoroughly tested, and facilitating a smooth team workflow.

    • Continuous Integration and Deployment (CI/CD): GitHub Actions, the built-in CI/CD tool, automates your development pipeline. You can configure workflows to automatically run tests, check code quality with linters, and build your app every time a developer pushes code. This catches bugs early, saves a significant amount of manual time, and ensures a stable codebase.

    • Project and Task Management: GitHub provides built-in tools like Issues, Projects, and Milestones. These features allow you to track bugs, manage features, assign tasks to team members, and visualise your project’s progress in a centralised location.

    • Security: GitHub provides robust security features to protect your codebase and sensitive information. You can use GitHub Secrets to securely store API keys, private certificates, and other credentials, ensuring they are not exposed in your codebase.

    • Open-Source Contribution: The open-source nature of React Native means that many of its libraries and tools are hosted on GitHub.1 This allows your team to easily contribute to the community, stay updated on the latest changes, and leverage the vast ecosystem of pre-built components.

    For agencies, using GitHub with React Native is a strategic decision that drives efficiency, ensures professionalism, and guarantees the quality of the final product. It transforms a solo coding effort into a well-managed, collaborative, and automated process, delivering a better experience for both your team and your clients.


    Top React Native GitHub Projects

    Featured React Native App GitHub Repositories

    When scoping out leading repositories, a few stand out by offering extensive app codebases and examples that not only demonstrate robust architecture but also innovative features:

    1. React Native Elements – This repository provides a rich set of customizable components, excellently documented and regularly updated, making it ideal for robust application design.
    2. Expo – Known for enabling rapid development cycles and providing a plethora of APIs, this repository is perfect for developers aiming for high productivity without compromising quality.

    Each repository provides a unique advantage, whether for learning advanced features or for employing high-quality code structures, ensuring they cater to a wide spectrum of development needs. 

    Highlighting a selection of open-source React Native apps offers insights into various applications from productivity to entertainment:

    • Peel – Focusing on minimalist design, this productivity app utilises React Native to offer seamless cross-platform functionality. It serves as an excellent starting point for developers interested in building an intuitive UI/UX.
    • MoviesApp – An entertainment app that utilises a rich set of media content APIs and offers a robust example of handling streaming data and state management in React Native.

    Developers can explore these apps to understand the real-world application of React Native in different contexts and use cases, enhancing their capability to develop versatile and responsive applications.

    Github advance functionality react native expert

    GitHub React Native Examples

    For those sharpening their skills or entering the field, studying specific GitHub React Native examples that emphasise clean architecture and best practices is invaluable:

    • Navigator – This project showcases exemplary implementation of navigation and routing in React Native, a crucial aspect of any mobile app.
    • WeatherApp – Implements Redux for state management, effectively demonstrating a scalable app architecture suitable for larger applications or future growth.

    Each example provides a foundation in different aspects of app development, from modularisation to efficient state management. This is making these repositories not only templates but also significant learning tools.

    React Native UI Components on GitHub

    React Native UI GitHub Repositories

    The React Native Paper and NativeBase are two standout repositories that offer an extensive range of customizable UI components:

    • React Native Paper – Boasts a collection of material design components that are easy to implement and customise, suitable for projects aiming for modern aesthetics.
    • NativeBase – Provides a wide array of components that are easily adaptable to existing themes, ideal for projects requiring rapid UI development without starting from scratch.

    Developers aiming to enhance their app’s interface with high-quality, pre-designed elements will find immense value in these repositories.

    Utilising UI Templates in Your Projects

    Integrating these UI components involves specific steps such as installing dependencies through npm or yarn and importing statements in your project files. Here’s how you can customise these templates:

    • Adapt Styles: Ensure your UI components match your app’s theme, modifying or overriding styles as necessary.
    • Extend Functionality: Add custom components or tweak existing ones to meet your specific needs.

    This process not only streamlines UI development but also ensures a cohesive look and functionality across your application.

    How to Choose the Right React Native GitHub Project for Your Needs

    Choosing the right project involves assessing several factors:

    • Project Maturity and Maintenance: Opt for projects with a solid history of updates and active maintenance.
    • Community Support: A vibrant community, indicated by stars, forks, and active contributions, assures ongoing development and support.
    • License Type: Ensure the license aligns with your intended use, be it commercial or personal.

    Moreover, reviewing documentation quality, code readability, and structure is essential to ensure the project meets your developmental and learning needs.

    Contributing to React Native Open Source Projects on GitHub

    Contributing back to these projects not only enhances your skills but also helps you gain recognition within the developer community:

    • Fork and Clone: Start by forking a project and cloning it locally.
    • Understand and Follow Contribution Guidelines: Each project has its own set of rules; adhere to them to make meaningful contributions.
    • Submit Pull Requests: Engage with project maintainers through clear communication and well-documented pull requests.

    This active participation fosters learning and community building.

    Our team has extensive experience in setting up and managing professional React Native projects on GitHub. We handle the complexities of CI/CD pipelines, automated testing, and secure secret management, allowing your team to focus on what matters most: building incredible applications. Ready to professionalise your React Native development workflow? Contact us for a free consultation today!

    Conclusion

    Exploring and utilising React Native app GitHub repositories significantly boosts project outcomes, driving innovation and efficiency. As you embark on this journey, remember that each repository is not just a toolkit but a gateway to community collaboration and continuous learning. Dive into these resources, contribute actively, and leverage the collective wisdom of the React Native community to enhance your development projects. Through these endeavours, GitHub remains an invaluable resource, continuously fostering a vibrant ecosystem of shared knowledge and cutting-edge technology.

    Frequently Asked Questions

    1. Is GitHub required to build a React Native app?

    No, you can build a React Native app without using GitHub. However, a modern professional agency relies on a version control system like GitHub for collaboration, project management, and quality control. Without it, you’d have no way to track changes, review code, or automate builds.

    2. How does GitHub improve a project’s quality?


    GitHub improves quality by making the development process transparent and collaborative. Features like Pull Requests allow team members to review each other’s code for bugs and inconsistencies before it’s merged. Additionally, GitHub Actions can run automated tests to catch errors as soon as a change is pushed, preventing bugs from making it into the final product.

    3. Is our code safe and secure on GitHub?


    Yes. GitHub offers a range of security features. You can set up private repositories so only your team and clients can access the code. For sensitive information like API keys, GitHub Secrets provides a secure way to store them without exposing them in your codebase.

    4. How does GitHub help with project management?


    GitHub provides a suite of project management tools like Issues, Projects, and Milestones. Agencies can use these to track a project’s progress, assign tasks, report bugs, and keep a transparent history of decisions. This is invaluable for communicating with clients and managing a complex project

    5. How does this help with client communication?


    Using GitHub creates a single source of truth for the project. Clients can be added to the repository to see the project’s progress, read code review comments, and view bug reports in real-time. This level of transparency builds trust and keeps everyone on the same page.

    What are the benefits of using React Native for mobile app development?
    • React Native is a framework for building mobile apps using React.
    • It allows you to build native apps using React and JavaScript.
    • It is a popular choice for building mobile apps.
    • It is a mature framework with a large community.
    • It is a mature framework with a large community.
    How can GitHub repositories accelerate my React Native project?
    • GitHub repositories can accelerate your React Native project by providing a way to share your code with others.
    • It can also help you find and use existing code that others have written.
    •  It can also help you find and use existing code that others have written.
    What should I consider when contributing to an open-source React Native project? You should consider the license of the project.
  • Integrating Firebase with React Native: A Complete Guide

    Integrating Firebase with React Native: A Complete Guide

    Key Takeaways

    • React Native enables cross-platform mobile app development using JavaScript.
    • Firebase offers a robust backend with services like databases, authentication, and analytics.
    • Integrating Firebase with React Native streamlines development and enhances app functionality.
    • Incorporating AI can significantly improve user experience through features like image recognition.
    • Automation tools like CI/CD pipelines enhance the efficiency and reliability of app deployments.
    • Implementing live and OTA updates ensures apps remain up-to-date without lengthy approval processes.
    • Security best practices are crucial when handling user data and managing API keys.
    • Performance optimisation using Firebase Analytics and Performance Monitoring is essential for a smooth user experience.

    Enhancing Your Mobile Development: A Comprehensive Guide to React Native with Firebase

    React Native is a pioneering framework that allows developers to create cross-platform mobile applications using JavaScript. It pairs effortlessly with Firebase, a robust suite of cloud services including databases, authentication, and analytics, offering a powerful backend platform. The combination of React Native with Firebase empowers developers by streamlining the development process, speeding up the time-to-market, and providing extensive backend capabilities. This guide will walk through detailed steps to integrate Firebase with React Native, enhance app functionality with AI, optimise performance, and much more. For a deeper understanding of building React Native applications, refer to How to Build a React Native App: A Comprehensive Guide.

    Why Integrate Firebase with React Native?

    Firebase eliminates the need for complex backend setups by providing ready-to-use cloud services. It enables developers to focus more on building app features rather than managing infrastructure.

    Key benefits include:

    • Authentication – Secure sign-in with email, phone, Google, Facebook, and more.

    • Real-time Database & Firestore – Store and sync data in real time across devices.

    • Cloud Storage – Manage images, videos, and files seamlessly.

    • Push Notifications – Engage users with Firebase Cloud Messaging (FCM).

    • Crashlytics – Monitor app performance and fix issues quickly.

    • Analytics – Track user behaviour for better decision-making.

    react native firebase inteegration services

    Integrating Firebase with React Native

    To integrate Firebase with a new React Native project, follow this step-by-step guide:

    Step 1: Create a New React Native Project

    npx react-native init MyFirebaseApp

    Step 2: Install Firebase and Required Packages

    For Firebase SDK (compatible with React Native):

    npm install @react-native-firebase/app

    • Install additional Firebase modules based on your needs, e.g.:

    npm install @react-native-firebase/auth # for authentication
    npm install @react-native-firebase/firestore # for Firestore database

    Step 3: Set Up a Firebase Project in the Firebase Console

    1. Go to https://console.firebase.google.com

    2. Click Add project → Enter a project name → Continue

    3. Once created, click Add app → Choose Android or iOS

    4. Follow the instructions to register your app:

      • For Android: Provide android/app/package name

      • For iOS: Provide iOS bundle ID

    Step 4: Configure Android App

    1. Add google-services.json:

    • Download from the Firebase console → Place it inside android/app/

    2. Modify android/build.gradle:

    buildscript {
    dependencies {
    classpath ‘com.google.gms:google-services:4.3.15’
    }
    }

    3. Modify android/app/build.gradle:

    apply plugin: 'com.google.gms.google-services'

    Step 5: Configure iOS App (Optional)

    1. Add GoogleService-Info.plist:

    • Download from Firebase → Add to ios/ using Xcode

    2. Enable necessary capabilities in Xcode (e.g., Push Notifications, Background Modes)

    3. Install pods:

    cd ios
    pod install
    cd..

    Step 6: Use Firebase in Your Code

    Example: Sign in with Firebase Auth


    import auth from ‘@react-native-firebase/auth’;

    function signInUser(email, password) {
    auth()
    .signInWithEmailAndPassword(email, password)
    .then(() => {
    console.log(‘User signed in!’);
    })
    .catch(error => {
    console.error(‘Sign-in error:’, error);
    });
    }

    Setting Up Firebase in a React Native Project

    To kickstart the integration of Firebase with your React Native project, follow these detailed steps:

    • Core Installation: Start by adding the core Firebase module to your project using Yarn:

      yarn add @react-native-firebase/app

    • iOS Setup:
      • Generate and download GoogleService-Info.plist from the Firebase Console.
      • Add this file to your /ios project directory with Xcode.
      • Detailed guide: Jscrambler’s Integration Guide.
    • Android Setup:
    • Rebuild your app to apply these configurations. Note that React Native 0.60+ supports autolinking, minimising manual setup. More details can be found in the React Native Firebase Documentation.
    • Extend Functionality: Install additional Firebase services such as Authentication or Firestore as per your needs:

      yarn add @react-native-firebase/auth @react-native-firebase/firestore

    Key Firebase Services for React Native Apps

    Authentication

    Firebase supports various authentication methods, including email/password, OAuth providers, and phone authentication. For tutorials, check the YouTube Tutorial and the FreeCodeCamp Tutorial.

    Cloud Firestore

    Manage real-time data storage and synchronisation effectively using Cloud Firestore. Explore these features in detail in the YouTube Tutorial and FreeCodeCamp Tutorial.

    Other Services

    Firebase also provides Realtime Database, Cloud Messaging, and Analytics to enhance your app capabilities. Learn more at React Native Firebase Documentation.

    react native firebase boost app

    Use Cases of React Native + Firebase

    • E-commerce apps – Manage products, orders, payments, and user authentication.

    • Social media platforms – Enable real-time chat, image sharing, and notifications.

    • On-demand services – Track orders or rides with live updates.

    • Educational apps – Store progress, lessons, and analytics with ease.


    Cost Advantage

    According to industry reports, React Native development can reduce costs by up to 40% compared to native development. Integrating Firebase further minimises backend expenses since it eliminates the need for custom servers and database management.

    Best Practices for Seamless Integration

    • Adhere strictly to the official Firebase documentation for specific services.
    • Securely manage sensitive configurations using environment files (.env).
    • Keep your codebase organised and modular, facilitating easier maintenance and scaling.

    Coordinating with Firebase

    Firebase can be utilised to manage notifications for available updates, enhancing the efficiency of the update process.

    Security Considerations When Using Firebase with React Native

    Data and User Information Security

    Implement robust security rules in Firestore and Realtime Database to protect data access and manipulation. Detailed security guidelines can be found in the Firebase Security Rules Documentation. Additionally, explore Mobile App Security Best Practices: Protecting User Data and Enhancing App Performance for comprehensive strategies.

    Managing Authentication and API Keys

    Secure handling of API keys and authentication processes is crucial. Techniques include using environment variables for sensitive configurations and regularly updating and monitoring API key usage to prevent unauthorised access.

    Performance Optimisation for React Native Apps with Firebase

    Optimising app performance involves efficient data queries, caching strategies, and regular monitoring with tools like Firebase Analytics and Firebase Performance Monitoring. Profiling tools within React Native also play a crucial role in identifying and addressing performance bottlenecks. To ensure your app includes all essential features for success, refer to Essential Features of a Successful Mobile App: A Comprehensive Guide.

    Conclusion

    Throughout this comprehensive guide, we’ve covered the strategic integration of Firebase with React Native, introducing advanced functionalities such as AI, automation, live and OTA updates, significant security practices, and performance optimisations. By leveraging these techniques and tools, developers can build scalable, feature-rich mobile applications while streamlining development processes and enhancing user experience. Implement these strategies to elevate your React Native projects and stay ahead in the mobile development game.

    React Native combined with Firebase offers an excellent foundation for building powerful, cost-effective, and scalable mobile applications. Whether you are a startup seeking rapid product launch or an agency developing for enterprise clients, this duo provides the perfect blend of performance, security, and scalability.

    Additional Resources

    Frequently Asked Questions

    1. What are the benefits of using Firebase with React Native?

    Using Firebase with React Native provides a scalable backend infrastructure, real-time database capabilities, user authentication, cloud storage, and analytics, all of which streamline the development process and enhance app functionality.
    Using Firebase with React Native offers powerful benefits like real-time data sync, easy authentication, and cloud storage without managing a backend. It speeds up development, supports both Android and iOS, and includes features like push notifications, analytics, and serverless functions. It’s ideal for building fast, scalable, and cross-platform mobile apps.

    2. How can AI enhance a React Native app?

    AI can enhance a React Native app by enabling features such as image recognition, natural language processing, personalised recommendations, and smart search functionalities, thereby improving user engagement and overall experience.

    3. What are the best practices for securing Firebase in a React Native app?

    Best practices for securing Firebase in a React Native app include implementing strict Firebase security rules, using environment variables to manage API keys, regularly monitoring and updating authentication methods, and ensuring data validation both on the client and server sides.

    4. How do CI/CD pipelines benefit React Native development?

    CI/CD pipelines automate the build, testing, and deployment processes, reducing the potential for human error, speeding up the release cycles, and ensuring that the app remains stable and reliable throughout its development lifecycle.

    react native firebase inteegration services

  • How to Build a Quiz App Using React Native – Beginner’s Guide

    How to Build a Quiz App Using React Native – Beginner’s Guide

    Key Takeaways

    • React Native enables cross-platform mobile app development, reducing time and cost.
    • Setting up the development environment is crucial for leveraging a React Native app template.
    • Implementing features like authentication, state management, and navigation enhances app functionality.
    • Utilising GitHub fosters collaboration and efficient code management.
    • Advanced features and proper deployment strategies ensure a robust and user-friendly quiz app.

    Introduction: Dive into React Native Development

    The term react native app example conjures up ideas of innovation and simplicity in mobile app development. In this blog post, our focus is to inspire and educate you by walking through a feature-rich React Native app template for building a quiz application. This example serves as an excellent template for your own projects, leveraging the unique advantages of React Native.

    What is React Native? Unlocking Cross-Platform Development

    React Native is a powerful JavaScript framework used to develop mobile applications that render natively on both iOS and Android platforms from a single codebase. This approach offers significant benefits:

    • Code Reuse: Write once and deploy on multiple platforms, significantly cutting down development time.
    • Large Ecosystem and Community: Access to a wide range of libraries, tools, and support from a global community.
    • Faster Development Cycles: Immediate updates without app store approval and rich development tools enhance developer productivity.

    For a closer look at React Native’s capabilities, watch this detailed overview video.

    Setting Up Your Development Environment

    To kickstart your development with a React Native app template, beginning with the setup is essential, especially for novices. Here’s how to initiate:

    1. Install Node.js: A core platform needed for running the JavaScript codebase.
    2. Install Expo CLI: Expo simplifies the initial setup and provides useful tools for rapid app prototyping.
    3. Emulator/Simulator Setup: Depending on your target OS, set up an Android emulator or an iOS simulator. Xcode is required for iOS.

    You can then initialise your React Native project using the selected template. For detailed setup guidance, view this setup video or visit Prerequisite React Native Development.

    community support partner

    Exploring a React Native App Example: Quiz App

    Our React native quiz app illustrates practical application architecture and features:

    • Data-Driven Questions: Fetches multiple-choice questions from an external source.
    • Progress Tracking: Uses a visual progress bar to indicate user advancement.
    • Score Handling: Computes scores automatically and displays results at the end.
    • Navigation: Enables smooth transition between different quiz screens.

    Implementing Authentication in Your Quiz App

    User authentication is pivotal for a personalised app experience. Using React native app auth tools like Firebase Auth or Auth0 allows you to:

    • Secure user data.
    • Provide personalised features such as leaderboards.
    • Save and fetch user progress.

    For an in-depth authentication setup guide, check this tutorial or visit Mobile App Security Best Practices.

    Managing App State and Navigation

    Effective state management and seamless navigation are keys to a smooth user experience. For state management, you might choose between local state, Context API, Redux, or Zustand based on your app’s complexity. Navigation can be handled adeptly with React Navigation, enabling users to move between screens like Home, Quiz, and Results effortlessly.

    Discover more about efficient state management in this Video on State Management or visit React Native App Development Services.

    cross platform react native agency

    Leveraging GitHub for Collaboration

    Utilising React native app GitHub repositories can significantly enhance your development process. Here you can fork existing quiz app projects or contribute to community-driven projects. Always ensure to comply with licensing terms when using or sharing code. Learn more at React Native vs Flutter 2025.

    Customizing and Personalizing Your Quiz App

    Enhance your app’s appeal by tweaking its aesthetics and functionality:

    • App Naming: Modify app.json or utilise React Native tools to rename your app.
    • Icon Customisation: Employ a React native app icon generator for unique and recognisable app icons.

    Guidelines for customising your app’s features are detailed in this App Customisation Guide.

    Advanced Features and Deployment

    To keep your users engaged, consider incorporating advanced features like push notifications and analytics. Tools like Expo Push Notifications or Firebase Cloud Messaging work well for these purposes.

    Ready to deploy? Ensure you optimise assets, configure production settings, and build standalone binaries for iOS and Android. Follow best practices for app store submissions to enhance your app’s acceptance chances.

    For deployment insights, watch this deployment tutorial.


    Conclusion: Utilising This React Native App Example

    By now, you should be equipped with the know-how to build and customise your own React Native quiz app by leveraging the materials and guidance provided. We encourage you to experiment, refine, and innovate based on the example and templates shared.

    For complete access to the source code and additional learning resources, visit our React native app GitHub repository and start transforming your app ideas into reality. Dive deep, create, and share your innovations!

    Frequently Asked Questions

    Q1: Do I need prior experience with React Native to build this app?

    Not necessarily. Basic knowledge of JavaScript and React is enough to get started.

    Q2: Can I connect my quiz app to an online database?

    Yes. You can integrate APIs or use Firebase/Firestore to fetch and store quiz data.

    Q3: Will my quiz app work on both Android and iOS?

    Yes. React Native allows you to build cross-platform apps with a single codebase.

    Q4: Can I monetise my quiz app?

    Absolutely. You can add ads, in-app purchases, or premium quiz packs.

    Q5: How long does it take to build a simple quiz app?

    A basic version can be built in a few days, while a feature-rich quiz app may take several weeks.

  • How to Build a React Native App: A Detailed Guide

    How to Build a React Native App: A Detailed Guide

    Key Takeaways

    • React Native enables the development of native mobile apps using JavaScript and React.
    • It offers a single codebase for both iOS and Android platforms, reducing development time.
    • Access to native components ensures high performance and a polished user experience.
    • Tools like React Native CLI and Expo cater to different development needs.
    • Effective debugging and CI/CD practices are essential for robust app development and deployment.

    How to Build a React Native App: A Comprehensive Guide

    Introduction

    React Native, developed by Facebook, is an innovative and widely embraced open-source framework for building native-style mobile applications on both iOS and Android. It leverages JavaScript and React, bringing rich mobile UI development capabilities to web developers using a familiar syntax. How to build a React Native app involves understanding this powerful framework, and this guide aims to equip you with the knowledge to do just that. For a deeper understanding of the fundamentals, refer to our What is Mobile App Development? An Introduction guide.

    Benefits of React Native

    benefits of react native mobile app development

    • Single Codebase: Deploy applications on both Android and iOS from a single codebase, reducing development time significantly.
    • Access to Native Components: Ensures your application has the high performance and polished look and feel of a native app.
    • Community and Ecosystem: With strong community support, developers have access to numerous libraries and tools that accentuate the development process.

    This guide is tailored for technical users who wish to build, run, debug, host, and deploy React Native applications, laying down a comprehensive step-by-step process to achieve the same.

    Setting Up Your Development Environment

    Install Node.js and npm

    Before diving into React Native, it’s essential to set up your environment, starting with Node.js and npm. Node.js is a runtime required to use React Native’s Command Line Interface (CLI) tools and npm for package management. Download and install them from the official Node.js website to ensure you are using the latest stable versions.

    Choose Your Toolchain: React Native CLI vs. Expo

    With Node.js and npm installed, the next step is selecting your toolchain.

    React Native CLI

    React Native CLI is suited for developers looking for flexibility and the ability to include native modules. It requires setting up dependencies for Android and iOS, making the initial configuration slightly complex but highly customizable. A typical React Native CLI project contains /android, /ios, and /src folders for Android, iOS, and your source files, respectively. To understand the prerequisites for using React Native CLI, check out our Prerequisites for React Native Application Development: A Comprehensive Guide.

    Expo

    Expo provides a simpler managed workflow with a set of tools and services designed for React applications. It’s an excellent choice for beginners or projects that do not require custom native modules, streamlining the development process significantly. Learn more about choosing the right toolchain in our Prerequisite for React Native Application Development: A Comprehensive Guide.

    Install Necessary Development Tools

    To effectively develop your application, certain tools are recommended:

    VS Code

    Visual Studio Code (VS Code) is a lightweight but powerful source code editor with built-in support for JavaScript, TypeScript, and Node.js. It’s enriched with features through extensions like React Native Tools, enhancing productivity in React Native development.

    Android Studio

    Android Studio provides the necessary build tools for Android development. It is indispensable for Android emulator setups and real-device deployments.

    Xcode (Optional for iOS Development)

    For iOS development, Xcode is the go-to solution, though it’s only available on macOS. While we won’t cover detailed steps here, it’s essential for compiling and deploying iOS apps.

    Building the React Native App

    Initialise a New Project

    Getting your application started is straightforward. Use the commands below based on the chosen toolchain:

    • React Native CLI: npx react-native init AppName
    • Expo: npx create-expo-app AppName

    For more insights on setting up your project, refer to our Harnessing React Native App Development Services for Seamless Multi-Platform Mobile Apps.

    Project Structure Overview

    React Native organises its projects into specific structures:

    • React Native CLI Projects: Contain /android, /ios, and /src folders. Each serves distinct roles in accommodating platform-specific code and JavaScript.
    • Expo Projects: Focuses more on JavaScript-only components, making it significantly easier for new developers to navigate.

    **Examples for Project Structures**

        /android - Native Android-specific code
        /ios - Native iOS-specific code
        /src - JavaScript source files
        

    react native expert for effective solution

    Configure Essential Settings and Dependencies

    Several packages will be essential throughout your development:

    • React Navigation: for navigation in apps.
    • Redux or Context API: for state management.
    • Axios or Fetch: for API calls.

    Install these by running npm install @react-navigation/native redux axios in your project directory.

    Running the React Native App

    How to Run a React Native App in VS Code

    For a smooth development experience in VS Code, follow these steps:

    • Install the React Native Tools extension.
    • Configure the VS Code terminal or use the integrated debug function to run commands like npx react-native run-android or npx expo start. This allows the app to launch in debug mode, setting you up for real-time debugging.

    How to Run on Android Devices

    To run apps directly on Android hardware:

    • Enable Developer Options and USB Debugging on your Android device.
    • Connect the device via USB and verify connections with adb devices.
    • Deploy directly using npx react-native run-android and ensure your device is recognised, troubleshooting as needed.

    How to Run an App in Android Studio

    Within Android Studio:

    • Open the /android folder of your project to set up the environment.
    • Create and configure an Android Virtual Device (AVD) and run the app using the emulator for testing.

    Debugging the React Native App

    Effective debugging is crucial in software development. React Native offers several tools to help locate and fix issues promptly.

    Common Debugging Techniques

    Understanding syntax errors, runtime errors, or logical errors is fundamental. Utilise commenting and clean, well-documented code to minimise these errors.

    Using VS Code’s Built-in Debugger

    Set breakpoints and inspect variables or the call stack in VS Code to understand flow and state across your application.

    Leveraging React Native Debugging Tools

    React Native’s integration with Chrome DevTools permits JavaScript code inspection and real-time debugging, simplifying the process considerably.

    Hosting the React Native App

    Backend/API Hosting Options

    Several backends can support your React Native app:

    • AWS Lambda: for serverless functions.
    • Firebase: for real-time databases and user authentication.

    Static Asset Management

    Utilise AWS S3, Firebase Storage, or other CDN services to manage and efficiently deliver assets like images and videos to your app.

    Integrating with Expo and React Native

    Both Expo and React Native can integrate seamlessly with these services, ensuring your backend and front-end are well-connected.

    Deploying the React Native App

    Preparing the App for Production Deployment

    Ensure your app is ready for deployment:

    • Optimise your assets: Minimise JavaScript, optimise images, and more.
    • Configuring Environment Variables: Manage API keys and sensitive data effectively.
    • Setting Up Signing Keys: Required for distributing your app through app stores.

    Steps to Deploy the App to Stores

    For production, you need to prepare your app for the respective app stores:

    • Google Play Store: Generate a signed APK or AAB file, create a developer account, and upload your app.
    • Apple App Store: Use Xcode to build your app, ensuring it meets Apple’s guidelines, and submit it through the Apple Developer account.

    Sources: GeeksforGeeks

    Implementing CI/CD Best Practices

    Adopt CI/CD for automating deployments using tools like GitHub Actions or CircleCI, enabling efficient, error-free production updates.

    Final Tip: Once your environment is ready, maintain a clean setup by avoiding unnecessary global packages and keeping your SDKs up to date.React Native application Agency 

    Conclusion

    This guide has offered a step-by-step walkthrough of how to build a React Native app, from setting up your development environment to deploying your app to production. React Native’s ability to leverage a single codebase for multiple platforms makes it an outstanding choice for developers looking to streamline their workflow and still produce high-quality native apps. Additionally, understanding the importance of mobile app development can further motivate and guide your development process.

    Move Forward with Confidence

    Implement what you’ve learned here to create robust, high-performing mobile applications. Explore further with detailed React Native Documentation and continue learning through community-driven tutorials and resources.

    Additional sources: YouTube Tutorial, GeeksforGeeks

    Your journey into React Native development starts now. Follow this guide, engage with the community, and start building something great!

    Frequently Asked Questions

    1. How much does it typically cost to develop a mobile app?

    The cost can range from $5,000 for a simple app to over $300,000 for a highly complex app, depending on various factors like design complexity, features, and development platform.

    2. How long does it take to develop a mobile app?

    The development timeline can vary from a few months to over a year, depending on the app’s complexity and the development process.

    3. Should I choose native or hybrid app development?

    If performance and access to device-specific features are critical, native development is preferable. If budget and development speed are priorities, hybrid development may be suitable.

    4. What are some cost-saving strategies for app development?

    Prioritising features for an MVP, utilising cross-platform development, and outsourcing to cost-effective regions are effective strategies to manage costs.

    5. Why is ongoing maintenance important for my app?

    Regular maintenance ensures your app remains competitive, secure, and compatible with the latest devices and operating systems.