Avoid common React Native errors to ensure smooth app development.
Optimise performance to maintain user satisfaction and app efficiency.
Adhere to coding standards for high-quality, maintainable code.
Plan your app structure to prevent chaotic code and difficult bugs.
Minimise the use of external libraries to reduce bugs and maintenance complexity.
Mistakes to Avoid When Developing an App: A Comprehensive Guide
Developing a robust, user-friendly application demands meticulous attention to detail and a proactive approach to avoiding common pitfalls. The phase “mistakes to avoid when developing an app” encompasses a variety of errors that could derail the functionality and success of your software. By understanding common React Native errors, performance pitfalls, and the significance of adhering to coding standards, developers can navigate these challenges and enhance the quality of their applications.
Insights from extensive research emphasise that steering clear of these mistakes not only streamlines the development process but also curtails costs and facilitates smoother application launches.
Common React Native Errors
Introduction to Common React Native Challenges
React Native emerges as a powerful tool for app development, but it brings with it a set of unique challenges, typically stemming from common errors in its utilisation.
Error 1: Wrong Estimations
Definition: Developers often mistakenly assume that components and layouts will function identically across varied platforms.
Example: UI layouts designed for iOS might not render correctly on Android, creating inconsistencies.
Solution:
Plan for differentiation between platforms from the beginning.
Conduct early analyses of backend compatibility across systems.
Error 2: Overusing External Library
Definition: Relying heavily on external libraries can slow down the app, introduce bugs, and complicate maintenance.
Example: Implementing several image processing libraries when one suffices.
Solution:
Choose well-supported libraries that directly address your needs.
Adopt a minimalist approach to adding external libraries.
Error 3: Not Planning App Structure
Definition: The absence of a predefined structure can lead to chaotic code and challenging bugs.
Example: Mixing of component files with utility functions without a coherent directory structure.
Solution :
Establish a clear structure for folders and components early in the project.
Segregate screens, components, and services into distinct folders.
Mistake: React Native is cross-platform, but iOS and Android have subtle differences in UI elements, permissions, and navigation behaviours. Ignoring these can cause inconsistent performance or layout issues.
Example: Using TouchableOpacity without considering Android’s ripple effect or iOS’s gesture differences.
Solution:
Use Platform-specific code.
Test thoroughly on both platforms.
Leverage platform-specific libraries like react-native-safe-area-context
Additional React Native Errors
React Native development is also hindered by other errors, such as not reviewing the code of external modules, mutating state within render functions, styling inaccuracies, and using unoptimized assets. Each of these issues warrants careful consideration and specific strategies to mitigate. For example, always use setState for state changes, and optimise assets before integration. Detailed explanations and solutions to these issues are discussed extensively on platforms like YouTube.
For advanced debugging techniques, refer to Mastering Debugging Techniques for React Native App Development.
Performance Pitfalls
Performance optimisation is crucial for ensuring that the app remains responsive and efficient. Neglecting this aspect can lead to user dissatisfaction and attrition.
Pitfall 1: Neglecting Performance Optimisation
Definition: Omitting performance enhancement measures results in sluggish applications.
Solution:
Use React.memo and useMemo for memoisation to avoid unnecessary re-renders.
Optimise images and use them FlatList for large lists to enhance performance.
Definition: Inefficient state management leads to unnecessary re-renders and performance hiccups.
Solution:
Employ effective state management frameworks like Redux or MobX.
Refrain from excessive use of local states when global solutions are applicable.
Learn more about managing state efficiently on dev. to.
Adhering to Coding Standards
Consistency in coding is vital for maintaining high code quality and facilitating teamwork. Adhering to established coding standards is not merely a best practice but a critical necessity.
Key Coding Standards and Implementation Tips
Consistent Naming Conventions: Stick to a naming strategy like camelCase for variables and PascalCase for components.
Modularise Code: Organise code into modules for better reusability and clarity.
Version Control and Quality Tools: Implement tools like Git, ESLint, and TypeScript to track changes and enhance code quality.
Pro Tip: Always keep your React Native version and libraries updated. Many performance improvements come from newer versions.
Conclusion
Staying informed about and vigilant against potential development errors, such as common React Native errors, performance pitfalls, and lapses in coding standards, is imperative for building successful applications. By applying the strategies and best practices discussed, developers can significantly uplift the quality and reliability of their apps, ensuring a smoother development journey and a robust end product.
Additional Resources
For ongoing learning and updates, developers are encouraged to engage with resources like React Native’s official documentation, browsing performance optimisation guides, and participating in coding communities such as Stack Overflow and Reactiflux Discord. These platforms provide valuable insights and a community-driven support system that can help in refining development skills and staying updated with the latest trends.
By prioritising these aspects and continuously enhancing their craft, developers not only avoid common mistakes but also advance their skills, ensuring their applications stand out in a competitive digital landscape.
Common mistakes include wrong estimations of component behaviour across platforms, overusing external libraries, and not planning the app structure properly.
Adhering to coding standards ensures consistency, high code quality, and easier maintenance, which are critical for teamwork and long-term project success.
Revolutionising Wearable Tech: React Native for Apple Watch App Development
React Native for Apple Watch is transforming the way developers create applications for wearable technology. As the wearable technology market continues to burgeon, driven by an uptick in the adoption of devices such as smartwatches and fitness trackers, the demand for streamlined and efficient wearable app development is more pronounced than ever. These developments promise not only enhanced convenience but also personalised user experiences adapted to individual routines.
react native App with solid foundation
Understanding Wearable App Development
Wearable app development encompasses the creation of software specifically designed for wearable devices, such as smartwatches, fitness trackers, and other similar devices. It stands out due to unique challenges such as limited display space and the need for optimised battery usage, which demands innovative solutions for the user interface and functionality.
While there is no “official” or direct way to write a WatchOS app using React Native’s JavaScript components, a highly effective and professional approach involves building a seamless bridge between a native WatchKit app and a React Native iOS app. This strategy allows you to leverage your existing React Native codebase for the core mobile application while providing a fast, responsive, and truly native experience on the Apple Watch.
Key Considerations in Wearable UI Design
Limited Screen Space: The small screens of wearable devices require developers to design concise, glanceable interfaces that provide essential information at a quick glance.
Battery Life and Performance: Developers must focus on minimising power consumption while ensuring smooth performance [UI Challenges].
Seamless Integration: Effective synchronisation between wearables and smartphones is critical, enabling a cohesive user experience [Integration Essentials].
Why Opt for React Native in Smartwatch Development?
React Native, a JavaScript framework, is renowned for facilitating the development of cross-platform apps with React, offering a blend of efficient development cycles and native-like user experiences for both iOS and Android devices. Read more.
Growing user base: According to Demand Sage Mordor Intelligence, with nearly half a billion users on smartwatches and rising, investing in watchOS features can broaden app reach.
Premium user segment: The Apple Watch remains a dominant, high-margin device used for health and utility scenarios, making dedicated watchOS features particularly compelling.
Competitive shift: While Apple faces softening in dominance, a well-integrated, polished watch app can differentiate your brand in a competitive smartwatch ecosystem.
Global Rise of the Wearable Market
As per the Fortune Business Insight report, the global wearable technology market was valued at USD 78.40 billion in 2024. It’s projected to reach USD 191.58 billion by 2032, with a 12.0% CAGR. North America leads the market with a 39.05% share in 2024. The smart clothing sector currently holds a 9% share, driven by a growing focus on fitness.
Advantages of React Native for Wearables
Faster Development Cycles: Developers benefit from reusable codebases, which accelerate the development process considerably [React Native Benefits].
Consistent UI Across Platforms: Uniform UI components across different devices enhance the user experience.
Ease of Mobile Integration: React Native simplifies the development of companion apps that seamlessly interact with Apple Watch extensions.
Comparing React Native with Native Development Approaches
Feature
React Native
Native (Swift/Obj-C)
Development Speed
Faster with a reusable codebase
Slower, tailored to the platform
UI Consistency
High across devices
Customizable per platform
Performance
Suitable for most needs
Optimal utilises full hardware capabilities
Platform Integration
Intermediate due to bridges
Comprehensive API access
Despite its advantages, React Native may face limitations in accessing deep native functionalities of platforms like watchOS, which native development can leverage to a greater extent.
Step-by-Step Guide to Developing Smartwatch Apps with React Native
Setting Up Your Environment
Start a React Native Project: Initialise a new project using React Native CLI or Expo, which provides a streamlined setup process. Learn how.
Create an Apple Watch Target: Integrate an Apple Watch extension within your Xcode project to manage watch-specific features.
Implement Bridging Tools: Use tools like react-native-watch-connectivity to facilitate communication between the iPhone and Apple Watch, ensuring smooth data transfer [Environment Setup].
Designing for Small Screens
Focus on clear, minimalist designs that convey information quickly and efficiently.
Leverage Apple Watch design principles to ensure content is easily understandable at a glance.
Optimizing Performance
Prioritise foreground activities while minimising background processing to preserve battery life.
Use efficient data handling strategies for updates and notifications, optimising the user’s experience without excessive battery drain.
Architect Your Data Flow
A professional approach involves architecting a clear data flow. The React Native app acts as the data source, fetching and managing data (e.g., from a backend API). It then uses the native bridge to push relevant information to the Watch app, which then updates its native UI. This ensures the watch app remains lean and efficient, while the React Native app handles the heavier lifting.
Integrating with watchOS
WatchOS integration is crucial for tapping into the advanced capabilities of Apple Watch, such as complications and specialised notifications. This involves setting up appropriate targets in Xcode, using the Watch Connectivity API for seamless data flow, and ensuring that your app leverages watchOS-specific UI components for optimal functionality. Detailed guide.
Navigating Technical Challenges
While React Native provides a robust framework for developing companion apps, it presents challenges such as the need for additional bridging to connect React Native with native modules. Overcoming these involves strategic planning and may require integrating tailored native code to access full-device features, which can complicate the development process. Learn more.
Empowering Developers: Tools and Resources
To aid developers in crafting superior wearable applications, several tools and resources are indispensable:
React Native Watch Connectivity: Enhances the communication between iOS apps and Apple Watch.
Expo: Simplifies the initial project configuration and offers a robust testing environment.
Apple’s watchOS Documentation: Provides comprehensive guidance on utilising the full potential of watchOS features.
Developers are also encouraged to explore community forums and GitHub repositories for additional insights and collaborative opportunities, which are invaluable in tackling specific developmental hurdles [Community Resources].
Things To Keep In Mind
React Native cannot run directly on watchOS—use native development with SwiftUI for Apple Watch apps.
Bridge with WatchConnectivity to connect your RN iOS app and native watch extension.
Market is growing, though competitive: Apple is still a major player, even with shifting market dynamics.
Value lies in seamless, lightweight integrations that enhance health, convenience, and user retention.
Conclusion
React Native for Apple Watch heralds a new era in wearable app development, combining the efficiency of cross-platform development with the capability to integrate deeply with native features. While it comes with its set of challenges—particularly in handling watchOS-specific functionalities—it remains a formidable tool for developers aiming to innovate and excite in the wearable tech space. As this technology evolves, the community around it grows, promising even more robust solutions and creative possibilities for future wearable applications.
Our team has proven expertise in both React Native and native iOS development to seamlessly integrate your mobile application with Apple Watch. We can build the robust communication bridges and native WatchKit extensions required to deliver a fluid, high-performance user experience.
Contact us for a free consultation today to discuss your vision and see how we can bring your React Native app to life on the Apple Watch!
Frequently Asked Questions
1. Is it possible to write the entire Apple Watch app in React Native?
No. Apple Watch apps run on a different architecture (watchOS) that does not include the JavaScript runtime required by React Native. The core of the Watch app’s UI and logic must be written natively in Swift or Objective-C. React Native is used to build the companion iOS app and to establish a robust communication bridge.
2. What are the key benefits of this hybrid approach?
This approach leverages the strengths of both technologies. You get the speed and single codebase efficiency of React Native for your main iOS app, while ensuring the Apple Watch app is highly performant and responsive with a truly native user experience. This also simplifies the management of data and business logic, as it’s primarily handled on the main app.
3. What are the main limitations?
The main limitation is that you cannot reuse your React Native UI components for the watch app. The Watch app must be developed separately, which adds to the development time. Additionally, some complex, real-time data synchronisation may require careful management to ensure a smooth user experience.
4. How does this affect the project timeline and budget?
While this method is more efficient than building both the main app and the watch app from scratch with native code, it still requires specialised expertise. The timeline and budget will be slightly higher than a mobile-only project, as it includes the development of the native watch app and the communication bridge. However, the investment results in a superior user experience and a powerful new touchpoint for your product.
React Native has revolutionised the way developers build mobile applications, combining the best aspects of native performance with the agility of JavaScript development. Now, this versatile framework is expanding its horizons beyond mobile, offering robust solutions for desktop application development on Windows and macOS platforms. In this post, we will delve into the technical feasibility of using Windows apps with React Native and explore React Native macOS applications, highlighting the growing trend towards unified codebases that transcend individual platforms. Overview of React Native
Overview of React Native
React Native is an open-source JavaScript framework developed by Facebook, enabling developers to create native applications for multiple platforms using a single codebase of React and JavaScript. Originally targeted at iOS and Android, its capabilities have extended thanks to a vibrant community contributing to its expansion. The key advantages of React Native include:
Unified development workflow that promotes code reuse across iOS, Android, and now desktop platforms
A large open-source community that drives continuous innovation and extension of the framework
React Native’s adaptability now includes support for desktop environments, paving the way for applications that run seamlessly across mobile devices and desktop computers. More information about React Native’s core features can be found on the Creole Studios website. Additionally, for a comprehensive understanding of multi-platform development with React Native, visit Harnessing React Native App Development Services for Seamless Multi-Platform Mobile Apps.
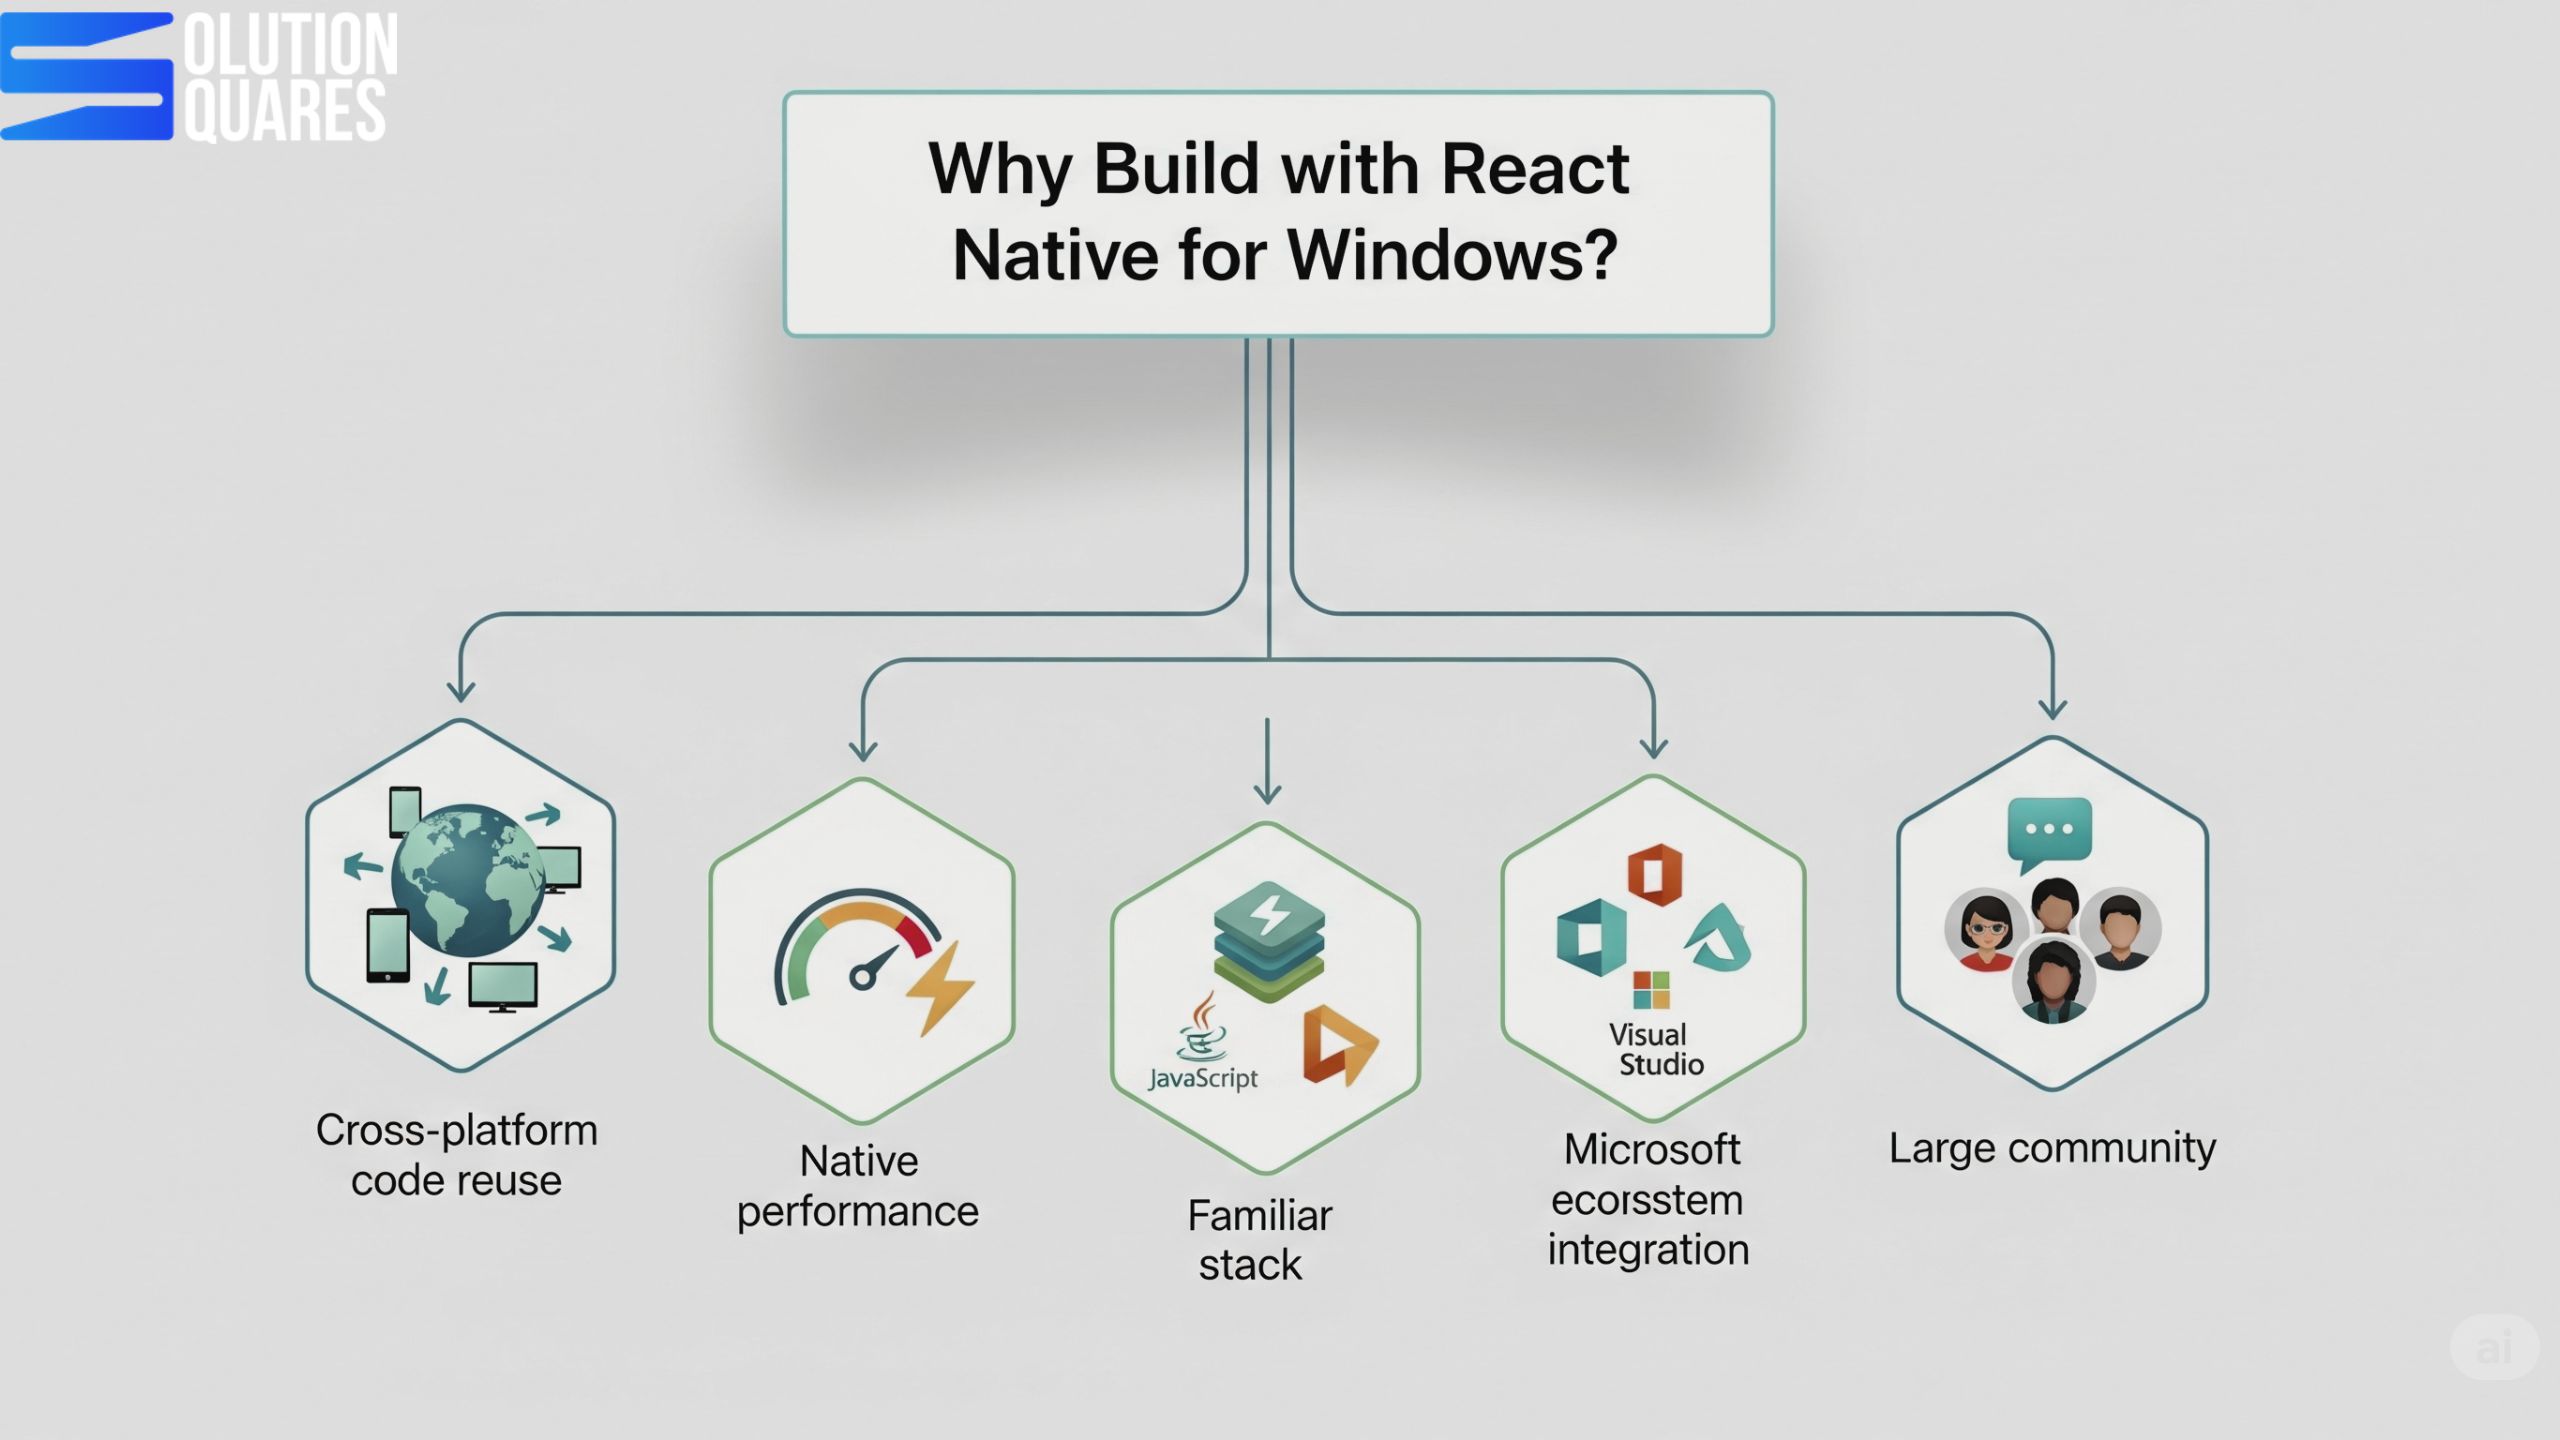
Why Build with React Native for Windows?
Advantage
Benefit
Cross-platform code reuse
Share logic & UI components across mobile and desktop
Windows apps with React Native are developed through React Native Windows, a Microsoft-supported extension. This allows developers to adapt their existing React Native code for the Universal Windows Platform (UWP) and Win32 applications, making it possible to maintain a unified codebase. Essential tools for setting up a React Native for Windows project include:
Node.js and the React Native CLI
Visual Studio 2022, equipped with the necessary workloads for Windows and C++ development
Developers are provided the tools to build applications compatible with both recent versions of Windows 10 and Windows 11, leveraging the latest Windows APIs. Examples of successful implementations include Microsoft’s own products and numerous enterprise applications that take advantage of this cross-platform approach. Learn more about this from Shivlab and the detailed guides on React Native for Windows Documentation. For an ultimate guide on building cross-platform desktop applications, refer to Solution Squares.
React Native for macOS
Similarly, React Native macOS extends the framework’s capabilities to Apple desktop environments. With tools such as Xcode and the react-native-macos CLI developers can bring their applications to macOS, supported by active community projects and Microsoft’s support initiatives. Compatible with the latest macOS versions, this extension allows the development of native macOS applications using the familiar React Native components and APIs. For implementation examples and further info, check Creole Studios.
Prerequisites
Before starting, make sure you have:
Requirement
Notes
Windows 10 or 11
64-bit, Version 1809 (Build 17763) or later
Node.js
LTS version (e.g., 18.x)
Yarn
Optional but recommended
Visual Studio 2022
With Desktop development with a C++ workload
React Native CLI
For project creation
Windows SDK
Comes with Visual Studio
Developing Windows Apps with React Native
Building Windows applications with React Native involves specific setup steps:
Install Node.js and the React Native CLI.
Set up the development environment in Visual Studio with the necessary workloads.
Initialise your React Native project and add Windows compatibility with specific commands designed to streamline the process.
Extensive testing across different Windows versions ensures compatibility and optimises performance.
This process, detailed React Native for Windows Documentation, underscores the adaptability and potential of React Native in creating desktop applications. For additional optimisation and deployment strategies, visit Solution Squares.
Comparing React Native Windows and React Native macOS
Both extensions offer tailored experiences for their respective platforms, but they share a unified approach to React Native development. Key differences lie in supported platforms, toolchains, community support, and the specific use cases they cater to, as demonstrated in the following table:
Aspect
React Native Windows
React Native macOS
Supported Platform
Windows 10, 11, UWP, Win32
Current macOS releases
Toolchain
Visual Studio 2022, Windows Build Tools
Xcode, macOS CLI
Community Support
Strong (Microsoft-backed, official docs)
Growing (community-driven, some Microsoft support)
Platform APIs
Windows APIs, C++, UWP components
macOS APIs, Swift/Obj-C native modules
Use Cases
Enterprise desktops, utilities, and productivity tools
Traditionally, businesses had to develop separate applications for Windows, macOS, and mobile platforms—a process that was costly, time-consuming, and complex. With React Native for Desktop, agencies can:
Use a single codebase → Develop apps that work across mobile, web, and desktop.
Reduce costs → Faster development cycles lower project budgets.
Ensure consistent UX → Unified interfaces across all platforms.
Tap into a growing ecosystem → Backed by Microsoft (React Native Windows + macOS) and community-driven efforts.
Useful Libraries for Windows Development
Library
Purpose
react-native-windows
Core Windows integration
react-native-fs
File system access
react-native-vector-icons
Icons
react-navigation
Routing/navigation
react-native-device-info
System info
Technical Feasibility Analysis
Building desktop applications with React Native is technically feasible if developers possess proficiency in React Native and JavaScript/TypeScript, along with access to platform-specific build tools like Xcode for macOS and Visual Studio for Windows. The performance of apps can be akin to native applications for several use cases, especially when employing optimisation techniques like the Hermes JavaScript engine.
Future of React Native in Desktop Development
React Native has long been the go-to framework for building high-quality cross-platform mobile apps. But in recent years, it has evolved beyond mobile—expanding into desktop development for Windows, macOS, and even Linux. For agencies, this evolution opens the door to faster delivery, broader reach, and cost savings for clients who want multi-platform solutions with a single codebase. So, what does the future of React Native in desktop development look like, and why should agencies care?
Cross-Platform Strategy
You can target:
Android + iOS → Mobile
Windows + macOS → Desktop
Web → Browser (using React Native for Web)
By structuring your app with shared logic + platform-specific components, you can cover all platforms with a single codebase.
React Native application Agency
Conclusion
The potential for building feature-rich, native desktop applications with React Native is immense. With strong community and official support, the framework is well-positioned to become a staple in the toolbox of developers aiming to leverage a unified codebase for mobile and desktop environments. As the ecosystem continues to expand, React Native appears increasingly capable of meeting the intricate demands of modern software development.
Additional Resources
For developers eager to dive deeper, the following resources are invaluable:
Official Documentation: Comprehensive guides and updates are available at React Native Windows and related Microsoft documentation.
Community Tutorials and Forums: Engage with other developers and find solutions through community-driven resources and forums.
Essential Tools and Plugins: Node.js, Visual Studio, Xcode, plus various React Native packages, are essential for developing robust applications.
Whether you’re planning a new project or scaling an existing one, React Native offers a compelling framework for creating seamless and efficient cross-platform applications.
1. What are the main benefits of using React Native for desktop application development?
React Native allows developers to use a unified codebase for both mobile and desktop applications, which reduces development time and maintenance efforts. Additionally, it leverages the performance of native applications while providing the flexibility and ease of JavaScript development.
2. What tools are required to develop React Native applications for Windows?
To develop React Native applications for Windows, you’ll need Node.js, the React Native CLI, and Visual Studio 2022 with the necessary workloads for Windows and C++ development.
3. How does React Native ensure performance comparable to native desktop applications?
React Native leverages native components and APIs, which allows applications to perform similarly to native desktop applications. Additionally, using optimisation techniques like the Hermes JavaScript engine can further enhance performance.
4. Is it necessary to have separate codebases for Windows and macOS applications in React Native?
One of the key advantages of using React Native for both Windows and macOS is the ability to maintain a unified codebase. This approach simplifies development and maintenance, allowing developers to reuse most of the code across both platforms.
5. What are the limitations of using React Native for desktop applications?
One limitation is that mobile APIs are not always mapped to their desktop equivalents, which can require additional custom implementations. Additionally, there may be platform-specific restrictions, especially on macOS, that developers need to navigate.
Code Reuse Across Platforms: React Native allows developers to write once and deploy on both Android and iOS, significantly reducing development time and costs.
Performance: Delivers smooth, native-like performance essential for user retention.
Hot Reloading: Enhances development efficiency by providing real-time feedback and quicker iterations.
Strong Community Support: A vibrant ecosystem with extensive documentation and active community resources.
Comprehensive Tooling: Includes tools for testing, debugging, and continuous integration to ensure app quality.
Mastering React Native for Android: A Comprehensive Guide
Introduction: Why React Native for Android is a Game-Changer?
React Native for Android offers a powerful framework for developers looking to build high-quality Android apps efficiently. As a cross-platform solution that allows the use of JavaScript and React to create native Android applications, React Native stands out in the mobile development landscape.
What is React Native?
React Native is a framework developed by Meta that bridges the gap between web and mobile platforms, enabling developers to use JavaScript to build applications that run natively on Android and iOS. Its ability to reuse code across platforms not only speeds up the development process but also reduces the effort required for app maintenance.
Advantages of React Native for Android Development
Some of the top benefits of using React Native for Android include:
Code Reuse Across Platforms: Write once, run anywhere—this principle dramatically cuts down on development time and costs.
Performance: With React Native, your app will deliver smooth, native-like performance, which is crucial for user retention.
React Native is truly unique in how it handles cross-platform development. You can write your application’s code once and deploy it on both Android and iOS devices, which simplifies the development process and reduces maintenance.
Reduction in Duplication: This approach minimises the need to duplicate code for different platforms, making your codebase cleaner and easier to manage.
Features such as Hot Reloading enhance the development process by allowing real-time feedback and quicker iterations. These capabilities ensure that updates and testing can happen swiftly and smoothly.
The ecosystem surrounding React Native is both vibrant and mature, with extensive documentation, myriad libraries, and an active community. This ecosystem is invaluable for both learning and troubleshooting.
Getting Started with React Native for Android Phones
Prerequisites for Setting Up the Development Environment
Before diving into React Native, ensure you’re familiar with JavaScript, React basics, and essentials like HTML and CSS. You’ll also need Node.js and npm installed on your computer. This foundational knowledge will help streamline your setup process and move forward with creating apps more efficiently.
Before you begin Android development with React Native, ensure the following are ready:
Setting up your development environment involves several steps:
Install Android Studio: This will be your primary IDE for Android development.
Set up Android SDK: Essential for building Android apps.
Environment Variables Configuration: Ensures your tools function correctly across the system.
Choose between React Native CLI and Expo CLI for your project scaffolding based on your project needs. The React Native CLI offers more control and customisation, while the Expo CLI provides a more managed environment.
These commands set up a new React Native project, which you can run on an emulator or a physical device. This practical approach allows you to see the results of your work immediately on an Android device.
Key Features of React Native for Building Android Apps
Hot Reloading for Efficient Development
Hot Reloading is a standout feature in React Native, allowing developers to immediately see the result of the latest changes without restarting the app. This feature significantly speeds up development by simplifying the trial-and-error process.
React Native provides a seamless integration with native Android components, enhancing the app’s performance and user experience. Whether it’s accessing the device’s camera or sending push notifications, React Native bridges JavaScript with native modules effortlessly.
React Native’s component-based structure makes it straightforward to build interactive user interfaces. Utilise core components like View, Text, and Button, and employ third-party UI libraries such as React Native Paper or React Native Elements to enrich your app’s design and functionality.
Effective state management and navigation setup are pivotal for creating functional, user-friendly mobile applications. Depending on your app’s complexity, you might choose from several options:
State Management: React’s useState, Redux, Zustand
Navigation: React Navigation provides a robust solution for implementing stack and tab navigators.
Best Practices for Developing with React Native on Android
Writing Clean and Maintainable Code
It’s vital to write clean code and structure your projects efficiently when working with React Native. Using modular code that separates components, business logic, and utility classes makes your codebase easier to manage and scale.
Moreover, adopting TypeScript or PropTypes ensures type safety and reduces the potential for runtime errors.
Ensuring Compatibility Across Different Android Devices
Android devices vary significantly in screen size, resolution, and hardware capabilities. It’s important to design your app to be flexible and adaptable to these differences. Implement adaptive layouts and thoroughly test your app on multiple devices to ensure consistent user experiences across all platforms.
Tools and Libraries to Enhance React Native Android Development
Popular Libraries for UI, State Management, and Networking
To streamline your development process, integrate these widely used libraries:
UI Libraries: React Native Paper, React Native Elements enhance the look and user experience of your apps.
State Management Tools: Libraries like Redux, Zustand, or MobX offer advanced state management solutions.
Networking: Axios provides a robust framework for handling network requests.
For an extensive list of tools and their applications, see Simplilearn.
Tools for Testing and Continuous Integration
Ensure the quality and stability of your React Native apps by employing tools such as:
Jest: For comprehensive unit testing.
Detox: For conducting end-to-end tests.
CI Services: GitHub Actions and CircleCI can automate your testing and deployment processes, ensuring that every build of your app meets quality standards.
Case Studies: Successful Android Apps Built with React Native
Examples of High-Profile Apps Using React Native for Android
Major apps like Facebook, Instagram, and Discord have leveraged React Native to enhance their performance and user engagement. These apps highlight React Native’s capability to handle large-scale applications efficiently.
Explore the functionalities these apps achieve through React Native and their impacts on user satisfaction at Simplilearn.
Lessons Learned and Tips from Real-World Projects
Real-world examples provide invaluable insights and actionable tips. Key lessons include:
Modular Architecture: Keeps code organised and manageable.
Regular Testing: Ensures that your app performs well across all updates and changes.
Strategies for App Monetisation and User Acquisition
Explore various monetisation strategies such as in-app ads, purchases, or offering a paid version of your app. To effectively attract and retain users, implement solid marketing strategies and optimise your app’s presence on the app store.
Learn more about monetisation and marketing strategies at Simplilearn.
Maintaining and Updating Your Android App Post-Launch
After launching your app, it’s important to continue maintaining and updating it based on user feedback and performance metrics. Keep your app fresh and engaging by:
Monitoring Performance: Use analytics to track how well your app is performing.
Updating Dependencies: Keep your app’s libraries and frameworks up to date.
Releasing New Features: Continuously improve the app’s functionality and user experience.
Conclusion: Start Building Your Android App with React Native Today
Recap of Benefits
React Native for Android offers significant advantages, such as reduced development time, code reuse, and access to a vast community. Its robust capabilities enable you to build high-quality, performant apps efficiently.
Encouragement to Get Started
Kickstart your Android app development project by setting up your environment and diving into your first React Native project. Utilise the plethora of available learning resources and become part of the thriving React Native community to maximise your development skills.
These resources offer comprehensive tutorials and courses to help you learn more about React Native and start building your own Android apps with confidence.
Call to Action: Join the React Native Community
Starter Kit or Course Invitation
Download a React Native starter kit or enrol in a dedicated course to accelerate your learning curve and start building powerful Android apps today.
Engagement Encouragement
We encourage you to share your React Native projects and experiences. Engage with the community through comments, forums, or social media to seek feedback and learn from fellow developers.
Join us on this exciting journey and start creating your own innovative Android apps using React Native!
The cost can range from $5,000 for a simple app to over $300,000 for a highly complex app, depending on various factors like design complexity, features, and development platform.
If performance and access to device-specific features are critical, native development is preferable. If budget and development speed are priorities, hybrid development may be suitable.
Prioritizing features for an MVP, utilizing cross-platform development, and outsourcing to cost-effective regions are effective strategies to manage costs.
Effective debugging is essential for maintaining the performance and stability of React Native applications.
Common React Native bugs include UI glitches, navigation problems, and performance bottlenecks.
Utilizing tools like React Native Debugger, Flipper, and Chrome DevTools enhances the debugging process.
Robust error handling strategies prevent app crashes and improve user experience.
Implementing code quality practices and automated testing minimizes the occurrence of bugs.
Mastering Debugging in React Native App Development
Debugging is a pivotal component throughout the React Native development lifecycle, ensuring that mobile applications are functional, reliable, and maintainable. In this expert guide on debugging a React Native app, you’ll gain essential insights into practical debugging techniques aimed at efficiently fixing React Native bugs. Additionally, you’ll discover effective error handling strategies and explore expert tools designed to empower you to tackle both common and intricate issues in your projects.
Importance of Effective Debugging
Effective debugging in React Native is essential for spotting and resolving issues early in the development phase, leading to a smoother development process and enhanced user experiences. Debugging not only helps in maintaining the overall performance and stability of the application but also reduces the time and resources spent on troubleshooting post-deployment. Efficient debugging practices are instrumental in preventing potential disruptions that could affect the user interface, functionality, and the integrative elements of the application.
Overview of This Post
In this comprehensive guide, we’ll delve into:
Common React Native Bugs: Identify and address frequent issues like UI glitches and performance bottlenecks.
Effective Debugging Techniques: Explore systematic strategies to eradicate bugs.
Error Handling in React Native: Learn to manage errors effectively to prevent app crashes.
Advanced Debugging Methods: Look at sophisticated techniques including performance profiling and managing third-party libraries.
Preventative Measures: Discuss strategies to minimise bugs through code quality practices and automated testing.
Case Studies: Real-world examples will illustrate practical applications of these strategies.
Recommended Tools: Discover tools that enhance your debugging efficiency.
Insights into why debugging is vital are provided by comprehensive studies like those found at TechAhead and AllianceTek.
What is Debugging?
Debugging is the process of identifying, analysing, and fixing bugs in your code. It helps ensure your app works as expected and provides a smooth user experience.
Common React Native Bugs
Overview of Frequent Issues
React Native applications commonly face a variety of challenges that can impede their performance. Below are some of the issues that developers frequently need to address:
UI Glitches: From layout misalignments to erratic component behaviours and rendering issues.
Navigation Problems: Issues like failed stack navigations or erroneous tab switches.
Cross-Platform Inconsistencies: Differing behaviours and bugs unique to iOS and Android platforms.
Network Request Issues: Problems linked to API calls and data management.
Understanding these common frustrations is vital in preemptively planning how to address them. For in-depth examples and debugging tips, refer to 30 Days Coding and AllianceTek.
Types of Bugs in React Native
Bug Type
Description
Syntax Errors
Incorrect code structure (e.g., missing brackets)
Runtime Errors
Errors that occur when the app is running (e.g., undefined variables)
Logical Errors
The code runs, but with incorrect results due to wrong logic
UI Bugs
Layout issues like overlapping elements or unresponsive components
Navigation Bugs
Screens are not transitioning properly
State Management Issues
Data not updating/rendering as expected
Platform-specific Bugs
Errors that only occur on iOS or Android
Performance Issues
Slow rendering, memory leaks, or dropped frames
Network/API Failures
Broken API calls, timeouts, and wrong data handling
Effective Debugging Techniques
Systematic Approach to Debugging
A structured approach to debugging is crucial for effectively identifying and solving issues within a React Native app. Here’s how you can apply systematic debugging techniques:
Setting Breakpoints: Critical for examining the state of the app at various stages of execution. More on setting effective breakpoints can be found at AllianceTek.
Console Logs & Alerts: Essential for immediate feedback on the app’s operation, helping trace variable values and application flow. More can be learned from TechAhead about strategic logging.
Debugger Tools:
React Native Debugger: Integrates with Redux, allowing for state management and time-travel debugging.
Flipper: Offers comprehensive app inspection, such as network activity and component hierarchy visualisation.
Chrome DevTools: Useful for profiling JavaScript performance and inspecting elements. For a detailed guide on these tools, check out resources by Wafa Bergaoui.
Keyboard Shortcuts: Improving efficiency by customising IDE shortcuts to access debugging features quickly and easily. Reference TechAhead for insights on optimising IDE setups with keyboard shortcuts.
Effective debugging is all about utilising the right techniques and tools to identify, isolate, and fix bugs efficiently. The resources and strategies mentioned here emphasise the importance of integrating advanced tools and systematic approaches to streamline the debugging process.
Error Handling in React Native
Effective error handling is pivotal in React Native to prevent crashes and ensure a smooth user experience. Here are some strategies to handle errors robustly:
Implementing Error Boundaries
Error boundaries are React components that catch JavaScript errors anywhere in their child component tree, log those errors, and display a fallback UI instead of crashing the entire app. Implementing error boundaries crucially improves the app’s resilience. For more on this, check out TechAhead.
Custom Fallback UIs
Create user-friendly fallback UIs that inform users about an issue and provide actions they can take when something goes wrong. This enhances user experience even in the face of errors.
Logging and Monitoring
Centralised Logging Solutions: Tools like Sentry and Flipper Log Viewer help capture and manage errors effectively, both in development and production phases.
Real-Time Monitoring: Keep tabs on app performance and error rates in real-time to swiftly react to issues. Comprehensive insights into logging and monitoring tools can be found through Wafa Bergaoui.
Well-implemented error handling not only prevents catastrophic app failures but also provides developers with key insights into the issues, thereby facilitating quick resolutions. Optimising and Deploying Your React Native App
Advanced Debugging Strategies
Advanced techniques provide deeper insight into complex React Native app issues. Here is how to leverage them:
Performance Profiling
Utilising tools such as Flipper or Chrome DevTools to profile app performance helps identify inefficiencies like excessive re-renders or slow network calls. Guidance on performance profiling can be accessed at 30 Days Coding.
Handling Platform-Specific Issues
Utilise platform-specific tools like Xcode or Android Studio to debug issues unique to iOS and Android. Ensure consistency across platforms by understanding their distinct behaviours and limitations.
Integrating Third-Party Libraries
Libraries like Flipper, Sentry, and React Native Debugger can greatly enhance debugging capabilities. These tools allow for deeper inspection of app states, navigation tracing, and crash reporting. Use the tips from Optimizing and Deploying Your React Native App to effectively integrate these resources.
These advanced strategies facilitate a deeper understanding of underlying issues, which is essential for maintaining a robust and efficient React Native application.
Preventative Measures to Minimise Bugs
To reduce the occurrence of bugs, adhere to rigorous code quality standards and implement thorough testing strategies.
Code Quality Practices
Linting with ESLint: Helps maintain code quality and prevents potential bugs by enforcing coding standards.
Type Checking with TypeScript: Reduces runtime errors through static type checking, improving code reliability.
Writing Unit and Integration Tests
Unit Testing: Ensures individual components function correctly.
Integration Testing: Verifies that multiple components interact seamlessly.
Setting up CI/CD pipelines automates the testing process, catching issues early and ensuring that only tested and verified code gets deployed. Additional insights on CI/CD best practices can be accessed at Optimising and Deploying Your React Native App.
Case Studies and Examples
Here, we’ll walk through real-world debugging scenarios to showcase the practical application of the discussed techniques. Whether it’s resolving an animation failure or troubleshooting an async storage crash, these examples will include troubleshooting steps and solutions, demonstrating the practical application of debugging skills in real environments.
Tools and Resources For Debugging
Utilise effective debugging and performance monitoring tools in your React Native development:
Tool / Method
Purpose
Console.log()
Basic debugging to log values
React Native Debugger
All-in-one debugger with Redux dev tools
Flipper
Meta’s debugging platform (recommended for advanced debugging)
Chrome Developer Tools
Debug JavaScript and inspect the network
VS Code Debugger
Breakpoints and debugging via extensions
Redux DevTools
Inspect state changes and actions
Sentry / Bugsnag
Crash reporting and error tracking
React Developer Tools
View component hierarchy, props, and state
Expo Dev Tools
For Expo-based apps, easy access to logs and testing
Test on a real device and a simulator for hardware-specific issues
Debugging UI Bugs
Use React Native Inspector (tap in dev menu)
Check alignment, margins, and paddings using the overlay
Tools like Flipper’s Layout Inspector also help
Common React Native Debugging Tips
Tip
Benefit
Use ESLint / Prettier
Prevents syntax and style bugs early
Keep components small
Easier to test and debug
Write unit tests
Helps catch regressions
Use try-catch blocks
Prevents the app from crashing
Check third-party libraries
Sometimes bugs come from them
Clear cache
Run npx react-native-clean-project or watchman watch-del-all && npm start --reset-cache
Update dependencies
Many bugs are fixed in newer versions
Use Error Boundaries
Catches errors in components gracefully
🧠 Sample Debugging Workflow
text
Problem: User screen not showing fetched data.
1. Console.log(userData) → undefined

2. Check API call → 401 error in Network tab

3. Inspect headers → Missing Authorization token

4. Fix token logic in fetchUser()

5. Reload app → Data shows correctly
Debugging in Production
In production mode, you can’t use DevTools. Use tools like:
Sentry
Bugsnag
Firebase Crashlytics
These tools help log real-time errors with:
Stack traces
Device info
Session history
User identifiers
Conclusion
Effective debugging and error handling are fundamental to developing robust and user-friendly React Native apps. By incorporating these advanced techniques and tools, developers can significantly enhance their ability to preemptively address issues and respond to them efficiently when they arise.
Call to Action
Are you currently debugging a React Native app? Share your experiences and challenges with us. Ensure you’re equipped with the latest in development strategies and technologies.
Frequently Asked Questions
1. What are some common bugs encountered in React Native app development?
Common bugs in React Native apps include UI glitches such as layout misalignments, navigation problems like failed stack navigations, performance bottlenecks causing sluggish responsiveness, state/props synchronisation issues, native module errors from integrating third-party libraries, and network request issues related to API calls and data management.
2. What tools are recommended for debugging React Native applications?
Recommended debugging tools for React Native include React Native Debugger, which integrates with Redux for state management and time-travel debugging; Flipper, which offers comprehensive app inspection capabilities like network activity monitoring and component hierarchy visualisation; and Chrome DevTools for profiling JavaScript performance and inspecting elements. Tools like Sentry and Bugsnag are also excellent for tracking and managing errors in production.
3. How do error boundaries enhance the stability of React Native apps?
Error boundaries are React components that catch JavaScript errors anywhere in their child component tree, log those errors, and display a fallback UI instead of crashing the entire app. This approach improves the app’s resilience by preventing catastrophic failures and maintaining a smoother user experience even when unexpected errors occur.
4. What strategies can prevent bugs in React Native development?
To prevent bugs in React Native development, it’s essential to adhere to code quality practices such as using linting tools like ESLint to enforce coding standards and TypeScript for static type checking. Additionally, implementing thorough testing strategies, including unit and integration tests, and setting up Continuous Integration/Continuous Deployment (CI/CD) pipelines can help catch and resolve issues early in the development process.
5. How can performance profiling improve React Native app development?
Performance profiling involves using tools like Flipper or Chrome DevTools to analyse the React Native app‘s performance, identifying inefficiencies such as excessive re-renders or slow network calls. By addressing these issues, developers can enhance the app’s responsiveness and overall user experience, leading to more robust and efficient applications.
Understand the difference between frontend hosting and backend services to effectively manage your React Native app’s infrastructure.
Popular cloud providers like AWS, GCP, Microsoft Azure, and Heroku each offer unique benefits tailored to different project needs.
Consider factors such as scalability, cost, ease of deployment, performance, and support when selecting a hosting provider.
Implementing best practices like optimising performance, securing your app, and utilising CI/CD pipelines ensures a robust hosting environmet.
Introduction
When developing mobile applications with React Native, one crucial aspect often overlooked is hosting. Hosting a React Native app involves providing the necessary infrastructure for the app’s frontend and backend services. Selecting the right cloud hosting options for React Native is pivotal for optimising performance, scalability, and reliability. This guide delves into the best practices for hosting a React Native app, ensuring developers and businesses can build robust and cost-effective mobile applications.
Understanding Hosting for React Native Apps
Define Hosting for React Native Apps:
Hosting a React Native app means setting up an environment where the app’s frontend code, backend APIs, and real-time user-to-server communications can thrive. Although React Native apps are primarily distributed through app stores as binaries, hosting effectively concerns backend services and potential web versions of these apps created via React Native Web. Learn more.
Different Hosting Services:
Unlike traditional web apps, React Native apps are packaged and deployed on app stores (Google Play Store, Apple App Store). However, hosting comes into play when handling:
Databases (SQL or NoSQL, like MongoDB, PostgreSQL, Firebase, Firestore)
Media & Static Assets (images, files, videos)
Real-Time Features (chat, notifications, location tracking)
CI/CD Pipelines (to automate builds, tests, and deployments)
Agencies must ensure that all these services are hosted reliably to deliver fast, secure, and scalable client apps.
Popular Cloud Hosting Options for React Native
AWS (Amazon Web Services)
Overview of Services: Uses AWS Amplify for Backend as a Service, Amazon EC2 for custom APIs, and Amazon S3 for static storage, including additional services like AWS Lambda and AWS CloudFront.
Benefits and Features: Known for its reliability and scalability, AWS enables seamless integration of various services, which is crucial for comprehensive mobile app development.
Factors to Consider When Choosing a Hosting Provider
Scalability: Important for handling growth; platforms like AWS, GCP, and Azure are leaders here.
Cost: Compare pricing models; AWS and GCP are great for detailed pricing, while Firebase and Heroku offer budget-friendly plans. Learn more.
Ease of Deployment: Platforms like Heroku and Firebase provide user-friendly setups, whereas AWS and Azure offer more tailored configurations.
Performance and Reliability: Ensure the provider offers excellent uptime, quick data delivery, and support for global reach.
Support and Documentation: Essential for ongoing maintenance and troubleshooting. Most major platforms provide extensive documentation and support options. Read more.
Cost of Hosting a React Native App
Component
Estimated Monthly Cost
Backend API Hosting
$0 – $50 (depending on usage)
Database (e.g., Firebase, MongoDB Atlas)
$0 – $30
CDN/Static Assets
$0 – $10
Cloud Functions
Pay-as-you-go (~$0.40/million invocations)
App Store Developer Accounts
Apple: $99/year, Google: $25 one-time
Crash Reporting & Monitoring
Free–$20/month, depending on scale
Many services offer free tiers, great for MVPs or testing.
Set up your environment with tools like Node.js and React Native CLI.
Configure necessary environment variables and dependencies.
Deployment on Selected Platforms:
AWS: Manage backend with Amplify, deploy using S3 and CloudFront, and set up custom servers if necessary.
GCP/Firebase: Set up Firebase projects, integrate SDKs, and deploy functions and hosting services.
Azure: Utilise Azure App Service for APIs and set up serverless functions as needed.
Heroku: Link your repository, set up environments, and deploy through Git.
Best Practices for Hosting React Native Apps
Optimise App Performance: Utilise techniques like asset compression and CDN integration.
Implement Security Measures: Focus on robust authentication, data encryption, and regular security audits.
Maintain the Hosting Environment: Regular updates and security checks are crucial for sustainability.
Utilise CI/CD Pipelines: Automate your deployment processes to enhance reliability and efficiency. Learn how.
Comparative Analysis of Hosting Providers
Provider
Key Features
Pricing Model
Best For
AWS
Amplify, Lambda, S3, CDN
Pay-as-you-go
High scalability, large apps
GCP/Firebase
RTDB, Functions, Hosting
Generous free tier, pay-as-you-go
Startups, MVPs, real-time apps
Azure
App Service, Functions
Pay-as-you-go, dev plans
Enterprise, Microsoft stack
Heroku
Simplicity, plugins, CI
Free for hobby, paid dynos
Prototyping, MVPs, and small teams
DigitalOcean
Simplicity, Droplets
Flat monthly pricing
Budget-focused projects
Netlify
Static web hosting
Free + paid tiers
Web projects with RN Web
Conclusion
To host a React Native app successfully:
Compile and publish the mobile app via the Play Store/App Store.
Host your backend and static assets with scalable cloud services.
Use monitoring and CI/CD tools to streamline operations.
Choosing the right hosting solution for your React Native app can considerably impact its performance, scalability, and overall user satisfaction. Evaluate your specific needs against the detailed features and benefits of each hosting provider discussed to make an informed decision. Dive into the world of mobile app hosting and start with the chosen platform’s official resources to embark on a successful deployment. Join us to host your app successfully and seamlessly.
Call to Action
Explore further by checking out these resources: AWS Amplify, Firebase, and Heroku. Don’t hesitate to share your experiences or raise questions with us to help cultivate a supportive developer community.
Frequently Asked Questions
1. Is backend hosting mandatory?
Only if your app needs server-side logic, user authentication, or a database. Purely static/local apps don’t require backend hosting.
2. How long does it take to develop a mobile app?
The development timeline can vary from a few months to over a year, depending on the app’s complexity and the development process.
Not directly. React Native apps are native apps, not websites. However, if you’re using React Native for the Web, you can host it like a traditional website on Netlify, Vercel, etc.
5. What’s the cheapest way to host a React Native app backend?
What is the cost of E-commerce Application Development in India?
The cost of developing an e-commerce application in India can vary widely depending on several factors, including the complexity of the app, the features and functionality required, the platform it’s built on, and the development team’s experience and location. However, here’s a general overview of the cost range for e-commerce application development in India:
1. Basic E-commerce Website:
For a simple e-commerce website, where you can display products, and allow users to browse and make purchases, you can expect the cost to start at around $3,000 to $6,000. This cost would include a basic design, product catalogue, shopping cart, and payment gateway integration.
2. Custom E-commerce Platform:
If you need a more customized solution with additional features such as user accounts, reviews, ratings, inventory management, and more, the cost can range from $10,000 to $30,000 or more.
3. Mobile Application:
If you want to develop mobile apps for both Android and iOS platforms in addition to a web application, the cost will increase. Usually, building a single-platform mobile app can cost between $5,000 to $20,000, depending on complexity. Developing for both Android and iOS can double the cost.
4. Advanced Features:
The inclusion of advanced features like recommendation engines, personalized shopping experiences, AI-based chatbots, and analytics can significantly increase the cost. These features might require ongoing development and maintenance.
5. Scale and Performance:
If you’re planning for a high-traffic e-commerce platform that needs to handle a large number of users and transactions, it will require additional investment in terms of server infrastructure, security, and scalability. Costs can range from $30,000 to $100,000 or more.
6. Maintenance and Support:
Don’t forget to budget for ongoing maintenance, updates, and support. This can be an additional 20-30% of the initial development cost per year.
7. Quality Assurance and Testing:
Proper testing is crucial for e-commerce applications. Testing can add 15-25% to the overall development cost.
8. Design and User Experience:
A well-designed e-commerce application can enhance user experience and boost sales. Investing in good design can increase the cost, with professional design services typically costing between $3,000 and $10,000 or more.
9. Third-party Integrations:
If you plan to integrate with third-party services, such as payment gateways, shipping providers, or marketing tools, these integrations can add to the cost.
10. Location of Development Team:
Costs can vary significantly based on the location of the development team within India. For example, development teams in major metropolitan areas like Bangalore and Mumbai may charge higher rates than teams in smaller cities or towns.
AI in Mobile App Development: Shaping the Future of User Experience
Introduction
The innovation that artificial intelligence (AI) brings to the mobile app industry is truly revolutionary, remodeling how apps interact with users. AI has become a core engine driving advancements and enhancing user experience in mobile apps. Alongside AI, emerging technologies like machine learning, AR/VR, blockchain, and IoT are progressively playing crucial roles in refining app functionalities, making apps smarter and more intuitive, hence meeting modern user demands powerfully.
Artificial Intelligence (AI) has become a game-changer in mobile app development, transforming apps from simple digital tools into intelligent, adaptive, and personalised experiences. For agencies and businesses, integrating AI into mobile apps is no longer optional—it’s a competitive advantage in 2025 and beyond.
AI in Mobile App Development: More Than Just a Buzzword
As AI continues its integration into mobile app development, it’s impossible to overlook its effect on innovation within the industry. AI instruments are transforming mobile applications into autonomous, intelligent systems capable of personalising interactions and boosting user satisfaction. (The Importance of Mobile App Development)
Understanding AI in Mobile App Development
What is AI in the Context of Mobile Apps?
Artificial Intelligence (AI) in mobile apps refers to the incorporation of intelligent algorithms designed to mimic human intelligence. This simulation manifests in capabilities such as learning from user interactions, solving problems autonomously, and understanding natural language. (What is Mobile App Development? An Introduction)
AI Transforms Mobile App Development
The leap from traditional, static apps to intelligent, adaptable apps is significant. AI in mobile apps means personalised engagements and enhanced functionality, resulting in heightened user engagement and improved app performance. (Essential Features of a Successful Mobile App: A Comprehensive Guide)
Personalisation: AI adapts responses and content based on user interactions.
Enhanced Functionality: AI provides advanced features like predictive text and smart search.
Integrating AI into Mobile Apps
How to Incorporate AI Effectively
Integrating AI into mobile apps involves selecting the appropriate AI tools or frameworks and clearly defining AI functionalities to enhance app operations. Common challenges include matching AI capabilities with app requirements and ensuring seamless user experiences without compromising performance. (Mobile App Security Best Practices: Protecting User Data and Enhancing App Performance)
1. Define the Purpose of AI in Your App
Before diving into integration, clarify why you need AI. AI can add value by:
Using cloud-based AI data pipelines for scalability.
Agencies often underestimate data preparation—it’s as critical as the algorithms themselves.
4. Integrate AI Models into Your Mobile App
There are two main approaches:
On-device AI: Lightweight models run locally for faster, offline performance.
Example: Face ID on iPhones.
Cloud-based AI: Uses powerful cloud servers for complex processing.
Example: Voice assistants like Siri or Google Assistant.
5. Focus on User Experience (UX)
AI should feel seamless to users. Tips include:
Avoid overloading the app with unnecessary AI features.
Ensure AI-driven suggestions are relevant and accurate.
Maintain transparency (e.g., explain why certain recommendations are shown).
6. Ensure Privacy and Compliance
With great data comes great responsibility. Agencies must:
Follow GDPR, HIPAA, or region-specific privacy laws.
Implement data encryption and secure storage.
Give users control over their data preferences.
7. Test, Monitor, and Improve AI Models
AI isn’t a one-time integration—it evolves.
Continuously monitor app performance.
Retrain models with new data.
Use A/B testing to measure AI’s impact on user experience.
Tools and Frameworks for AI Integration
Artificial Intelligence (AI) is no longer a futuristic concept—it’s the driving force behind modern mobile and web applications. From personalised recommendations to predictive analytics, AI empowers agencies to deliver smarter, scalable, and more engaging solutions for clients.
To integrate AI successfully, agencies need the right tools and frameworks. Below is a categorised breakdown of the most reliable options in 2025.
1. Machine Learning Frameworks
Machine Learning (ML) powers predictive analytics, personalisation, and intelligent automation.
TensorFlow (by Google): Open-source, highly scalable ML framework ideal for deep learning and large-scale applications.
PyTorch (by Meta): Flexible and popular among researchers and developers for rapid prototyping and production-level AI.
Scikit-Learn: Best for beginners and agencies working on data modelling, regression, and clustering.
Core ML (Apple): Enables seamless AI integration into iOS applications with on-device ML models.
2. Natural Language Processing (NLP) Tools
For chatbots, voice assistants, and text-based intelligence.
Dialogflow (Google): Ideal for conversational AI, chatbots, and voice applications.
IBM Watson: Provides enterprise-grade NLP, speech recognition, and sentiment analysis solutions.
spaCy: Open-source library for text classification, entity recognition, and NLP pipelines.
OpenAI APIs (ChatGPT, GPT models): Perfect for advanced conversational agents, content generation, and semantic search.
3. Computer Vision Frameworks
Used for image recognition, object detection, and AR-powered experiences.
OpenCV: A lightweight, open-source library for image and video processing.
TensorFlow Lite: Enables running computer vision models efficiently on mobile devices.
AWS Rekognition: Cloud-based service for facial recognition, object detection, and video analysis.
Google ML Kit: Provides pre-trained vision APIs for face detection, barcode scanning, and text recognition.
4. Speech & Voice AI Tools
Enhancing apps with speech-to-text, text-to-speech, and voice recognition.
Amazon Alexa Skills Kit: For developing voice-enabled apps and devices.
Microsoft Azure Cognitive Services: Offers speech recognition, translation, and voice biometrics.
Google Cloud Speech-to-Text: Highly accurate real-time transcription services.
5. Cloud-Based AI Services
For scalability, security, and easy deployment.
AWS AI Services: Ready-to-use APIs for NLP, vision, and recommendation engines.
Google Cloud AI: AI and ML development tools with pre-trained and custom model support.
Microsoft Azure AI: Enterprise-grade AI with APIs for ML, NLP, and computer vision.
The right AI tools and frameworks depend on the project’s goal, platform, and client needs. For agencies, mastering these options ensures faster development, reduced costs, and cutting-edge applications that win clients’ trust.
Ways To Integrate AI With Mobile App Development
1. Machine Learning for Mobile App Personalisation
Mobile app personalisation involves using machine learning algorithms to analyse user data and behaviour to deliver a tailored and unique experience for each individual. Instead of a one-size-fits-all approach, the app adapts its content, features, and recommendations based on user preferences, past interactions, and real-time context.
This process typically involves:
Data Collection: Gathering user data such as browsing history, purchase behaviour, location, and demographic information.
Algorithm Application: Using various ML models like collaborative filtering (e.g., “users who bought this also bought…”), clustering (grouping similar users), and predictive analytics to identify patterns and predict future behaviour.
Dynamic Content Delivery: The app then uses these insights to dynamically change its interface, push personalised notifications, or recommend products, articles, and services that are most relevant to the user.
Advantages:
Increased User Engagement and Retention: A personalised experience makes users feel understood and valued, which increases the likelihood that they will use the app more frequently and for longer periods.
Higher Conversion Rates: By offering tailored product recommendations and relevant content, personalization reduces friction in the customer journey and leads to higher sales and conversions.
Improved User Experience: Personalisation makes the app feel more intuitive and efficient, as users are presented with the information they need without having to search for it.
Valuable Data Insights: The data collected for personalisation provides businesses with deep insights into user behavior and preferences, which can be used to improve the app, develop new features, and refine marketing strategies.
2. Voice Recognition in Mobile Apps
Voice recognition (or speech recognition) is a technology that allows a mobile app to understand and interpret human speech. It converts spoken words into text or commands, enabling hands-free interaction with the app. This technology is powered by advanced AI and Natural Language Processing (NLP) models that can identify speech patterns, accents, and context.
Examples of its use include:
Voice Assistants: Built-in assistants like Siri and Google Assistant.
Voice Search: Searching for products in an e-commerce app or for content in a media app using only your voice.
Dictation: Converting spoken words into text for messages, emails, or notes.
Hands-Free Operation: Controlling an app’s features while driving or when a user’s hands are occupied.
Advantages:
Enhanced Convenience and Efficiency: Voice recognition allows users to perform tasks more quickly and easily, without needing to type or navigate through menus.
Improved Accessibility: It makes mobile apps more accessible for users with disabilities, such as those with visual impairments or motor limitations.
Hands-Free Operation: This is particularly useful for tasks performed while multitasking, such as in the car or while cooking.
Increased User Engagement: The natural and intuitive nature of voice-based interaction can lead to a more dynamic and enjoyable user experience.
3. Chatbot Integration in Mobile Apps
Chatbot integration involves embedding an AI-powered or rule-based virtual assistant directly into a mobile app. These chatbots can communicate with users in real-time, simulating human conversation to provide support, answer questions, or guide users through a process.
There are two main types of chatbots:
Rule-Based: Simple bots that follow a predefined conversational flow. They are effective for answering FAQs.
AI-Powered (Conversational AI): These bots use NLP and machine learning to understand user intent, learn from conversations, and provide more human-like, context-aware responses.
Advantages:
24/7 Availability: Chatbots are available around the clock to assist users, providing instant responses and eliminating wait times for support.
Cost Savings and Operational Efficiency: Chatbots can handle a large volume of routine customer inquiries, reducing the need for a large human support team. This frees up human agents to focus on more complex issues.
Improved Customer Experience: By providing quick and accurate answers, chatbots can significantly improve customer satisfaction and retention.
Scalability: A chatbot can handle thousands of simultaneous conversations, making it easy to scale customer support as the user base grows.
Lead Generation and Sales: Chatbots can act as a virtual sales assistant, guiding users through the sales funnel and answering product questions to increase conversion rates.
4. Mobile App Automation Using AI
Mobile app automation using AI primarily refers to the use of AI and machine learning for quality assurance and testing. Instead of relying on manual testing or rigid, pre-scripted automation, AI-powered tools can autonomously test an app, identifying bugs and ensuring a seamless user experience. This goes beyond simple automation by introducing an element of “intelligence.”
Key features include:
Self-Healing Scripts: When the app’s user interface changes (e.g., a button’s location or ID changes), AI can automatically update the test script to prevent it from failing.
Predictive Analytics: AI analyses historical test data to predict where bugs are most likely to occur in a new version of the app.
Intelligent Test Generation: AI can automatically generate new test cases based on user behavior data and code changes, ensuring comprehensive test coverage.
Visual Validation: AI can perform visual regression testing, ensuring that the app’s design and layout are consistent across different devices and screen sizes.
Advantages:
Faster Time-to-Market: AI-powered automation drastically reduces the time and effort required for testing, allowing businesses to release new app updates and features more quickly.
Improved Quality and Reliability: AI can find bugs and performance issues that might be missed by manual testers, leading to a more stable and reliable app.
Reduced Manual Effort and Cost: Automating repetitive testing tasks frees up human testers to focus on more strategic and exploratory testing.
Increased Test Coverage: AI can simulate a wide range of real-world user behaviours and test scenarios, ensuring the app performs well under various conditions.
Conclusion
Integrating AI into mobile app development empowers businesses to deliver personalised, intelligent, and future-ready apps. For agencies, leveraging AI means offering clients cutting-edge solutions that boost engagement and business outcomes
Engage with us to share your experiences or queries about integrating these technologies into your mobile apps. For further exploration of these subjects, check our related posts and resources. We look forward to hearing from you and discussing how these exciting technologies are shaping the future of mobile app development!
Frequently Asked Questions
1. What does AI integration in mobile apps mean?
AI integration involves embedding Artificial Intelligence technologies—like machine learning, natural language processing, or computer vision—into mobile apps to make them smarter, more personalised, and capable of learning from user behaviour.
2. Why should agencies consider AI integration for client projects?
AI can:
Enhance user experience with personalisation.
Improve engagement through chatbots and virtual assistants.
Boost business decisions with predictive analytics.
Increase efficiency via automation. This gives agencies a competitive edge and helps deliver more value to clients.
3. Which types of mobile apps benefit most from AI?
Entertainment apps (content suggestions, voice recognition).
4. What tools and frameworks are commonly used?
Popular tools include TensorFlow, PyTorch, Core ML, Dialogflow, OpenAI APIs, Google ML Kit, and AWS AI services—each depending on the app’s specific needs.
5. How secure is AI integration in apps?
AI systems must comply with data privacy regulations (GDPR, HIPAA, etc.). Using secure APIs, encryption, and ethical AI practices ensures user data remains safe.
6. Does AI increase the cost of mobile app development?
Yes, AI may increase upfront costs due to specialised tools, skilled developers, and training models. However, it usually leads to long-term savings by reducing manual work, improving retention, and enhancing monetisation opportunities.
7. Can AI be integrated into existing mobile apps?
Absolutely. Agencies can enhance existing apps by integrating APIs or SDKs for features like chatbots, recommendation engines, or voice assistants without rebuilding the app from scratch.
8. What is the future of AI in mobile app development?
The future points to hyper-personalisation, real-time language translation, augmented reality (AR) experiences, and AI-driven automation. Agencies adopting AI now will stay ahead of industry trends in 2025 and beyond.
React Native offers a seamless blend of native user experience and cross-platform development, ensuring efficient mobile app creation.
Selecting the right React Native app development company is pivotal for the success of your project and future scalability.
Hiring expert React Native developers ensures adherence to best practices, high-quality code, and up-to-date knowledge in the framework.
The cost of React Native development is influenced by factors like project complexity, timeline, features, and geographical location.
Top React Native agencies are distinguished by their innovative solutions, technical expertise, and commitment to client success.
Top React Native App Development Companies for 2025
Introduction: Choosing the Right React Native App Development Companies
React Native continues to dominate cross-platform mobile app development in 2025, allowing businesses to build fast, scalable, and cost-efficient apps for both iOS and Android. However, choosing the right React Native app development company can be challenging, especially with so many agencies and freelancers in the market. The right partner will ensure high-quality code, on-time delivery, and post-launch support.
Understanding React Native App Development Companies
Definition of React Native App Development Companies
React Native app development companies are specialised firms that create mobile applications for both iOS and Android platforms using the React Native framework. These firms employ React Native developers who leverage the framework’s capabilities to build cross-platform applications with near-native performance.
Benefits of React Native App Development
1. Cross-Platform Development
React Native allows you to write code once and run it on both iOS and Android, saving time and effort while ensuring a wider reach.
2. Faster Development
With reusable components and pre-built libraries, developers can speed up the app creation process and deliver projects more quickly.
3. Hot Reloading
Developers can see changes instantly without rebuilding the entire app, which makes testing and debugging much faster and more efficient.
4. Cost-Effective
Since there is only one codebase for multiple platforms, development and maintenance costs are significantly reduced.
5. Strong Community Support
React Native is backed by Facebook (Meta) and a huge open-source community, offering plenty of resources, plugins, and ongoing updates.
6. Native-Like Performance
By using native components, React Native delivers performance that is very close to fully native apps.
7. Easy Third-Party Plugin Integration
It supports third-party plugins for functionalities like maps, payments, or analytics without needing heavy native development.
8. Modular Architecture
React Native uses a modular architecture that makes apps easier to upgrade, maintain, and scale as business needs grow.
9. Rich UI Capabilities
The framework provides flexible and customizable UI components, allowing developers to build responsive and visually engaging apps.
10. Backed by Big Brands
Many leading companies—such as Facebook, Instagram, Walmart, and Airbnb—trust React Native, proving its reliability and scalability.
Typical Services Offered
Here’s a professional breakdown of the typical services offered by a React Native development company, written for agencies and businesses looking for such expertise:
1. Custom React Native App Development
Building tailor-made mobile applications that meet unique business needs and ensure seamless performance across iOS and Android.
2. Cross-Platform App Development
Creating apps that run on multiple platforms with a single codebase, reducing time-to-market and costs.
3. UI/UX Design for Mobile Apps
Crafting engaging, responsive, and intuitive user interfaces optimised for different devices and screen sizes.
4. App Integration Services
Integrating third-party APIs, plugins, and tools such as payment gateways, maps, analytics, AI/ML models, and social media platforms.
5. React Native App Migration & Upgradation
Helping businesses migrate existing apps to React Native or upgrade them to the latest framework version for better performance and security.
6. App Maintenance & Support
Providing ongoing support, bug fixing, updates, and performance monitoring to ensure smooth operations post-launch.
7. MVP Development
Developing Minimum Viable Products (MVPs) to test ideas quickly in the market before committing to full-scale development.
8. Enterprise Mobility Solutions
Creating secure, scalable, and enterprise-grade mobile apps tailored for businesses and large organisations.
9. App Testing & Debugging
Ensuring quality assurance through manual and automated testing to deliver bug-free, stable applications.
10. Cloud Integration & Hosting
Connecting React Native apps with cloud platforms (AWS, Azure, Google Cloud, Firebase) for better scalability, security, and real-time data sync.
11. IoT & Wearable App Development
Developing apps that integrate with IoT devices, smart wearables, and connected ecosystems using React Native.
12. Consulting & Strategy
Offering expert consultation and roadmap planning for businesses to maximise ROI with React Native technology.
To grasp a deeper insight into these services, explore resources like Clutch and DesignRush.
Cost of React Native Development
Cost Breakdown
The cost of React Native development can vary widely and is influenced by numerous factors:
Project complexity: More complex apps require more time and expertise, increasing the cost.
Development timeline: Faster development can often cost more due to the need for more resources to meet tight deadlines.
App features: More features mean more work, which can increase the cost of the app.
For detailed cost factors and examples, visit DesignRush.
Regional Cost Comparison
While React Native development costs can differ based on geographic location, you might find comparable levels of expertise across various regions. For instance:
US agencies might charge between $25 – $50/hr.
Eastern European firms often offer rates from $25 to $49/hr, but can deliver similar quality at potentially lower costs.
Budgeting Tips
To effectively manage your React Native development costs:
Account for all services: Consider costs beyond just the initial development, such as ongoing maintenance and updates.
Plan for the unexpected: Always have a buffer in your budget for unforeseen expenses.
Hiring Expert React Native Developers
Benefits of Hiring Experts
Expert React Native developers for hire bring numerous advantages:
Access to best practices: Experienced developers are well-versed in the dos and don’ts of React Native development.
High-quality code: Experts produce clean, maintainable code that adheres to industry standards.
Up-to-date knowledge: Professionals keep up with the latest developments and features in the React Native framework.
Expertise in React Native development is crucial, as noted in references like GeeksforGeeks.
Qualifications and Skills
When seeking skilled React Native developers, look for:
Experience with cross-platform frameworks: Demonstrated ability through past projects.
Proficiency in JavaScript/TypeScript: Essential for React Native development.
Strong communication skills: Important for teamwork and understanding project requirements.
Portfolio of published apps: Evidence of their capability to deliver end-to-end solutions.
Hiring Models
Different hiring models for React Native developers suit different project needs:
Freelancers: Offer flexibility and competitive rates, but might include risks regarding reliability and continuity.
Full-time developers: Provide dedication and stability, but come with higher costs and responsibilities.
Agency teams: Deliver comprehensive expertise and streamlined project management, but at a premium.
The pros and cons of each hiring model are examined more closely in resources like Clutch.
Identification of Top Agencies
In 2025, the top React Native agencies include celebrated names such as MindSea, Innowise, Ninehertz, Droids on Roids, PagePro, and AgileEngine. These agencies have been recognised for their innovative solutions and robust technical prowess in React Native development.
Agency Overviews
Each top agency has its unique strengths:
MindSea: Known for exceptional user experience designs.
Innowise: Offers robust solutions for scalable applications.
Ninehertz: Excels in delivering cost-effective projects on time.
Droids on Roids: Specialises in dynamic and engaging apps.
PagePro: Focuses on minimalist and clean design principles.
AgileEngine: Renowned for its agile methodologies and rapid deployment capabilities.
Further insights about these agencies can be found on GeeksforGeeks and Clutch.
Criteria for Excellence
To stand out as a top React Native agency, several factors are pivotal:
Transparency in processes and communications: Ensures that clients are always informed and engaged.
Track record of successful cross-platform apps: Demonstrates capability and reliability.
Ability to handle complex integrations: Illustrates advanced skills and technical depth.
Ongoing support: Shows commitment to client success beyond the app launch.
React Native Consulting Services
Role of Consulting Services
React Native consulting services play an essential role in the app development process by providing strategic insights and expert recommendations on:
Architecture: Ensuring the app’s structure is robust and scalable.
Technology choices: Selecting the right stack to meet both current and future needs.
Scaling strategies: Planning for growth to accommodate more users or new features.
The impact of consulting services is profound and can fundamentally enhance the efficiency and outcome of a project, as described in sources like GeeksforGeeks.
Benefits of Consulting
Consulting services bring several key benefits:
Streamlining the development process: Reducing time to market and optimising resource use.
Minimising technical debt: Ensuring that decisions made today don’t lead to significant rework tomorrow.
Adherence to best practices: Keeping the project aligned with industry standards and regulations.
For scenarios in which consulting can significantly add value, refer to the details in GeeksforGeeks.
Evaluating React Native App Development Companies
Comprehensive Evaluation Guide
When evaluating React Native app development companies, consider these key areas:
Experience and expertise: The company’s history with similar projects can indicate their suitability for yours.
Portfolio and client testimonials: Validate their claims of expertise and customer satisfaction.
Technical proficiency: Ensures that the team has the skills needed to overcome technical challenges.
Thorough evaluation is crucial to selecting the right partner, and tools for this process can be sourced from Clutch.
Checklists and Key Questions
During the evaluation process, ask potential companies:
Experience with similar projects: Have they tackled similar challenges before?
Case studies and references: Can they demonstrate their successes through tangible examples?
Development process and project management approach: How do they ensure project success from start to finish?
Post-launch support: What kind of ongoing assistance do they offer?
For a detailed checklist and more questions, consider insights from Clutch.
Alignment with Project Requirements
Ensuring that a company’s capabilities align with your project requirements is vital for success. Discuss your specific needs and expectations to find a partner who can not only meet but exceed them.
Comparing Costs and Value Offered
Cost vs. Quality Analysis
While cost is a significant factor, it’s crucial to balance it with the quality of service provided. Higher costs might lead to better quality and smoother project execution, but it’s important to verify that this is the case. Review past project outcomes to gauge whether a higher cost is justified.
For more on how cost correlates with quality in React Native development, check resources like GeeksforGeeks and Clutch.
Negotiation Strategies
When discussing pricing, consider negotiating for:
Flexible pricing models, Such as phased payments or performance-based contracts.
Phased development approaches: Allowing you to evaluate progress and impact at each stage.
Conclusion: Selecting the Best React Native Development Partner
In conclusion, choosing the right React Native development partner is a balanced approach between assessing capabilities, aligning costs with budget, and ensuring long-term support. As React Native continues to thrive as a premier choice for cross-platform app development in 2025, selecting a company that matches your needs not only ensures your project’s success but also sets the stage for future innovations. Consider these factors critically and begin evaluating your options to embark on a successful development journey. Explore top agencies, ask the right questions, and prioritise your project’s specific needs for a partnership that exceeds expectations.
For starting your project and further inquiries, don’t hesitate to reach out to the top React Native development firms recommended here, ensuring a partnership that aligns with your visions and goals.
Frequently Asked Questions
1. What is React Native?
React Native is a cross-platform framework developed by Meta that allows developers to build mobile apps for both iOS and Android using a single codebase in JavaScript/TypeScript.
2. Why should I choose React Native over native development?
React Native reduces development time and cost by using one codebase for multiple platforms. It also offers faster updates, reusable components, and strong community support, making it ideal for businesses that want efficient, scalable apps.
3. What kind of apps can be built with React Native?
React Native is suitable for:
E-commerce apps
Social networking platforms
On-demand services (food delivery, ridesharing)
Educational and e-learning apps
Enterprise apps
Healthcare and fitness apps
4. Is React Native suitable for large-scale enterprise apps?
Yes. React Native supports enterprise-grade solutions with modular architecture, strong integrations, and scalability features. Many global brands (e.g., Facebook, Instagram, Walmart) use React Native successfully.
5. Can React Native apps integrate with third-party tools and APIs?
Absolutely. React Native seamlessly integrates with APIs, third-party libraries, and backend services like Firebase, AWS, or custom APIs to add features such as authentication, payments, and real-time chat.
6. How much does it cost to build a React Native app?
The cost depends on app complexity, features, design, integrations, and timeline. Generally, React Native development can save 30–40% of costs compared to building separate native apps for iOS and Android.
7. How long does it take to build a React Native app?
A basic app may take 6–8 weeks, while a complex app (with advanced features like real-time chat, payments, or third-party integrations) may take 3–6 months. Timelines vary depending on project scope.
8. Is React Native secure for mobile apps?
Yes, provided best practices are followed. Security can be enhanced by using Firebase/third-party authentication, SSL pinning, secure storage, and regular code audits.
9. Will my React Native app perform as well as a native app?
In most cases, yes. React Native apps provide near-native performance and can handle heavy UI/UX features. For extremely performance-critical apps (e.g., high-end 3D gaming), native development may be better.
10. Do React Native apps support push notifications?
Yes. React Native integrates with Firebase Cloud Messaging (FCM), OneSignal, and APNs to provide push notifications across iOS and Android.
11. What post-launch support do React Native development companies provide?
Most companies offer maintenance, updates, bug fixing, performance monitoring, and feature enhancements as part of ongoing support.
12. Can an existing native app be migrated to React Native?
Yes. Companies can migrate specific modules or entire apps to React Native to save costs and unify codebases while maintaining performance.
13. How do you ensure React Native app quality?
React Native development companies use testing strategies like unit testing, integration testing, UI testing, and QA automation to ensure the app runs smoothly across devices.
14. Will my React Native app be future-proof?
React Native has a strong community, constant updates from Meta, and wide industry adoption, ensuring your app remains reliable, up-to-date, and future-ready.
Cross-Platform Development: React Native enables seamless development across iOS, Android, and web platforms from a single codebase.
Code Reusability: Significant portions of code can be reused across mobile and web applications, enhancing efficiency.
Enhanced Performance: Advanced rendering optimisations and native UI components ensure superior performance.
Responsive Design: Supports Flexbox and mobile-first design for adaptable web applications.
Integration with Web Technologies: Combines React Native components with traditional web elements.
Harnessing the Power of Web Development with React Native
In today’s rapidly evolving digital landscape, web development with React Native is emerging as a pioneering strategy for crafting scalable, performant, and cross-platform web applications. With the advent of React Native Web, the significance of React Native has surged, marking its transition from a mobile-centric technology to a versatile tool capable of powering robust web projects. This technology enables developers to utilise a familiar framework to deliver seamless user experiences across all platforms, YouTube Source, React Native App Development Services
Understanding Web Development With React NAtive
Originally developed by Facebook, React Native was designed to build native mobile applications using JavaScript combined with React’s proven component-based architecture. The extension of React Native into the realm of web development through React Native Web allows developers to apply the same code constructs and development practices to create React Native web apps, effectively merging the workflows of mobile and web projects. YouTube Source, Prerequisites for React Native Development.
Benefits of Building Websites with React Native
Building websites with React Native, specifically using the react-native-web library, offers a unique set of benefits by extending the “learn once, write anywhere” philosophy to the web. This approach is not a replacement for traditional web development with React but a powerful strategy for teams that need to maintain a presence across multiple platforms.
1. Code Reusability and Efficiency
The most compelling benefit is the ability to share a significant portion of the codebase between mobile (iOS/Android) and web applications. This is a game-changer for several reasons:
Reduced Development Time and Cost: Instead of maintaining separate teams and codebases for mobile and web, a single team can work on both. This dramatically shortens the time-to-market and reduces overall development costs.
Streamlined Development Process: With a unified approach, developers can work on features and bug fixes once, and the changes can be deployed across all platforms simultaneously. This makes the development cycle more agile and efficient.
Consistent UI/UX: Sharing UI components ensures a consistent look, feel, and user experience across all platforms, which is crucial for brand consistency.
2. Access to a Rich Ecosystem
React Native for Web benefits from the robust and mature ecosystem of both React and React Native.
Vast Library of Components: Developers can use a wide range of pre-built components and third-party libraries for things like navigation, state management (e.g., Redux, Zustand), and more, many of which have been adapted for web use.
Strong Community Support: With a large and active community, developers can easily find solutions, tutorials, and support for any challenges they face.
3. High Performance and Optimisation
React Native for Web is designed for performance, leveraging modern web technologies.
Optimised Styling: The framework uses a “CSS-in-JS” approach that converts JavaScript styles into highly optimised, production-ready CSS.
Server-Side Rendering (SSR): It supports SSR, which is essential for improving initial load times and boosting Search Engine Optimisation (SEO). This is a critical advantage for web applications that need to be discoverable by search engines.
4. Simplified Maintenance
With a single codebase, maintaining the application becomes much simpler. Bug fixes and updates only need to be applied in one place, reducing the chance of inconsistencies and errors across platforms. This also makes scaling the application and adding new features a much more straightforward process.
5. Benefits for React Developers
For teams already familiar with React, the transition to React Native for Web is seamless. The core concepts of components, JSX, state, and props are the same, allowing web developers to quickly become productive in a cross-platform environment without a steep learning curve.
6. Progressive Web App (PWA) Support
React Native for Web can be used to build Progressive Web Apps. PWAs are web applications that provide a native app-like experience, including offline support, push notifications, and home screen installation. This allows businesses to provide a high-quality experience to users on a mobile browser without requiring them to download a separate app.
Key Features of React Native Web Apps
Many well-known companies have successfully adopted React Native for Web to create cross-platform experiences, allowing them to share a single codebase between their mobile apps and web platforms. This approach significantly streamlines development, reduces costs, and ensures brand consistency.
Case Studies and Examples
Twitter: Twitter used React Native for Web for its mobile web experience. This strategic decision allowed the company to improve performance and consistency across different platforms, including iOS, Android, and the web, using a single set of tools and components.
Discord: The Discord team leveraged React Native for Web to power its web application. Because of the shared codebase, Discord can maintain a consistent user experience and quickly roll out new features to both its mobile and web users with minimal extra effort.
Major League Soccer (MLS): The official MLS app uses React Native for Web to provide a consistent experience across its mobile app and website. This ensures that users, whether on their phone or a desktop, get the same high-quality, up-to-date content and functionality.
Flipkart: India’s leading e-commerce company, Flipkart, has used React Native for Web to improve the performance and user experience of its mobile website. This move helped them to create a faster, more responsive shopping experience while managing a massive volume of users and products.
Use Cases
Rapid Prototyping and MVP Development: Startups and development teams can use React Native for Web to build and launch a Minimum Viable Product (MVP) simultaneously on multiple platforms (iOS, Android, and web). This allows them to get to market faster and validate their idea with a wider audience.
Web Companion to a Mobile App: For businesses with an existing React Native mobile app, integrating a web version using React Native for Web is an efficient way to expand their reach to desktop users. This is a common strategy for e-commerce, content, and social media platforms.
Internal Tools and Dashboards: Many companies use React Native for Web to build internal tools, such as dashboards for monitoring data or administrative panels for managing content. The ability to use the same codebase for both a mobile app (for on-the-go access) and a web version (for desktop use) simplifies development and maintenance.
Getting Started with Web Development with React Native
Setting Up the Development Environment
Embarking on your React Native web development journey begins with setting up essential tools such as Node.js, npm, and the Expo CLI, along with the React Native Web library YouTube Source.</p>
Step-by-Step Guide
Initialisation: Begin by installing Expo CLI or React Native CLI (npm install -g expo-cli or npx react-native init).
Project Creation: Create a new project using npx create-expo-app or npx react-native init ProjectName.
Web Integration: Add react-native-web to your project’s dependencies.
Configuration: Adjust configuration files to support web functionalities.
<p>For further exploration and mastery, delve into resources like JavaScript Mastery, Expo documentation, and comprehensive YouTu
be tutorials that cater to both beginners and advanced developers. YouTube Source.
Case Studies and Examples
Successfully adopted React Native for Web to create cross-platform experiences, allowing them to share a single codebase between their mobile apps and web platforms. This approach significantly streamlines development, reduces costs, and ensures brand consistency.
Examples For React Native Web
Twitter: Twitter used React Native for Web for its mobile web experience. This strategic decision allowed the company to improve performance and consistency across different platforms, including iOS, Android and web, using a single set of tools and components.
Discord: The Discord team leveraged React Native for Web to power its web application. Because of the shared codebase, Discord can maintain a consistent user experience and quickly roll out new features to both its mobile and web users with minimal effort. features to both its mobile and web users with minimal extra effort.
Major League Soccer (MLS): The official MLS app uses React Native for Web to provide a consistent experience across its mobile app and website. This ensures that users, whether on their phone or a desktop, get the same high-quality, up-to-date content and functionality.
Flipkart: India’s leading e-commerce company, Flipkart, has used React Native for Web to improve the performance and user experience of its mobile website. This move helped them to create a faster, more responsive shopping experience while managing a massive volume of users and products.
Use Cases
Rapid Prototyping and MVP Development: Startups and development teams can use React Native for Web to build and launch a Minimum Viable Product (MVP) simultaneously on multiple platforms (iOS, Android and web). This allows them to get to market faster and validate their idea with a wider audience.
Web Companion to a Mobile App: For businesses with an existing React Native mobile app, integrating a web version using React Native for Web is an efficient way to expand their reach to desktop users.
Best Practices for Building React Native Web Apps
Performance Optimization
To maximise app responsiveness, employ techniques such as profiling, code splitting, and asset optimisation. These strategies are pivotal in maintaining high-performance standards in React Native web applications, YouTube Source.
Maintainable Code Structures
Organise your codebase logically with a focus on scalability. Employ a modular structure and share code judiciously to prevent conflicts across different platforms, YouTube Source.
Security Considerations
Implement up-to-date security measures, including robust authentication protocols, encrypted data transmission, and regular updates to dependencies.
Conclusion
React Native for Web allows developers to create web applications using the same codebase as their mobile apps. This approach, enabled by the react-native-web library, brings key features of the React Native ecosystem to the web platform.
Frequently Asked Questions
1. How does code reusability benefit development?
Code reusability significantly reduces development time and maintenance efforts by allowing the same code to be used across multiple platforms.
2. What are the key tools needed to start with React Native Web development?
Essential tools include Node.js, npm, Expo CLI or React Native CLI, and the React Native Web library.
3. How does React Native ensure enhanced performance?
React Native integrates advanced rendering optimisations and native UI components, which often surpass traditional web development performance benchmarks.
4. What are the common challenges when developing with React Native for the web?
Common challenges include platform-specific inconsistencies and compatibility issues with third-party modules not designed for the web.