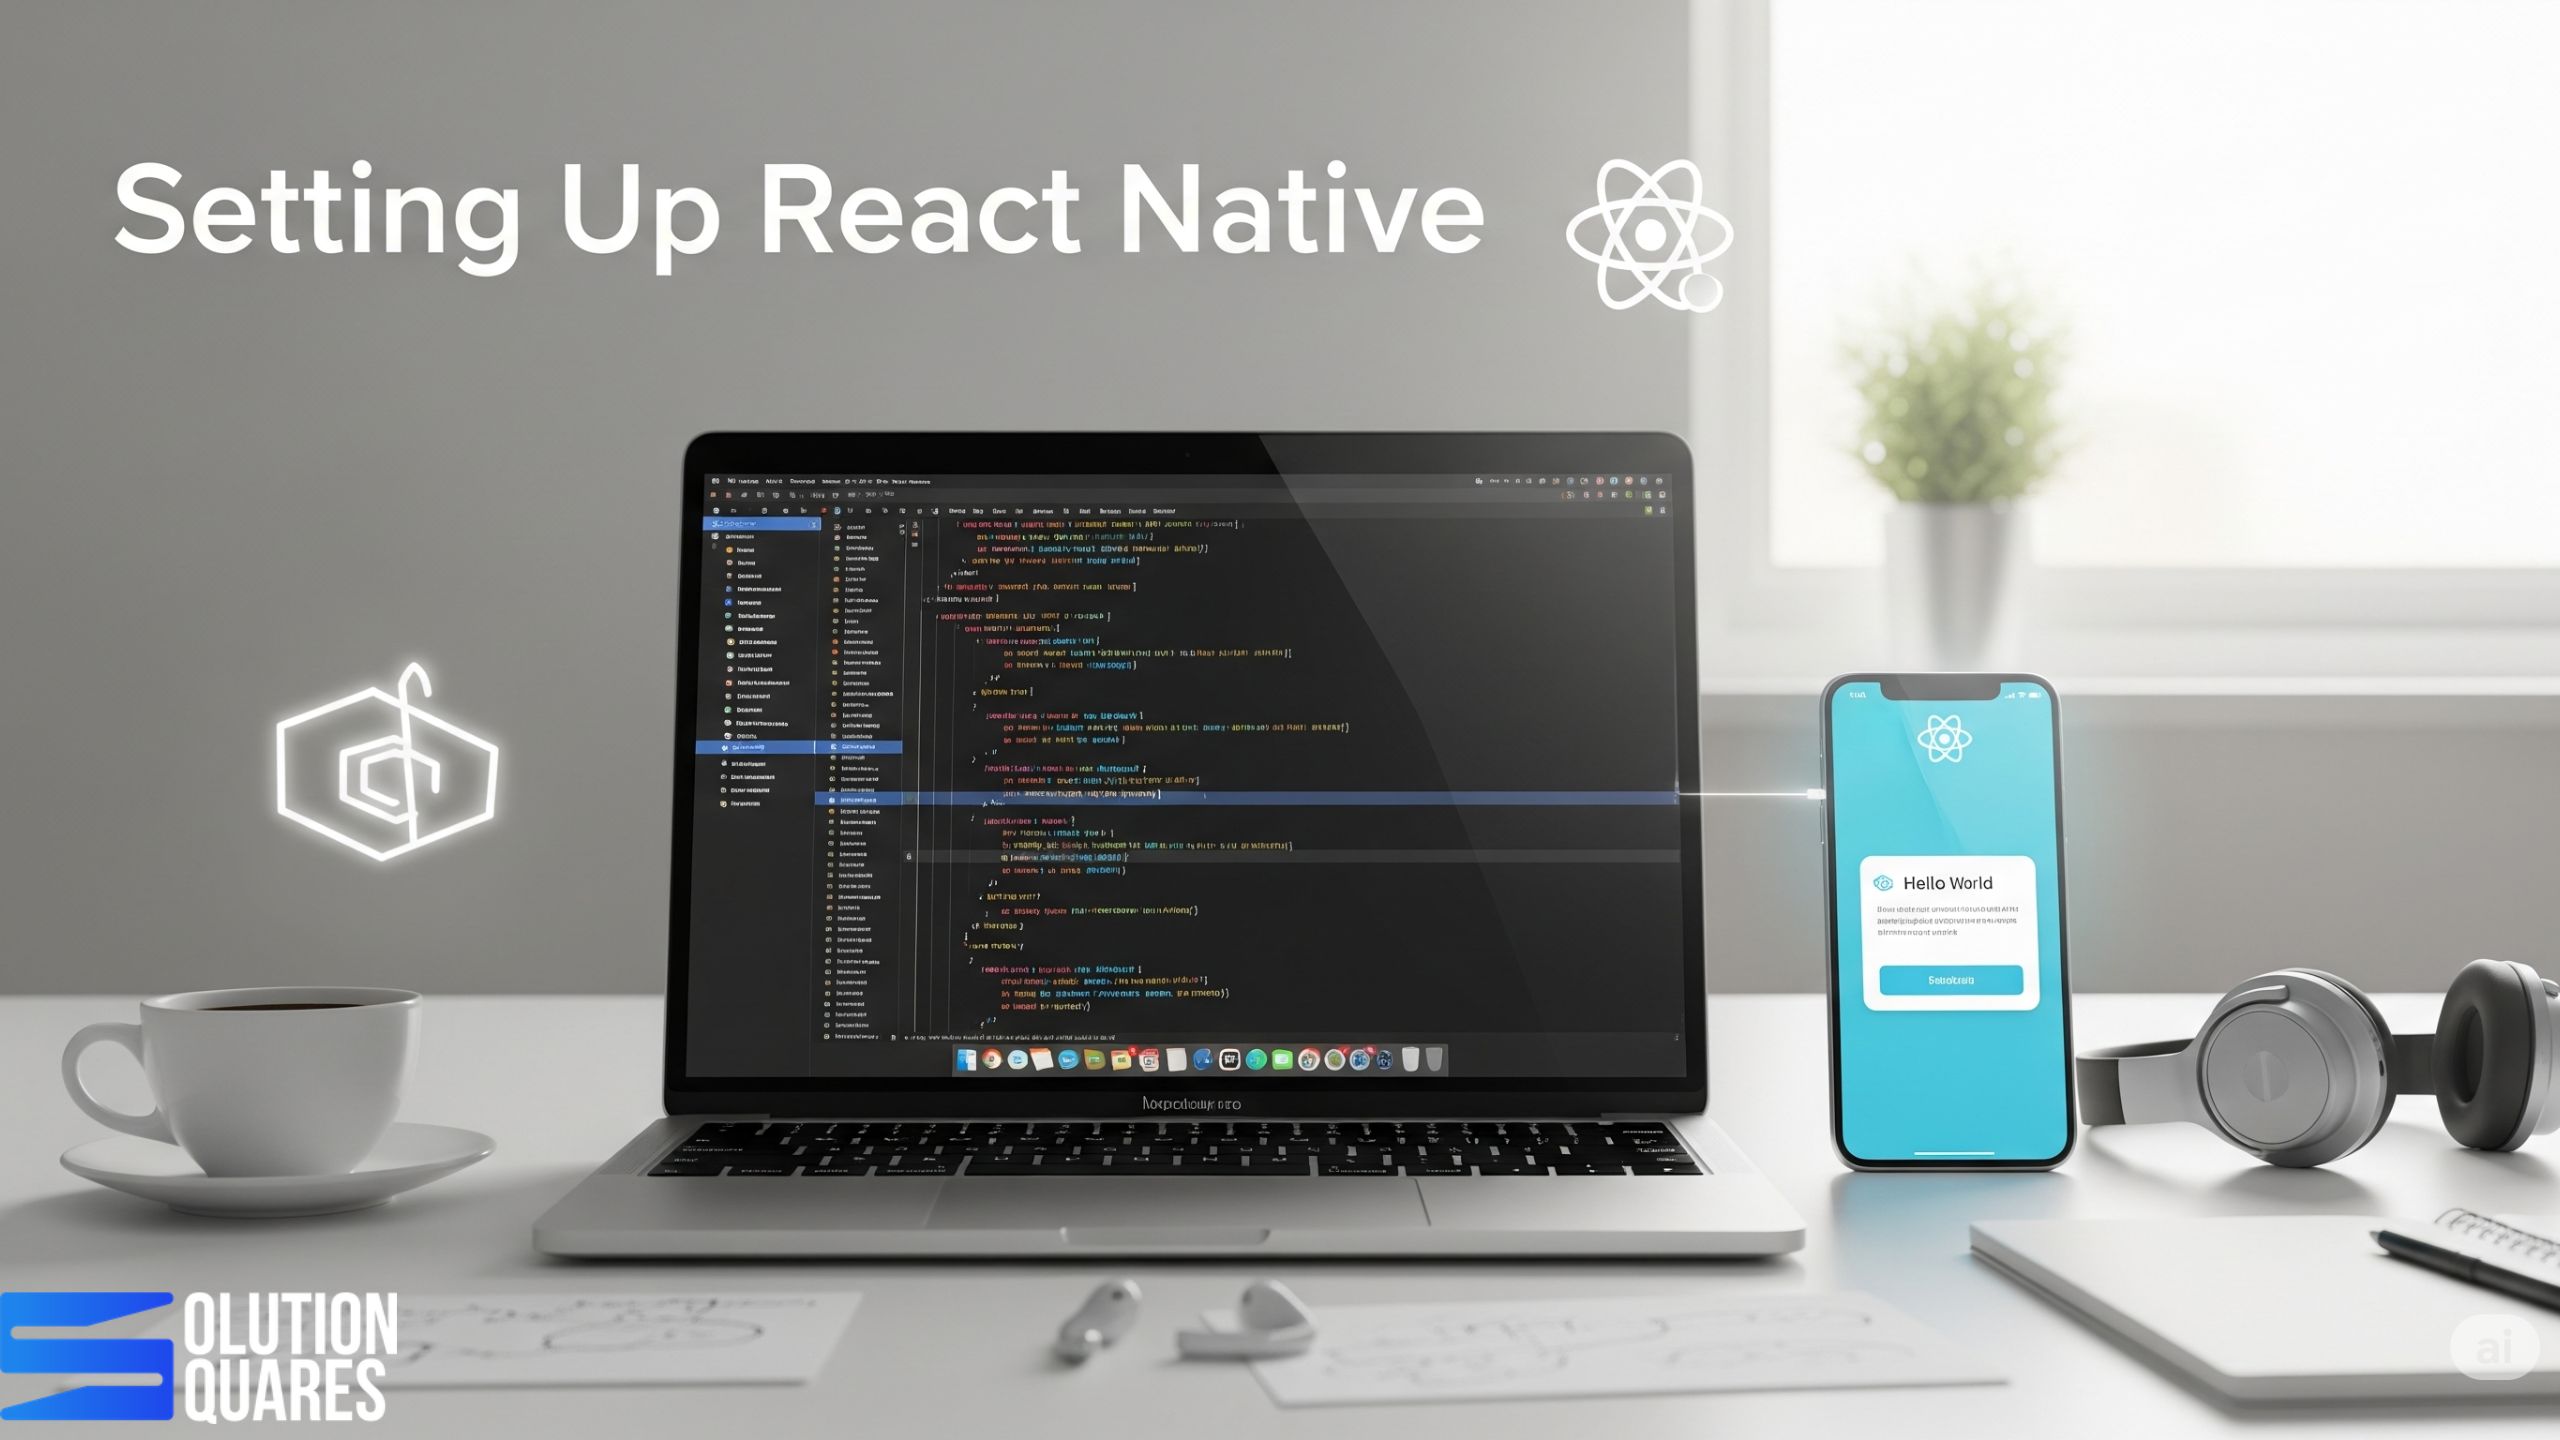
Learn how to install React Native using both CLI and Expo.
Configure the development environment for both Android and iOS platforms.
Discover best practices for maintaining and troubleshooting your React Native setup.
Introduction
React Native is a powerful open-source framework that enables developers to build high-quality, cross-platform mobile applications using JavaScript and React. Properly setting up React Native is crucial for a smooth development experience, ensuring reliability and leveraging platform-specific features effectively. In this comprehensive guide, we will walk you through how to set up React Native, install React Native tools, and configure your React Native environment for both Android and iOS development.
React Native allows developers to build high-quality, cross-platform mobile applications using JavaScript and React. Setting it up properly is crucial for smooth development, efficient debugging, and faster builds. This guide will walk you through the installation and configuration process step-by-step.
Why Agencies Choose React Native Setup Services
Faster Development – Build for iOS and Android simultaneously.
Cost-Effective – One codebase reduces resource and budget requirements.
Scalability – Easily integrate with APIs, databases, and third-party tools.
Future-Ready – Stay aligned with the latest mobile development trends.
Version Control Integration (GitHub/GitLab/Bitbucket)
CI/CD Pipeline Setup for seamless deployment
Prerequisites for Setting Up React Native
Before you dive into the React Native setup, ensuring you have the correct software and tools is essential. This section outlines everything you need to prepare. Learn more.
Required Software and Tools
Node.js and npm/yarn: Node.js is a JavaScript runtime, essential for running JavaScript outside the browser, while npm and Yarn are popular package managers for managing JavaScript projects. Make sure to install the latest LTS version of Node.js along with npm or Yarn.
Java Development Kit (JDK): The JDK is crucial for compiling Android applications. Download and install the JDK to facilitate Android app development.
Watchman: Especially recommended for macOS users, Watchman is a tool developed by Meta for watching file changes, which can significantly speed up the development process by efficiently managing file changes.
Android Studio: This is the official IDE for Android development, necessary for both developing and emulating Android applications.
Xcode (macOS only): If you plan to develop for iOS, installing Xcode is necessary as it provides the necessary tools and environment to build iOS applications.
System Requirements by Operating System
Windows: Supports only Android development. It’s not possible to develop iOS applications on Windows.
macOS: Supports both Android and iOS development, offering a more flexible development environment.
Linux: Like Windows, it supports only Android development.
For more details on setting up your environment, refer to detailed resources and tutorials here and here.
Installing React Native
You have two main paths to install React Native: using the React Native CLI for a more traditional native experience, or using Expo for a simplified, abstracted setup.
Step-by-Step Guide to Installing React Native CLI
Install Node.js: Download the LTS version of Node.js from the official website and verify the installation by executing node -v and npm -v in your terminal.
Global Installation of React Native CLI (Optional): Though not necessary due to npx, you can install the React Native CLI globally using:
npm install -g react-native-cli
Alternatively, use npx to run CLI commands without a global installation. For more details, refer to the guide here.
Alternative: Using Expo for Faster Setup
For beginners or those looking for a quick start, Expo provides an alternative way of setting up React Native. Initialise your project using:
npx create-expo-app@latest
Expo simplifies the setup process by managing native configurations behind the scenes. Learn more about using Expo in this video tutorial.
Verifying the Installation
For React Native CLI: Check the installation with react-native --version.
For Expo: After initialising, start your project with npm start or npx expo start, which will launch the project in Expo Go, as demonstrated in this tutorial.
React Native Environment Setup
Setting up your development environment properly is essential for both Android and iOS platforms to ensure that everything runs smoothly.
Configuring the Development Environment for Android
Install Android Studio and Android SDK: Available on the official website, these tools are essential for Android app development.
Set Up Emulator: Use the AVD Manager in Android Studio to create a virtual Android device.
Set Environment Variables: Configure your machine to recognise the Android SDK by setting the ANDROID_HOME and updating your PATH. For detailed guidance, see the documentation here.
iOS Setup (macOS Only)
Install Xcode: Available via the Mac App Store, required for iOS app development.
Configure iOS Simulator: This can be done inside Xcode by downloading components for your desired iOS versions. Learn more.
Creating Your First React Native Project
Whether you choose the React Native CLI or Expo, starting your first project is straightforward. Find out how.
Using React Native CLI
To start a new project, run:
npx react-native init MyNewProject
Replace MyNewProject with your desired project name.
Using Expo
Expo can be used for quicker setup:
npx create-expo-app@latest MyNewProject
This command creates a new project with all required dependencies and directories.
Common Setup Issues and Troubleshooting
Setting up a development environment can sometimes lead to issues, such as the wrong Node.js version, JDK issues, or improperly set environment variables. Always ensure your setup aligns with the official React Native environment setup documentation. For more complex issues, the React Native community on platforms like Stack Overflow and GitHub can provide invaluable help. Additionally, refer to our comprehensive Troubleshooting Guide.
Best Practices for Maintaining Your React Native Setup
Keep all dependencies up-to-date and use environment-specific configurations to manage different stages of development. Regularly cleaning your project and managing dependencies efficiently can avoid common problems and performance issues.
Conclusion
By following this guide, you’ve learned how to set up React Native, install necessary tools, and troubleshoot common issues. With your environment ready, you can now start building robust, cross-platform applications using React Native. Dive deeper into its features, explore third-party libraries, and start building amazing applications!
For further reading and resources, check the React Native documentation and keep engaging with the community to enhance your development skills.
Frequently Asked Questions
1. Do all agencies need the same React Native setup?
No. Each agency has unique requirements depending on client industries, integrations, and scale. We provide a customised setup based on your workflow.
Q2. How long does it take to set up React Native for a new project?
Typically, 2–5 days depending on integrations, CI/CD requirements, and team size.
Q3. Will you also provide documentation after setup?
Yes. We deliver step-by-step documentation so your team can easily continue development.
Q4. Can you integrate third-party tools like Firebase or Stripe during setup?
Absolutely. We configure popular services and APIs during the setup phase to save time later.
Q5. What if my agency has ongoing projects?
We can audit and optimise your existing React Native setup to improve performance, scalability, and maintainability.
Q6. What kind of ongoing support do you provide after the app is launched?
We provide comprehensive post-launch support and maintenance services, including bug fixes, performance monitoring, security updates, and feature enhancements. We ensure your clients’ apps remain secure, up-to-date, and performant in the long term.
Q 7. How do you handle client communication and project transparency?
We believe in a collaborative and transparent approach. Our clients get access to our project management dashboards, where they can track progress, review deliverables, and provide feedback in real time. We also schedule regular meetings to discuss project status and next steps.
Essential Website Speed Optimisation Tips for Superior SEO Rankings
Website speed optimisation is crucial for enhancing user experience and improving search engine rankings. Faster websites lead to better user engagement, lower bounce rates, and higher retention.
Introduction
In the digital age, the speed of your website is a pivotal factor affecting user experience and search engine rankings. Website speed optimisation not only enhances user engagement but also boosts your presence in search results. A slow, poorly optimised website can lead to higher bounce rates, lower rankings on search engines, and ultimately lost revenue opportunities. For companies looking to scale and succeed online, website optimisation is no longer optional — it’s essential. Further Reading
A high-performing website is the engine of a modern business. It’s not just a digital brochure; it’s a lead-generation machine, a trust-builder, and a key driver of revenue. For businesses seeking to grow, website optimisation isn’t a “nice-to-have”—it’s a necessity. We help businesses transform their websites from static pages into powerful assets.
Why Website Optimisation Matters?
Without ongoing optimisation, a website can become a liability—slow, difficult to find, and ineffective at converting visitors into customers. Optimising your website is a strategic, continuous process that directly impacts your bottom line. Here’s a detailed look at why it’s essential for every business:
Improved User Experience – Fast-loading, mobile-friendly websites keep visitors engaged.
Higher Search Rankings – Google rewards optimised websites with better visibility.
Competitive Advantage – Stay ahead of competitors who neglect optimisation
Improved Search Rankings: Optimisation helps your website appear higher in search results, making it easier for potential customers to find you.
Reduced Marketing Costs: When you rank organically, you don’t have to spend as much on paid ads to get noticed.
Better User Experience (UX): A fast, easy-to-navigate website keeps visitors engaged and encourages them to explore your content.
Higher Conversion Rates: Optimisation guides users toward specific actions—like making a purchase or filling out a form—which directly boosts your revenue.
Faster Loading Speeds: A fast website reduces frustration and bounce rates, ensuring visitors stay long enough to convert.
Looks Professional: A polished, modern, and bug-free website reflects professionalism and reliability.
Enhanced Security: Using HTTPS encryption protects user data, which is a major factor in building trust with your audience.
Greater Accessibility: Optimising your site for accessibility shows that your business is inclusive and committed to a positive user experience for everyone.
Increased Brand Trust: A visible, high-ranking website establishes your business as a credible leader in your industry.
Key Strategies to Boost Website Optimisation
1. Improve Website Speed
Compress images without losing quality.
Use a Content Delivery Network (CDN).
Minify CSS, JavaScript, and HTML files.
2. Mobile-First Optimization
Ensure responsive design.
Test across multiple devices.
Implement accelerated mobile pages (AMP) if required.
3. Enhance SEO Performance
Optimise metadata (titles, descriptions, alt text).
Improve internal linking structure.
Use schema markup for better indexing.
4. Streamline Website Architecture
Clear navigation and hierarchy.
Reduce unnecessary redirects.
Create user-friendly URL structures.
5. Leverage Analytics & Testing
Use Google Analytics & Search Console for performance insights.
Implement A/B testing for key landing pages.
Monitor Core Web Vitals regularly.
Essential Website Speed Optimisation Tips
Optimising your website’s speed should never be overlooked. Here are some actionable tips to help boost your site’s performance:
Compress and Optimise Images and Videos
Large media files can slow down your site. Utilise tools like Adobe Photoshop or TinyPNG to minimise file sizes without losing quality, ensuring faster loading times. Read more
Use a Content Delivery Network (CDN)
A CDN can significantly reduce load times by storing cached copies of your content in multiple geographic locations. Providers like Cloudflare and Akamai optimize content delivery, making your site quick and responsive. Explore
Minimise HTTP Requests
Limit scripts, plugins, and third-party integrations that add extra HTTP requests to your site. Simplify your site’s design by combining CSS and JavaScript files where possible.
Leverage Browser Caching
Implement caching to allow users to store certain parts of your site on their browsers, reducing loading times for repeat visitors. Tools like WP Super Cache for WordPress can assist with this. Learn how
Optimise Server Response Time
Choose a reliable hosting provider and periodically optimise your database. Server-side caching solutions like Redis can also improve performance. Web Development Services by Solution Squares
Continuous Performance Monitoring
Regularly check your site’s speed using tools like Google PageSpeed Insights and WebPageTest to stay updated with your website’s performance. Check here
How Website Performance Affects SEO
The Impact of Speed on Rankings
Fast-loading sites are favoured in Google’s ranking algorithm. Improving your site’s speed is crucial for SEO success and should be a key component of your strategy. DetailsAdditional info
User Experience
Enhancements in website speed have been shown to improve user satisfaction, reduce bounce rates, and increase time on site. Google’s user-centric metrics, such as LCP and CLS, are part of these considerations. Web Design Solution
Best SEO Practices for Web Development
Building a visually appealing website is important, but without proper SEO (Search Engine Optimisation), your site may never reach its full potential. SEO ensures that your website is discoverable, user-friendly, and capable of ranking higher in search engine results. For businesses, integrating SEO directly into web development ensures long-term success by combining great design with high visibility.
Optimise Website Structure
Use a clear URL hierarchy (example.com/services/web-design).
Implement breadcrumb navigation for user-friendly browsing.
Keep code clean and lightweight to reduce load times.
2. Mobile-First Design
Ensure responsive design across all devices.
Test on different screen sizes and operating systems.
Follow Google’s mobile-first indexing guidelines.
3. Improve Page Speed
Compress images and use modern formats (WebP, AVIF).
Enable browser caching and server-side compression (Gzip/Brotli).
Minify CSS, JavaScript, and HTML files.
4. SEO-Friendly URLs & Metadata
Use short, descriptive URLs with keywords.
Write unique title tags and meta descriptions for every page.
Add alt text to images for accessibility and indexing.
5. Structured Data & Schema Markup
Implement schema markup for products, reviews, FAQs, and events.
Help search engines better understand and display your content.
6. Secure the Website (HTTPS)
Use SSL certificates for secure connections.
Google prioritizes HTTPS websites in search results.
7. Internal Linking & Navigation
Link related pages for better crawlability.
Create an XML sitemap and submit it to search engines.
Avoid broken links to enhance user experience.
8. Content Optimisation
Use relevant keywords naturally in headings and body text.
Structure content with H1, H2, H3 tags.
Keep content unique, valuable, and engaging.
9. Core Web Vitals Compliance
Focus on Largest Contentful Paint (LCP) – fast loading.
Optimise First Input Delay (FID) – smooth interactivity.
Integrate Google Analytics and Google Search Console.
Track page performance, visitor behaviour, and conversions.
Use insights to continuously optimise.
SEO is not just about keywords — it starts with strong web development practices. By implementing these SEO-friendly strategies during development, businesses can ensure their websites are built for performance, visibility, and long-term growth.
Conclusion
Implementing the website speed optimisation tips discussed can have a profound impact on your SEO and overall digital success. Start optimising today to enhance user experience and climb the SEO ladder. Ready to enhance your site’s performance?Contact us for professional optimisation services or subscribe for more actionable tips.
Visuals and Further Engagement
Charts and Graphs: Visualise the beneficial impact of speed optimisations on your SEO results.
Case Studies: Learn from real-life examples of websites that improved performance after optimisation.
Interactive Tools and Simulations: Test your page speed and visualise potential improvements with interactive online tools.
Frequently Asked Questions
1. How does website speed affect SEO rankings?
Website speed is a critical ranking factor for search engines like Google. Faster websites provide better user experience, leading to higher engagement and lower bounce rates, which positively influence SEO rankings.
2. What tools can I use to test my website’s speed?
You can use tools like Google PageSpeed Insights, WebPageTest, and GTmetrix to analyse your website’s performance and receive optimisation suggestions.
3. What is a Content Delivery Network (CDN), and how does it help?
A CDN is a network of servers distributed globally that store cached versions of your website’s content. By delivering content from a server closest to the user, it significantly reduces latency and improves load times.
4. How often should I optimise my website’s speed?
Website optimisation should be an ongoing process. Regularly monitor your site’s performance, especially after making significant changes or updates, to ensure it maintains optimal speed.
5. Can optimising images make a significant difference?
Yes, optimising images can greatly reduce page load times. Large image files are one of the most common causes of slow websites. Properly compressed and formatted images improve speed without compromising quality.
Choosing the right programming languages is essential for scalability, security, and performance in web development projects.
Understanding the distinction between frontend and backend development is crucial for selecting appropriate technologies.
Selecting the best frameworks can expedite development and enhance application functionality.
The choice between a headless CMS and a traditional CMS impacts content management and delivery strategies.
Staying informed about upcoming web development trends ensures future-proof and competitive applications.
Best Programming Languages for Web Development
Choosing the best programming languages for web development is crucial for any project, whether it’s a simple website or a complex web application. The decision on whether to focus on frontend vs. backend development and using the best frameworks for web development can significantly impact your project’s scalability, security, and performance. This post explores the leading programming languages, digs into the differences between frontend and backend development, discusses the advantages of various frameworks, and delves into the headless CMS versus traditional CMS debate. Additionally, we look ahead to the most important web development trends expected in 2025.
Best Programming Languages for Web Development
When choosing a programming language for your web development project, consider performance, community support, ease of learning, and scalability. Let’s explore some top contenders:
JavaScript
Strengths: Acts as a bridge in frontend vs. backend development with platforms like Node.js.
Use Cases: Ideal for everything from interactive UIs to real-time applications and server-side rendering.
Collaboration between frontend and backend teams is essential for creating a seamless user experience and efficient application performance.
Best Frameworks for Web Development
Selecting the right framework can expedite development and enhance application functionality.
Frontend Frameworks
React: Known for its modular structure, enabling dynamic UI development. React’s Ecosystem
Vue.js: Appreciated for its progressive framework, making it easy for developers to learn and integrate.
Angular: A complete solution favoured by enterprises for its robustness and TypeScript integration.
Backend Frameworks
Django (Python): Includes ready-made components for quick development cycles.
Ruby on Rails: Emphasises convention over configuration for fast deployment.
Express.js (Node.js): Offers a minimalistic framework suited for a variety of backend applications.
Choosing a framework depends largely on project requirements, team expertise, and future scalability considerations.
Headless CMS vs. Traditional CMS
The choice between a headless and traditional CMS can impact how content is managed and delivered across platforms, crucial for achieving optimal operational fluency and user engagement.
Traditional CMS
Examples: WordPress, Joomla, Drupal.
Characteristics: Integrated frontend and backend, straightforward setup, ideal for blogs and smaller content-driven websites.
Headless CMS
Examples: Strapi, Contentful, Sanity.
Characteristics: Backend-only management with frontends consuming content via APIs, suitable for modern web architectures needing multi-channel content delivery.
Web Development Trends in 2025
Looking forward, several key trends are poised to redefine the web development landscape:
AI and Machine Learning: Enhancing personalisation and user engagement through smarter algorithms.
Progressive Web Apps (PWAs): Bridging the gap between web and mobile app functionality.
Jamstack Architecture: Prioritising speed, security, and developer ease with decoupled frontends.
Serverless Computing: Reducing the complexity of backend server management.
Advanced Security: Increasing focus on robust security protocols to protect data integrity and privacy.
Headless CMS Growth: Flexibility and scalability for bespoke, sophisticated digital experiences.
Conclusion
Selecting the best programming languages and frameworks for web development is fundamental in building efficient, scalable, and secure web applications. Whether integrating a headless CMS for future-proofed content management or embracing upcoming trends like AI, the choices made today will shape your technological capabilities and competitive edge in 2025 and beyond. Make informed decisions based on project needs, current tech trends, and future growth predictions to ensure success in the evolving digital marketplace.
Frequently Asked Questions
1. What factors should I consider when choosing a programming language for web development?
Consider factors such as performance, community support, ease of learning, scalability, and the specific needs of your project.
2. How do frontend and backend development differ?
Frontend development focuses on the user interface and what users interact with, using technologies like HTML, CSS, and JavaScript. Backend development handles server-side logic, databases, and application integration, using languages like Python, Ruby, and PHP.
3. Why is it important to choose the right framework for my web project?
The right framework can expedite development, enhance application functionality, ensure scalability, and align with your team’s expertise and project requirements.
4. What are the advantages of using a headless CMS over a traditional CMS?
A headless CMS offers greater flexibility in content delivery across multiple platforms via APIs and is better suited for modern web architectures requiring multi-channel content distribution.
5. What are the upcoming web development trends I should be aware of for 2025?
Trends include AI and machine learning integration, progressive web apps, Jamstack architecture, serverless computing, advanced security measures, and the growth of headless CMS solutions.
React Native offers a cross-platform solution, enabling faster development for both iOS and Android.
Kotlin provides native Android development with superior performance and direct access to APIs.
Choosing between cross-platform and native depends on project requirements, performance needs, and budget.
Both frameworks have robust communities and comprehensive support, ensuring sustainable development and maintenance.
React Native vs Kotlin: Deciding the Best Mobile App Development Strategy
Introduction
When it comes to mobile app development, one fundamental choice looms large: should you use a cross-platform framework like React Native, or should you go fully native with Kotlin on Android? Both approaches have their merits and pitfalls, influencing everything from performance and development speed to cost and scalability. Both technologies are powerful, but they serve different business needs. To choose the right strategy, agencies must weigh factors like performance, cost, scalability, and time-to-market. Let’s explore the pros and cons of each.
This blog post aims to dissect the crucial differences between React Native vs Kotlin in an effort to guide you to the right decision for your specific needs, highlighting why understanding cross-platform vs native Android development is pivotal.
Understanding React Native
React Native is a framework based on JavaScript and React, enabling developers to craft mobile applications for both iOS and Android from a single codebase. This cross-platform solution reduces the duplication of effort, potentially speeding up the development process and lessening maintenance demands.
Key Features and Advantages
Single Codebase: One project can cover both major platforms (iOS and Android), significantly simplifying updates and bug fixes.
Rapid Development: Features like Hot Reload empower developers to see code changes in real time, accelerating the development cycle.
Ecosystem and Community: With a robust suite of tools, including CLI tools, Expo, and numerous libraries, React Native encourages a smoother development journey.
Common Use Cases
React Native is particularly effective for projects that need to hit the market quickly and where budget constraints are evident. It’s well-suited for applications requiring moderate complexity without intense reliance on custom native features.
Understanding Kotlin for Android Development
Kotlin serves as the officially endorsed language for native Android development. Being statically typed and designed to run on the Java Virtual Machine (JVM), it offers robustness and performance benefits that are hard to overlook for intensive and platform-specific applications.
Key Features and Advantages
Direct Access to APIs: A fully native approach allows developers to exploit the full spectrum of Android’s powerful features without constraints.
Optimal Performance: Apps built in Kotlin are compiled to bytecode, which means they run natively on the device, offering the best possible performance and response times. Read more
Common Use Cases
Kotlin is ideal where performance is non-negotiable: high-graphics gaming, real-time data applications, or complex utilities that leverage deep Android-centric functionalities.
react native or kotlin cross platform
Cross-Platform vs Native Android Development
Understanding the conceptual differences between cross-platform and native development is crucial for making an informed choice.
Cross-Platform Development
Advantages:
Efficiency and Speed: Develop once and deploy over multiple platforms, cutting down on time and resources. Explore cost details
Reduced Costs: Maintaining a single codebase is generally cheaper than managing two separate ones for iOS and Android.
Drawbacks:
Performance Constraints: May not deliver the same fluid experience as native apps, with occasional lags or delays, particularly in more complex scenarios.
Native Android Development
Advantages:
Best-in-Class Performance: Leveraging Kotlin and native APIs, these apps are fast and efficient.
Deeper Feature Integration: Allows developers to implement sophisticated functionalities inherent to the Android ecosystem.
Drawbacks:
Resource Intensive: Requires more time and expertise, particularly if a parallel iOS version is also needed.
Comparing React Native and Kotlin
Performance
While React Native continues to improve with updates such as Fabric and TurboModules, Kotlin’s native solution still leads, especially in scenarios demanding high performance.
Development Speed
React Native potentially accelerates development timelines due to shared codebases and features like hot reload. Kotlin, while potent, often requires more time, particularly when parallel development for iOS is factored in.
Community and Support
React Native benefits from a broad JavaScript/React community, while Kotlin enjoys comprehensive support from Android’s ecosystem.
Learning Curve
React Native tends to be more accessible for developers familiar with JavaScript, whereas Kotlin appeals to those with a background in Java and Android development.
Cost Efficiency
React Native can be more cost-effective for startups or companies looking to deploy on both iOS and Android simultaneously. However, Kotlin might entail higher costs but rewards you with unmatched performance and robustness. Detailed cost analysis
Decision-Making Factors
Selecting between React Native and Kotlin often boils down to specific project needs:
Product Scope: Do you need support for multiple platforms or just one?
Performance Requirements: Are you building a high-performance application where speed and responsiveness are paramount?
Timeline and Budget: Is rapid development and cost-effectiveness a priority?
Team Skills: What expertise does your development team have?
React Native vs Kotlin: Quick Comparison
Both React Native and Kotlin have their merits and can be the best choice under different circumstances. By considering the factors outlined above, businesses and developers can make informed decisions that align well with their project requirements and long-term goals.
Feature
React Native
Kotlin
Platform Support
iOS + Android (cross-platform)
Primarily Android (with Kotlin Multiplatform for iOS)
Development Speed
Faster (single codebase)
Slower (separate codebases unless using KMP)
Cost Efficiency
High (one team for both platforms)
Moderate (more resources needed for iOS & Android separately)
Choose React Native if your client needs a cross-platform solution that balances cost, speed, and functionality.
Choose Kotlin if your client needs a high-performance Android app, or if they’re building a complex, enterprise-level solution.
react native or kotlin cross platform
Conclusion
React Native and Kotlin serve different developer needs, and choosing between them depends largely on the project scope, performance needs, budget constraints, and team expertise. While React Native offers a fast and cost-effective solution for cross-platform applications, Kotlin remains unbeatable in performance metrics, making it ideal for high-end, platform-specific applications.
Successful mobile app development is contingent on making informed choices, and understanding the distinctions between React Native vs Kotlin is a pivotal step in that journey. We encourage developers and businesses to weigh their options carefully to pick a technology stack that not only addresses their immediate needs but also aligns with their strategic business outcomes.
These sources will provide more detailed guidance and insights to help refine your development strategy and ensure your mobile app meets its intended market with efficacy and grace.
Frequently Asked Questions
1. Which is more cost-effective: React Native or Kotlin?
React Native is generally more cost-effective because you only need one team and one codebase for both platforms. Kotlin often requires separate teams for Android and iOS (unless using Kotlin Multiplatform), which can increase costs.
2. Can Kotlin be used for iOS apps as well?
Yes, with Kotlin Multiplatform, agencies can share business logic across iOS and Android. However, UI still needs to be developed separately for each platform, unlike React Native, which handles both with one codebase.
3. Which framework is better for performance?
Kotlin delivers true native performance on Android since it directly uses platform APIs. React Native apps perform very well but may lag slightly behind in extremely complex or resource-intensive apps.
4. Which is faster to develop with—React Native or Kotlin?
React Native is faster for cross-platform apps because it uses a single codebase for iOS and Android. Kotlin takes more time unless it’s an Android-only project.
5. Is React Native suitable for enterprise-level apps?
Yes, but with some limitations. React Native is great for MVPs, startups, and apps that need quick cross-platform deployment. For very large, complex apps (especially Android-first), Kotlin is often more reliable.
6. Do both React Native and Kotlin have strong community support?
Yes. React Native has a large global community and ecosystem of libraries, while Kotlin is officially supported by Google and has rapidly growing adoption.
7. Can an app built in React Native be migrated to Kotlin later?
Yes, agencies can start with React Native to validate an idea and later migrate parts or the whole app to Kotlin for better performance and scalability.
8. Which agencies should recommend for startups?
React Native is usually the better choice for startups—it’s faster, cheaper, and allows launching on both platforms quickly.
9. Which agencies should agencies recommend for enterprise clients?
Kotlin is often better for enterprises building Android-first or performance-heavy apps, especially if advanced native features are required.
Performance and Integration: Swift offers unmatched native performance and deep integration with iOS features, while React Native provides adequate performance for most applications.
Development Speed and Cost: React Native enables faster and more cost-effective development across multiple platforms using a single codebase.
Community and Ecosystem: Both frameworks have robust communities, with React Native benefiting from the extensive JavaScript ecosystem, and Swift being closely tied to Apple’s ecosystem.
Scalability and Flexibility: Swift is ideal for large-scale projects requiring high performance, whereas React Native offers flexibility for dynamic and multi-platform applications.
Long-term Maintainability: Swift minimises external dependencies, enhancing app security and maintainability, while React Native leverages widespread JavaScript support for resource availability.
React Native vs Swift: Choosing the Best Framework for iOS App Development
When it comes to iOS app development, agencies often face a key question: Should we build with React Native or Swift? Both have their strengths, but the right choice depends on your project goals, budget, and scalability needs. Let’s break it down.
Choosing the right framework for iOS app development is crucial as it affects app performance, development speed, costs, access to iOS features, and long-term maintainability. In this detailed guide, we delve into the comparison of “React Native vs Swift,” examining these two powerful iOS app development frameworks to help you make an informed decision tailored to your project’s needs.
React Native for iOS Development
What It Is: React Native is a cross-platform framework by Meta that allows developers to build apps for both iOS and Android using JavaScript and a single codebase.
Benefits for Agencies:
Faster Development: Shared codebase reduces time to market.
Cost-Effective: One team can handle both iOS and Android.
Large Ecosystem: Pre-built components and community support.
Hot Reloading: Makes testing and iteration quicker.
Best For:
Startups or businesses needing both iOS & Android apps quickly.
Projects where budget efficiency is important.
Apps that don’t require heavy native integrations.
Introduction to React Native vs Swift
When it comes to developing iOS applications, selecting the right framework can make a significant difference. The comparison between React Native and Swift is essential for developers and businesses aiming to optimise app quality, speed, and efficiency. This post will cover overviews of both frameworks, detailed comparisons on various aspects, including performance, productivity, ecosystem support, and more, to guide your framework choice.
Overview of React Native
Definition and Origin:
React Native, pioneered by Meta, is a cross-platform framework that uses JavaScript to enable the development of both iOS and Android applications from a single codebase. It interfaces with native platform APIs through a dynamic bridge.
Key Features:
Cross-Platform Code Sharing: A Write once, run anywhere approach significantly reduces development time and effort.
JavaScript/React Paradigm: Employs known technologies from web development, enhancing developer accessibility.
Bridge Modules: These allow for the utilisation of native components, ensuring flexible integration of native functionalities.
Benefits for iOS Development:
Cost Efficiency and Speed: Multi-platform targeting without the need for separate codebases streamlines development and cuts costs.
Wide Developer Base: Leverages the extensive JavaScript community, facilitating resource availability and support.
Near-Native Experience: Achieves a user experience that rivals native applications in many scenarios.
Overview of Swift
Definition and Role:
Swift is Apple’s intuitive programming language for building, offering rich integration with iOS system components through direct API access.
Key Features:
Native Performance: Swift applications run directly on iOS hardware, maximising performance and efficiency.
First-Party UI Frameworks: Direct access to SwiftUI and UIKit simplifies the creation of engaging user interfaces.
Longevity and Stability: Ideally suited for complex applications requiring robust stability over time.
Benefits for iOS Development:
Optimised Performance: Provides superior processing speed and smoother user experiences.
Deep iOS Integration: Offers comprehensive control over device features like cameras, GPS, and biometrics.
Reduced Dependencies: Minimises external dependencies, enhancing app security and maintainability.
When to Choose Swift
You want top performance and the smoothest native experience.
You’re building iOS-only or deeply integrated Apple apps (e.g., heavy ARKit, HealthKit, Apple Pay).
You have experienced iOS developers.
When to Choose React Native
You want one app for iOS and Android from a single codebase.
You need faster MVP delivery.
Your team knows JavaScript and prefers flexibility.
Comparing React Native and Swift
Performance:
Swift’s direct access to hardware and APIs facilitates top-tier performance, particularly for resource-intensive applications. React Native, while capable, may experience delays due to its bridge-based interaction model. CrustlabSolutionsquares
Real-world application performance varies; simple applications might not exhibit significant disparity, but the difference becomes apparent in more demanding scenarios. WebandcraftsSolutionsquares
Development Productivity:
React Native’s alignment with JavaScript and existing web technologies can accelerate development, especially when targeting multiple platforms simultaneously.
Swift, designed specifically for Apple’s ecosystem, offers a streamlined environment optimised for iOS development.
Ecosystem and Community Support:
Both frameworks boast robust communities. React Native benefits from the widespread JavaScript community, while Swift developers are deeply integrated with Apple’s continuous innovations.
Cost Effectiveness:
React Native can be more cost-effective for developing applications across multiple platforms due to its cross-platform nature.
Swift could entail higher costs if parallel development for other platforms is necessary.
Flexibility and Scalability:
Swift excels in scenarios requiring high performance and deep integration with iOS features, making it ideal for large-scale, long-term projects.
React Native offers considerable flexibility in managing diverse and dynamic application features across platforms.
Platform Scope
Swift → Apple’s native programming language for iOS, iPadOS, macOS, watchOS, and tvOS. Best for purely Apple ecosystem apps.
React Native → Cross-platform framework (JavaScript/TypeScript) for iOS + Android from a single codebase. Best for multi-platform development.
Development Speed
Swift →
Slower if you also need Android (you’d need a separate Java/Kotlin app).
Great for teams familiar with Apple tools (Xcode, SwiftUI).
React Native →
Faster for cross-platform projects — one codebase for iOS & Android.
Swift is unmatched in performance for iOS-specific applications, offering stability and full feature access. React Native stands out in multi-platform application development, providing speed and efficiency with adequate performance.
Bottom Line:
Swift = Best for pure iOS, performance-heavy, or highly Apple-integrated apps.
React Native = Best for cross-platform apps, rapid development, and smaller teams.
Framework Selection Guidance:
Opt for Swift for maximum performance, acute iOS feature integration, and applications where long-term stability is vital.
Choose React Native for rapid, cost-effective development across iOS and Android, leveraging existing JavaScript/React skills.
Selecting between React Native and Swift depends significantly on specific project needs—whether prioritising speed and cost efficiency across multiple platforms with React Native or seeking the highest level of performance and integration for iOS applications with Swift. Consider all aspects to align the choice of framework with your strategic goals.
Frequently Asked Questions
1. Can React Native apps perform as well as Swift apps?
React Native apps deliver near-native performance, but for highly complex or graphics-intensive apps, Swift provides superior speed and optimisation.
2. When should agencies recommend Swift over React Native?
Swift is the better choice when:
The client targets only iOS users.
The app needs advanced iOS features like ARKit or CoreML.
Performance and scalability are top priorities.
3. Can an app start with React Native and later switch to Swift?
Yes. Many businesses begin with React Native to validate their idea quickly, then transition critical features or the full app to Swift as they scale.
4. How do agencies decide which framework is right for their clients?
The decision depends on factors like budget, timeline, target audience (iOS-only vs. cross-platform), required features, and long-term scalability.
5. Does Apple recommend Swift over React Native?
Apple officially supports Swift, but React Native is widely accepted in the industry. Agencies often choose based on client needs rather than platform preference.
6. How long does it take to develop an iOS app with React Native vs. Swift?
React Native: Faster, especially for cross-platform apps.
Swift: Takes longer but offers deeper native customisation.
7. Which option is better for startups?
React Native is usually better for startups as it allows launching on both iOS and Android quickly with a smaller budget.
Cross-platform Development: Extends React Native from mobile to Windows desktop applications.
Code Reusability: Utilise a single codebase across iOS, Android, Web, and Windows.
Native Performance: Integrates seamlessly with Windows-specific features for optimal performance.
Comprehensive Setup: Requires Windows 10/11, Visual Studio 2022, Node.js, and React Native.
Robust Community Support: Backed by Microsoft and an active developer community.
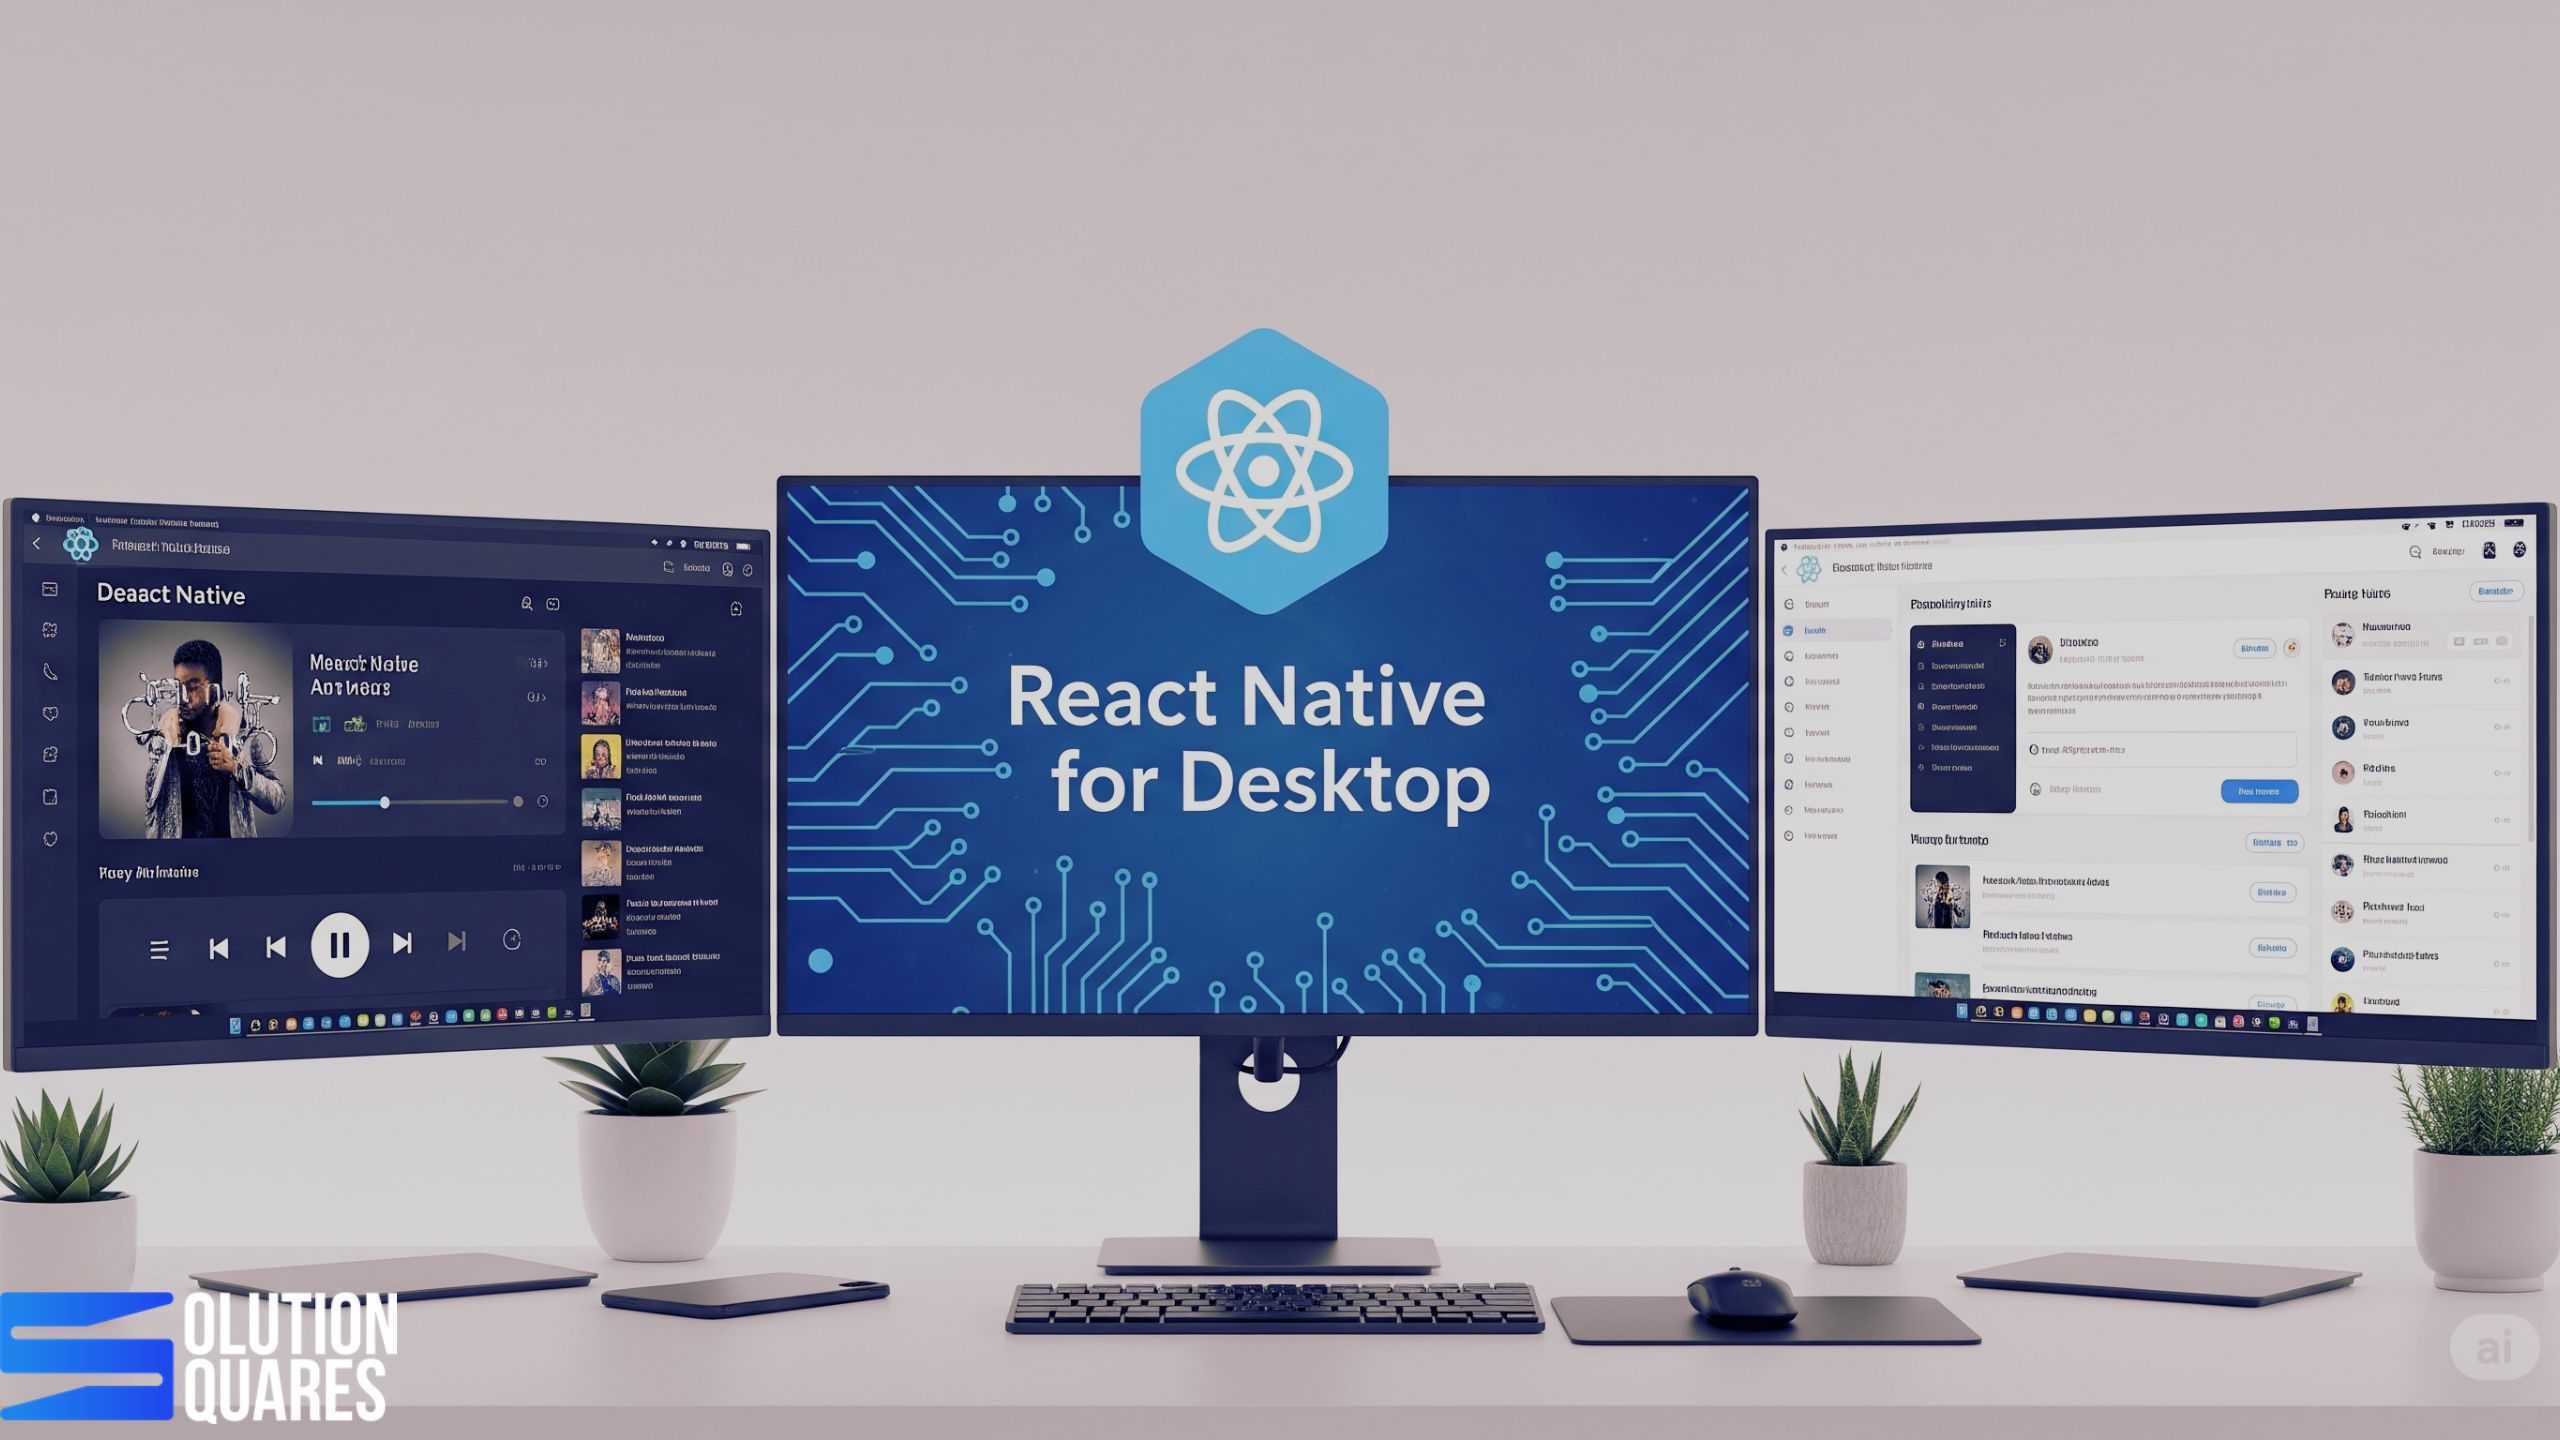
React Native for Windows marks a significant evolution of the popular React Native framework, extending its capabilities from mobile to include native desktop applications on the Windows platform. Originating as a solution for mobile app development, React Native has grown to support desktop environments, unlocking new opportunities for developers.
In today’s fast-moving digital world, businesses no longer limit themselves to mobile-first strategies.
Agencies and enterprises are seeking solutions that extend their applications seamlessly across platforms—including desktops. React Native for Desktop bridges this gap by allowing developers to use the same React Native codebase for Windows, macOS, and beyond.
For agencies, this isn’t just a technical advantage—it’s a strategic opportunity to deliver scalable, cost-efficient, and user-friendly solutions to clients. For more details, check the official React Native for Windows Documentation.
Understanding React Native for Desktop
React Native for desktop allows developers to use JavaScript and React to construct cross-platform applications that perform like native apps on desktop OS, including Windows. This extension of React Native means that applications can now have a single unified codebase for mobile and desktop platforms.
Native Look & Feel React Native for Desktop ensures that apps look and behave like native desktop applications, supporting platform-specific UI elements.
Performance Optimization With access to native APIs and modules, agencies can build responsive, high-performing apps for enterprise-grade use.
Scalability A shared codebase makes it easier to scale across devices—mobile, web, and desktop—without excessive maintenance.
Rich Ecosystem From developer tools to third-party libraries, React Native integrates with existing desktop workflows seamlessly.
Desktop options & tradeoffs (high level)
React Native for Windows + macOS (Microsoft-backed): Native controls, broad device targets (Windows PC, Xbox variants), active docs and GitHub. Great if you want a native desktop app with JS-driven UI. Microsoft GitHub GitHub
react-native-macos (Microsoft repo): macOS-specific target — use when macOS parity is required. GitHub
React Native Web + Electron / Tauri: Reuse RN Web for desktop wrapped in Electron/Tauri — easier UI reuse from web, but heavier runtime (Electron) or more setup (Tauri). Good if you’re already web-first. Bacancy
Alternatives: Flutter Desktop, native (Swift/Kotlin/WinUI) or pure Electron/Tauri, depending on priorities.
Why Choose React Native for Windows
Choosing react native for Windows offers several advantages for desktop application development:
Code Reusability: Write once and deploy across multiple platforms, including iOS, Android, Web, and Windows.
Consistent UI/UX: Ensures a uniform experience across different devices.
Native Performance: Integrates deeply with Windows features like system notifications and file system access.
Strong Backing by Microsoft: Promises reliable support and updates.
JS thread ↔ Native bridge — RN’s runtime still separates JS logic and native UI. Desktop targets expose native UI components mapped from RN primitives.
New RN Architecture (Fabric, TurboModules) — improves performance and allows tighter native integration; check platform support for Fabric & Hermes on desktop before enabling. React Native
Hermes engine — often recommended for performance and a smaller memory footprint; verify desktop support for your RN version.
Native modules — some desktop features (tray, native menus, file dialogues) will require writing/using native modules or leveraging community packages.
Development workflow & tooling
Use VS Code + platform IDE (Visual Studio for Windows, Xcode for macOS) — JS editing in VS Code, debugging native in platform IDE.
Use fast refresh for JS changes; rebuild native only when you change native code.
Use TypeScript for safer cross-platform APIs and shared code.
Key Features and Capabilities
React native for Windows supports essential features like:
Native modules for device features access.
Fluent Design and WinUI for modern UI designs.
Hot-reloading and live-reloading for a dynamic development experience.
Further, these capabilities make developing applications less time-consuming and more intuitive. Full features are detailed here.
Comparing React Native for Windows with Other Frameworks
While frameworks like Electron and Flutter offer alternatives, none integrate as seamlessly with both mobile and desktop platforms as React Native for Windows. Additionally, it strikes a balance between performance and ease of use, ideal for leveraging existing JavaScript and React skills.
The future of React Native for Windows is bright and strategically significant for agencies. Backed heavily by Microsoft, which uses it for products like Office and Xbox, it’s becoming a robust solution for desktop application development.
Key aspects include:
New Architecture (Fabric, TurboModules, JSI): This core rewrite brings near-native performance, smoother UI, and faster communication between JavaScript and native code, crucial for high-quality apps.
Universal Platform Expansion: Agencies can now truly leverage a single codebase for mobile, web, and desktop, drastically reducing development costs and accelerating time-to-market for clients.
Native Integration: It seamlessly integrates with the Windows App SDK and Fluent UI, ensuring a native look and feel. The “Content Islands” feature allows for modernising existing Windows apps incrementally.
Enhanced Developer Experience: Microsoft’s continuous investment in tooling and TypeScript support improves efficiency and code quality.
For agencies, this means offering cost-effective, high-performance, and consistent cross-platform solutions, allowing them to expand their service offerings to desktop with confidence and maximise their React Native expertise. For more details, visit React Native for Windows Roadmap.
Conclusion:
In conclusion, React Native for Windows offers a powerful, efficient approach to building desktop applications.
By utilising a unified codebase, developers can streamline their processes and elevate their app development across multiple platforms. Moreover, the ongoing support from Microsoft and the active community reinforce its viability and invite developers to embrace this transformative tool.
Expand your development horizons by mastering how to run React Native on Windows and start building versatile, high-performance desktop applications today.
1. What are the main benefits of using React Native for Windows?
React Native for Windows offers cross-platform development, code reusability, native performance, and strong support from Microsoft, enabling developers to build efficient desktop applications with a unified codebase.
Unlike Electron or Flutter, React Native for Windows integrates seamlessly with both mobile and desktop platforms, leveraging existing JavaScript and React skills while offering a balance between performance and ease of use.
Prerequisites include Windows 10/11, Visual Studio 2022 with UWP and Desktop C++ workloads, Node.js, Yarn/npm, and the latest version of React Native.
4. What challenges might developers face when using React Native for Windows?
Developers may encounter limited API coverage and a less mature ecosystem for native modules. Staying updated with the latest releases and engaging with the community can help mitigate these challenges.
5. Where can I find support and resources for React Native for Windows?
Support and resources are available through the official React Native for Windows Documentation, the GitHub repository, and various community forums and tutorials.
React Native allows for cross-platform mobile app development using a single JavaScript codebase.
Proper installation requires setting up essential tools like Node.js, React Native CLI or Expo CLI, and development environments for both Android and iOS.
Utilizing tools like nvm can help manage Node.js versions efficiently.
Common installation issues often involve environment configurations and can be resolved with troubleshooting steps like clearing npm cache.
Optimizing your development setup with tools like Visual Studio Code enhances productivity.
React Native, developed by Meta, is an influential open-source framework utilized for crafting cross-platform mobile applications using JavaScript and React. Its ability to let developers write a unified codebase for both iOS and Android has boosted its popularity among the mobile app development community. Ensuring a proper installation of React Native is crucial for a seamless and productive development experience. This post serves as your thorough guide to install React Native app environments, backed by the most current practices and resources.
Prerequisites
System Requirements
Windows: Ensure your system is running on Windows 10 or later.
macOS: Users should have macOS 11 (Big Sur) or newer for optimal iOS app development.
Linux: Android development is feasible on Linux, although it does not support iOS development.
iOS Setup (macOS Only): Install Xcode from the App Store, set up an iOS simulator, and install Xcode command-line tools:
xcode-select --install
Node Setup for React Native
For stability, use the LTS version of Node.js, such as Node 18+. Using Node Version Managers like nvm for macOS/Linux and nvm-windows for Windows systems can help administer Node.js versions efficiently to avoid compatibility issues. source
Running the React Native App
Starting the Development Server:
With Expo:
npm run start
With React Native CLI:
npx react-native start
Launching the App on Simulators/Emulators:
For Expo users, press i for the iOS simulator or a for the Android emulator.
Problems can range from missing dependencies and incorrect environment settings to incompatible versions. Solutions may involve:
Clearing npm cache: npm cache clean --force.
Deleting node_modules and reinstalling: rm -rf node_modules && npm install.
Double-check the environment and dependency conformity to official requirements. source
Optimising Your Development Setup
Enhance your workflow with Visual Studio Code equipped with React Native extensions. Persistently update your development tools and manage your code efficiently by configuring absolute paths.
From system requirements to running your application, this guide endeavours to ensure you are well-prepared to dive into React Native app development. Embrace the journey, and take advantage of a meticulously configured development environment for best practices.
Additional Resources
For further reading and resources, consult the official React Native documentation and discover more through interactive tutorials on platforms like YouTube. Engage with the community via forums to enhance your learning and troubleshooting skills.
1. What are the system requirements for installing React Native?
Ensure your system is running on Windows 10 or later, macOS 11 (Big Sur) or newer for iOS development, or Linux for Android development.
2. Should I use React Native CLI or Expo CLI for my project?
For beginners, Expo CLI is recommended due to its simplicity. React Native CLI is better suited for advanced users who need more customization options.
3. How can I verify my Node.js installation?
Open your command prompt and type node -v. It should display your current Node.js version.
4. What should I do if I encounter installation issues?
Try clearing the npm cache using npm cache clean --force, delete the node_modules directory and reinstall dependencies with npm install, and ensure all environment variables are set correctly.
5. How can I manage different Node.js versions?
Use Node Version Managers like nvm for macOS/Linux or nvm-windows for Windows to efficiently manage and switch between different Node.js versions.
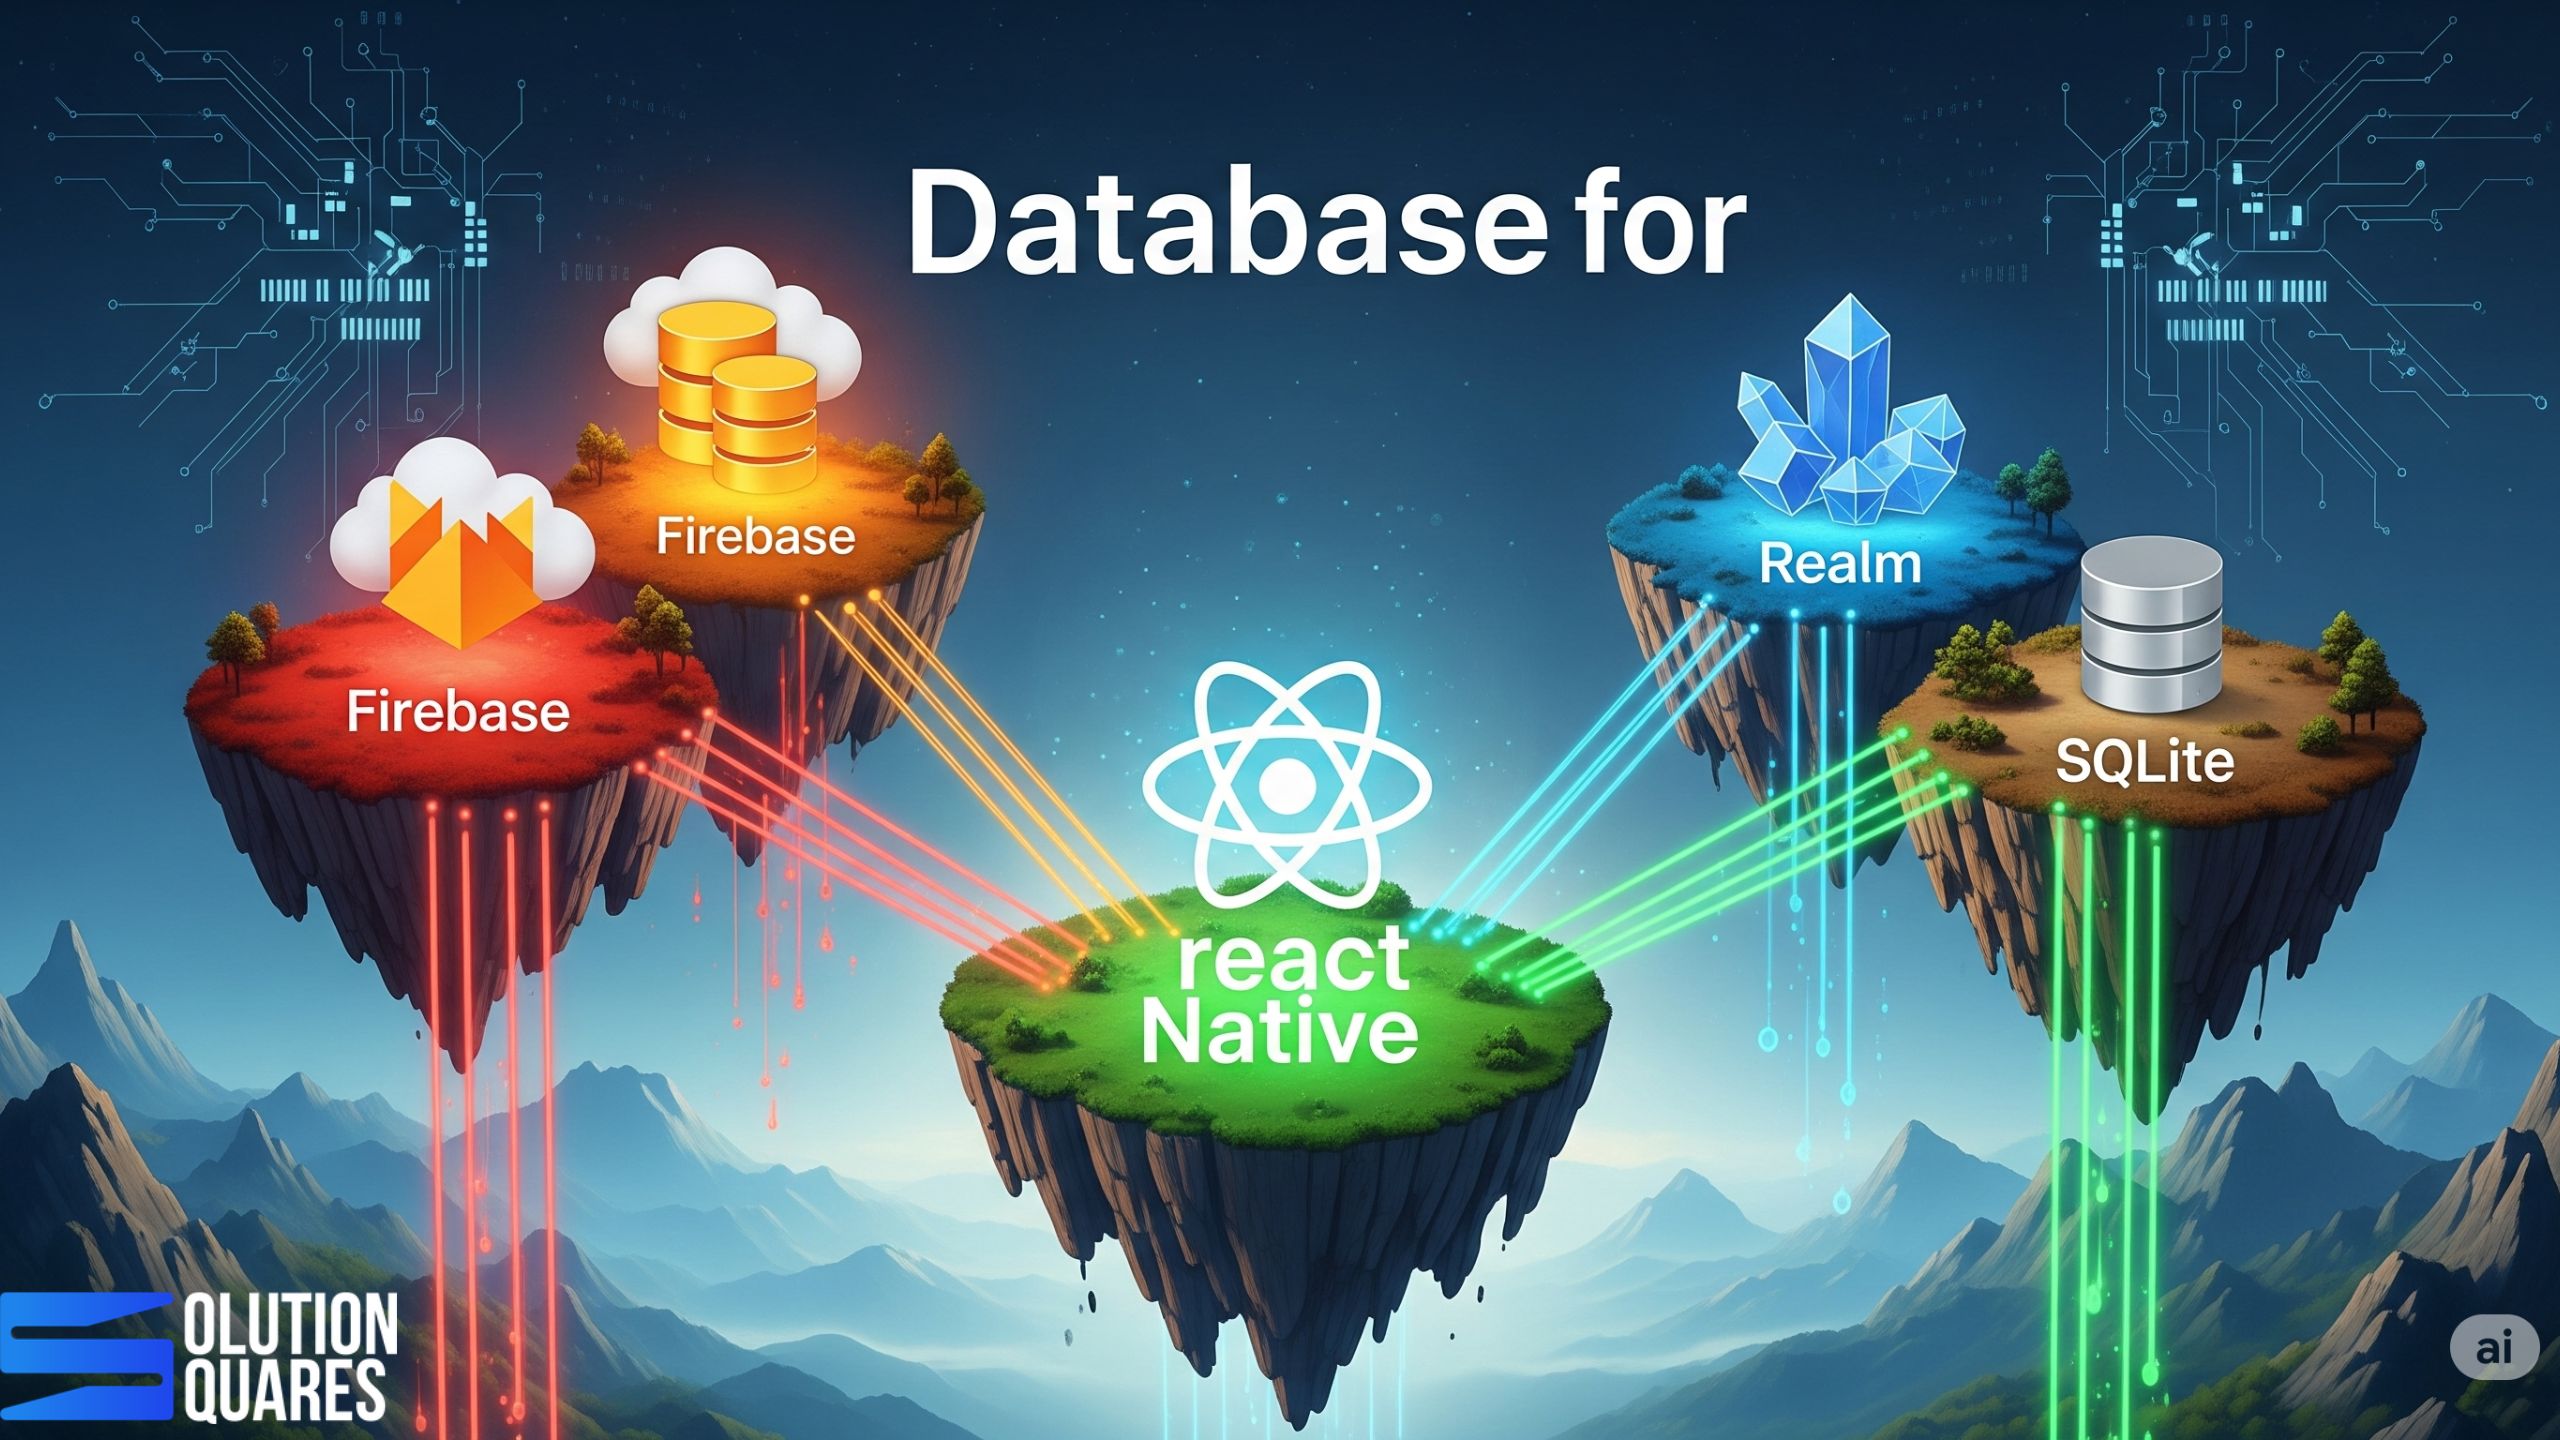
Choosing the right database is essential for optimal performance and user experience in React Native apps.
Firebase, Realm, and SQLite are leading database options, each with unique strengths.
Firebase offers real-time synchronisation and scalability, suitable for dynamic applications.
Realm excels in offline capabilities and high performance for local data storage.
SQLite is ideal for structured, file-based data management without real-time requirements.
Choosing the Best Database for Your React Native App
Selecting the right database is a critical decision that significantly impacts the performance, scalability, and maintainability of your React Native applications. The database you choose significantly impacts how your app stores and manages data, which in turn affects the app’s functionality, responsiveness, and scalability.
For agencies building mobile solutions for clients, understanding the various database options and their trade-offs is paramount to delivering successful projects. This guide outlines key considerations and popular database choices to help you make informed decisions.
Why the Right Database is Crucial for Your React Native App
Effective data storage in React Native plays a pivotal role in your app’s overall performance and user experience. Choosing the appropriate database can enhance your app’s ability to manage real-time updates, operate offline, and secure user data. Let’s explore how to identify the best databases available for these purposes.
How to Select a Database?
Data storage in React Native involves the technologies used to store, retrieve, and manage data. It includes local storage on the device and cloud-based solutions that provide data syncing across platforms.
Before diving into specific database technologies, let’s consider the crucial factors that will influence your selection:
Data Structure and Relationships: How is your application’s data organised? Does it involve complex relationships, or is it primarily document-based? Relational databases excel at structured data with clear schemas and relationships, while NoSQL databases offer more flexibility for unstructured or semi-structured data.
Offline Capabilities: Does your app need to function when the user is offline? If so, you’ll need a database that supports local storage and synchronisation with a remote backend when connectivity is restored.
Scalability Requirements: How much data do you anticipate your app will handle, and how many concurrent users will there be? Some databases are better suited for horizontal scaling (distributing data across multiple servers) than others.
Performance Needs: What are the performance-critical aspects of your application? Do you need low-latency reads and writes, or is data processing more intensive? Different databases offer varying performance characteristics for different workloads.
Development Complexity and Cost: Consider the ease of integration with React Native, the learning curve for your development team, and the hosting and maintenance costs associated with each database option.
Security: Ensure the database offers robust security features to protect sensitive user data.
Here’s an overview of some of the most common database choices for React Native projects, categorised for clarity:
Local Databases (for Offline Support)
Realm: A mobile database that runs directly on the device. Realm is known for its speed, ease of use, and excellent offline synchronisation capabilities. It supports complex data models and offers strong encryption.
SQLite: A widely used, lightweight, and embedded relational database. While powerful, integrating SQLite with React Native often requires third-party libraries and manual schema management.
AsyncStorage: A simple, unencrypted key-value store built into React Native. Suitable for storing small amounts of non-relational data but not recommended for complex data or sensitive information.
Cloud-Based Backend Databases
Firebase (Firestore): A NoSQL document database offered by Google Cloud. Firestore is highly scalable, provides real-time data synchronisation, and offers a generous free tier. Its ease of integration with React Native makes it a popular choice.
AWS Amplify (DataStore & DynamoDB): AWS Amplify provides a set of tools and services for building mobile and web applications. DataStore offers an abstraction layer with built-in offline capabilities that can sync with the fully managed NoSQL database DynamoDB in the cloud. DynamoDB is highly scalable and performant.
Supabase: An open-source alternative to Firebase, offering a PostgreSQL database as a service along with features like real-time subscriptions, authentication, and storage. Supabase provides the power of a relational database with developer-friendly tools.
MongoDB Atlas: A fully managed cloud database service for MongoDB, a popular NoSQL document database. MongoDB is known for its flexibility and scalability, making it suitable for applications with evolving data schemas.
Other Cloud Providers (e.g., Azure Cosmos DB, Google Cloud SQL/Cloud Spanner): Major cloud platforms offer various managed database services, including both NoSQL and relational options. These can be excellent choices if your client’s infrastructure is already tied to a specific cloud provider.
Making the Right Choice for Your Client’s Project
The “best” database ultimately depends on the specific requirements of your client’s React Native application. Consider the following questions during your decision-making process:
What are the core functionalities of the app and how will data be used?
Is robust offline support a critical requirement?
What are the anticipated data volume and user growth projections?
Does the project have specific security or compliance needs?
What is the development team’s familiarity and expertise with different database technologies?
What is the client’s budget for hosting and maintenance?
By carefully evaluating these factors, your agency can select a database that aligns with the project’s technical needs and business objectives, ensuring a performant, scalable, and maintainable React Native application.
Ready to Build Powerful React Native Apps?
Contact us today for a free consultation to discuss the best database strategy for your next React Native project! We have the expertise to guide you in choosing and implementing the optimal solution to meet your client’s needs and deliver exceptional mobile experiences.
Firebase vs. Realm: A Detailed Comparison
Firebase:
Overview: A comprehensive Backend-as-a-Service that offers more than just a database. Its real-time capabilities and cloud services make it a versatile choice for apps that require constant data syncing.
Pros: Streamlines application development with extensive support and automatic scaling.
Cons: May get expensive as scalability needs grow; not optimised for local-only data storage.
Realm:
Overview: Realm is optimised for local storage, offering excellent data management and synchronisation services through Realm Sync.
Features/Benefits: Real-time automatic updates, strong offline capabilities, and data encryption.
Pros: High performance and great for complex, offline-first applications.
Cons: Cost associated with Realm Sync and less straightforward cloud integration.
Comparative Analysis: Firebase vs. Realm
Feature
Firebase
Realm
Real-time sync
Excellent
Good with Realm Sync
Offline support
Yes
Exceptional
Security
Strong rule-based security
Robust encryption offered
Scalability
High scalability in the cloud
Primarily local scalability
Integration
Easy integration
Requires initial setup for sync
SQLite for React Native
SQLite offers a reliable choice for those who need a lightweight, file-based system for structured data. It provides full SQL capabilities and is suitable for applications without the need for cloud-backed features. Its major advantage is operating independently from network connectivity, making it an excellent option for devices with frequent or prolonged offline periods.
Factors to Consider When Choosing a Database
Deciding on a database often depends on several factors:
Project Scalability: Cloud databases like Firebase are advantageous for growing applications due to their backend scalability. In contrast, Realm and SQLite are constrained by local storage limits.
Development Team Expertise: Your team’s familiarity with database management can determine the best choice, whether cloud-based or local solutions.
Budget: Costs can vary significantly between databases, especially when considering cloud services versus local storage solutions.
Conclusion: Making the Right Choice
Choosing the right database for your React Native app involves balancing various factors, including functionality, scalability, cost, and development preferences. Each database offers unique advantages that may suit different types of projects:
Firebase is ideal for dynamic, collaborative applications requiring real-time data.
Realm shines in apps where performance and offline access are critical.
SQLite excels at straightforward data management tasks with its robust SQL support.
Before making a decision, assess your specific requirements and consult detailed documentation and resources to understand the best practices for implementing your chosen database. [Learn More]
Further Reading and Resources
Official Documentation: Explore detailed guides and API documentation provided by Firebase, Realm, and SQLite.
Tutorials and Integration Guides: Check platforms like Back4App and RxDB for practical, hands-on integration advice. [Explore]
Frequently Asked Questions
1. What is the difference between a local and a cloud database for a React Native app?
A local database is an embedded database that stores data directly on the user’s device. This is crucial for enabling offline functionality, as it allows the app to work even without an internet connection. A cloud database, on the other hand, stores data on remote servers. It provides the main data repository for your application, enabling synchronisation across multiple devices and users.
2. Why would a mobile app need a local database?
A local database is essential for any app that needs to function reliably without an internet connection. It provides offline access to data, improves the app’s responsiveness by reducing network latency, and helps maintain a smooth user experience even in areas with poor connectivity.
3. What is the main difference between SQL and NoSQL databases? Which one should I choose for my project?
SQL (Relational) databases, like PostgreSQL, use structured tables with predefined schemas and are ideal for applications with complex data relationships and a need for data integrity.
NoSQL (Non-Relational) databases, like Firestore or MongoDB, are schema-less and store data in flexible formats (e.g., documents, key-value pairs). They are better suited for large-scale applications with unstructured data and high scalability requirements. The “best” choice depends on your project’s specific data structure and scalability needs.
4. Can a single database handle both offline data and cloud synchronisation?
Yes, some database solutions like Realm and AWS Amplify’s DataStore are designed to handle both local storage and seamless cloud synchronisation. They automate the process of syncing data between the local database on the device and the cloud backend, greatly simplifying development.
5. How do databases like Firebase and Supabase differ?
Both Firebase and Supabase provide a suite of backend services, including a database, authentication, and file storage. The main difference lies in their database technology:
Firebase (Firestore) is a NoSQL document database, known for its real-time capabilities and ease of use.
Supabase is an open-source alternative built on a PostgreSQL (SQL) database, offering the benefits of a relational database with a similar real-time functionality. The choice often comes down to your preference for a SQL or NoSQL data model.
6. Does the choice of database affect the performance of my React Native app?
Yes, absolutely. The database choice can significantly impact app performance, particularly for data-intensive applications. A poorly chosen database can lead to slow load times, UI lag, and increased battery consumption. Factors like query efficiency, data indexing, and the database’s ability to handle concurrent reads and writes all play a role in the overall performance of your app.
React Native enables cross-platform mobile app development using JavaScript and React.
Choosing React Native without Expo offers greater flexibility and control over native code.
Setting up a bare React Native project involves configuring native environments for iOS and Android.
Understanding the differences between React Native CLI and Expo CLI is crucial for project setup.
Migrating from Expo to bare React Native requires careful planning and execution.
Adhering to best practices ensures efficient development and maintenance of React Native applications.
Harness the Power of React Native without Expo: A Comprehensive Guide
Overview of React Native
React Native has revolutionised the mobile app development landscape by allowing developers to build cross-platform apps using React and JavaScript. This technology is favoured by industry giants like Meta, Microsoft, and Shopify, who leverage it for shared codebases and swift iteration cycles. By utilising React Native, companies can maintain a single codebase while deploying to both iOS and Android platforms.
Developing React Native applications without Expo, often referred to as the bare workflow, is a professional approach that offers greater flexibility and control over your project. This is the preferred method for agencies and clients who require deep customisation, access to specific native features, and direct control over the build process.
In this guide, our primary focus is on React Native without Expo. Opting for this approach gives developers maximum control over native code and build configurations, essential for tailor-made solutions in complex projects.
Alternatives to Expo
For developers seeking enhanced customisation, alternatives to Expo include the React Native CLI for a purely bare setup and Expo’s Bare Workflow for a semi-managed environment. These options offer varying degrees of control over the development environment (ShiftAsia, Godel Technologies).
Understanding React Native and Expo
What is React Native?
React Native is a framework designed for building native apps using JavaScript. This technology bridges the gap between web development and mobile app platforms like iOS and Android, facilitating the creation of UI components with a single codebase (Godel Technologies).
Introduction to Expo
Expo provides an open-source platform layered atop React Native, enhancing the development process with a streamlined setup and a rich set of integrated services and SDKs. The Managed workflow simplifies the initial setup, allowing for rapid development cycles and easy implementation of features such as push notifications and OTA updates (Utilities Online, Godel Technologies, Dev.to).
Comparison Between Expo and Bare React Native
Expo Managed Workflow: Offers ease of use with minimal setup requirements, ideal for faster project onboarding. However, it limits customisation of native modules unless opting for Development Builds or ejecting (Utilities Online, Dev.to).
Bare React Native (No Expo): Provides full access to the native project environment, allowing for extensive customisation and optimal performance tuning. Although it involves higher complexity in setup and maintenance, it offers unparalleled flexibility (ShiftAsia, Godel Technologies).
Hybrid Approach: Utilising Expo Development Builds can integrate custom native modules while retaining many benefits of the Expo ecosystem (ShiftAsia).
Reasons to Choose React Native without Expo
While Expo’s managed workflow is excellent for rapid prototyping and simple apps, it abstracts away native code and can become a limitation for complex projects.Opting for the React Native CLI (the bare workflow) provides several key benefits:
Full Native Control: You have direct access to the android/ and ios/ folders, allowing you to modify native code, add custom native modules, and integrate third-party libraries that are not supported by Expo.
Customisation: Agencies can implement highly customised features, fine-tune performance, and configure every aspect of the build pipeline, from code signing to app flavours.
Reduced App Size: Because you only include the native dependencies your app needs, the final binary size can be significantly smaller compared to Expo’s managed workflow, which includes a large number of pre-built APIs.
CI/CD Integration: The bare workflow is more straightforward to integrate with robust Continuous Integration/Continuous Deployment (CI/CD) pipelines using tools like Fastlane or Bitrise.
Greater Flexibility: Developers can directly modify Xcode and Gradle settings, incorporate custom native code, and customise build pipelines to meet specific enterprise needs. This level of control is crucial for projects with unique performance and security requirements.
Performance Optimisations for Complex Applications: Optimise performance by customising the Hermes engine settings, employing ProGuard/R8 optimisations, and selectively including libraries to reduce the app size and improve startup time.
Avoiding Expo’s Limitations and Dependencies: Operating without Expo eliminates dependencies on the Expo SDK release cycles and managed services, providing autonomy over when and how to update the application framework and integrate new features .
Setting Up Bare React Native
Definition
A bare React Native setup mirrors a traditional native development environment, using the React Native CLI, Android Studio, and Xcode to manage platform-specific projects. This setup bypasses Expo’s managed environment, offering developers complete control over the native configurations.
Step-by-Step Guide to Initialising a Bare React Native Project
Prerequisites Installation: Install critical development tools like Node.js (LTS version), Watchman (for macOS users), and Java 17 for Android development. Set up Android Studio SDKs and configure the Android environment, along with Xcode and CocoaPods for iOS development. Make sure Android emulators or iOS Simulator are enabled for testing. Learn more.
Create the Project: Use the command: npx react-native@latest init MyApp --template react-native-template-typescript.
iOS Setup: Navigate to the iOS directorycd ios && pod install && cd .., then open ios/MyApp.xcworkspace In Xcode to configure the app’s signing and schemes.
Android Setup: Ensure ANDROID_HOME that the Java toolchain is correctly configured. Open the android/ folder in Android Studio to synchronise the Gradle settings.
Running the Application: Launch the app on iOSnpx react-native run-ios, or on Android with npx react-native run-android.
Project Structure Tips
Create a A A src directory to house the application code, organising it into feature modules. Isolate native code in the ios/ and android/ directories. Centralise environment variables with tools like react-native-config and ensure that secrets are stored securely outside the source code.
Managing Native Code and Integrations
Opt for libraries that support autolinking and follow best practices for TurboModules and the new React Native architecture when developing custom modules. Utilise CocoaPods post_install hooks and adjust Gradle build types/flavours for managing different build environments. Document all integration steps in the project’s README to minimise dependencies on individual developers’ expertise.
React Native CLI Setup
Introduction to React Native CLI
The React Native CLI is a command-line utility that lays the foundation for React Native projects, interfacing directly with Metro bundler and native build tools, providing a streamlined workflow without the need for Expo’s abstraction.
Installation and Configuration
Initialise React Native projects using the npx command, which avoids the need for global installations and ensures the use of the latest version available: npx react-native@latest init .... Set up development environments by configuring Android Studio SDKs, enabling emulators, and preparing the Gradle JDK. On macOS, install CocoaPods and manage Xcode signing settings to complete the iOS configuration.
Differences Between React Native CLI Setup and Expo CLI
Expo CLI/Managed Workflow: Expo CLI requires minimal native setup and offers instant testing capabilities on physical devices via Expo Go. However, it imposes constraints on SDK customisation and native module integration.
React Native CLI: Allows extensive control over native modules and configurations, requiring manual setup of development toolchains. Unlike with Expo Go, building and testing native changes are necessary, though this provides unlimited access to native functionalities.
Common Commands and Workflows
Starting the Metro Bundler:npx react-native start
Launching Applications:
On iOS: npx react-native run-ios
On Android: npx react-native run-android
Linking Dependencies: Autolinking simplifies the process, but manual execution of pod install For iOS or a Gradle synchronisation for Android may be necessary when adding new libraries.
Releasing Applications: Utilise native build pipelines such as Xcode Archive/TestFlight for iOS and Gradle Assemble/Upload for Android. Integration of continuous integration tools like Fastlane or GitHub Actions can automate builds and deployments, further streamlining the release process.
Migrating from Expo to Bare React Native
Considerations Before Migrating
Before moving away from Expo, inventory all uses of the Expo SDK and assess the feasibility of replacing them with native or other third-party alternatives. Evaluate whether Expo Development Builds, which allow some custom native integration, might meet the needs of your project without fully migrating. Additionally, plan for the infrastructure and processes required for building, signing, and deploying apps previously managed by Expo’s EAS services.
Step-by-Step Migration Process
Audit Dependencies: Catalogue all expo-* packages, configuration plugins, and instances where Expo APIs are employed.
Choose a Migration Path:
Hybrid Approach: If retaining some Expo benefits is desirable, consider using Expo Development Builds with added custom native modules.
Full Migration to Bare React Native: If complete independence from Expo is preferred, eject from the managed workflow or transition to a bare setup, removing all Expo-specific packages and configurations.
Initialising a Bare Project or Ejecting: Start a new React Native project using the CLI and gradually move existing code over, or utilise Expo’s tools to help transition from a managed to a bare workflow. Adjust configuration files such as app.json or app.config.js to their native counterparts, Info.plist for iOS and AndroidManifest.xml for Android.
Replace Expo APIs: Identify suitable replacements for Expo APIs, such as using react-native-permissions for permissions management, react-native-push-notification or Firebase for notifications, react-native-image-picker for media selection, and react-native-geolocation-service for location services. Further, native modules may also be developed to fulfil specific functionalities not covered by existing libraries.
Configure Native Projects:
iOS: Manage CocoaPod dependencies, set up necessary app capabilities like background modes and notifications, and configure signing certificates.
Android: Adjust Gradle dependencies, set permissions in AndroidManifest.xml, and integrate necessary Kotlin or Java modules.
Validating Builds: Thoroughly test the application on physical devices and emulators to ensure stability and functionality. Additionally, set up continuous integration and deployment pipelines to automate build and release processes, and prepare app store assets and signing credentials for submission.
Post-Migration Handling
To maintain consistency and stability post-migration, lock down versions of dependencies in Podfile.lock and use Gradle version catalogues. Document all steps required for manual integration to reduce reliance on specific team members’ knowledge and expertise.
Troubleshooting Common Issues
Build Failures: Align versions of React Native, the Hermes engine, Android Gradle Plugin, and Xcode to resolve issues related to SDK version mismatches. Troubleshoot CocoaPods or Java version discrepancies to address build errors.
Missing Permissions or Credentials: After removing dependencies on Expo, explicitly configure Info.plist on iOS and AndroidManifest.xml on Android to include required permissions and app entitlements.
Autolinking Gaps: Double-check Podspec files and Gradle configurations for any mismatches, and run pod install or clean project caches to fix linking issues.
Best Practices for Developing React Native without Expo
Managing Dependencies and Updates
Stay informed about updates to React Native by regularly reviewing official release notes. Test new versions and major changes on separate branches to ensure compatibility with existing code before merging into the main project. Opt for stable, well-maintained libraries and pin versions to avoid unexpected updates. Use tools like Renovate or Dependabot to automate dependency management and keep your project current with minimal manual intervention. Discover more.
Performance Optimization
Enable the Hermes JavaScript engine to enhance performance and reduce the size of your application. As Fabric and TurboModules reach stable release phases within the React Native ecosystem, start integrating them into your projects to leverage their performance improvements. Split your JavaScript bundle to load code asynchronously and lazily load screens that are not critical to the initial user experience. Memoise resource-heavy components to prevent unnecessary re-renders and keep your app responsive. Learn how.
Ensuring Cross-Platform Compatibility
Conduct frequent tests on both iOS and Android platforms to catch and fix platform-specific issues early. Adjust app designs to follow platform-specific guidelines where appropriate to maintain a native look and feel. Implement feature flags judiciously to manage experimental features and use platform-specific file extensions (such as .ios.tsx or .android.tsxto organise code that diverges across platforms.
Utilising Community Resources and Libraries
Engage with the broader React Native community by attending conferences, participating in forums, and contributing to open-source projects. Take advantage of established libraries like React Navigation for routing, Reanimated for complex animations, and React Native Gesture Handler for touch interactions. Regularly compare the benefits and drawbacks of using Expo versus bare React Native setups to stay informed about the best tools and practices for your specific project needs.
Encouragement for Developers
Every app development project has unique requirements that may benefit from different aspects of the React Native ecosystem. We encourage developers to begin with a capability matrix to assess the features and integrations that are crucial for their app. Depending on the level of customisation and control needed, either a fully bare setup or a hybrid approach using Expo Development Builds may provide the optimal path forward.
Whatever choice you make, React Native offers a flexible and powerful framework for building high-quality, native apps. As the ecosystem continues to evolve, keep exploring new tools and techniques that can enhance your app’s performance, maintainability, and user experience.
Additional Resources
For further reading and more detailed guides on both bare React Native setups and using Expo tools, please refer to the following resources:
Expo Documentation – Instructions on using Expo Managed workflows and integrating Expo Development Builds.
Awesome React Native – An “awesome” type curated list of React Native components, news, tools, and learning material.
React Native Radio Podcast – Regular podcasts featuring experts discussing trends, features, and challenges in the React Native world.
By staying engaged with both the documentation and the community, developers can keep their skills sharp and their projects aligned with the latest best practices in React Native development. Whether you choose to work with Expo or without it, the wealth of resources available ensures you have the support needed to build exceptional mobile applications.
Conclusion
Choosing between React Native with or without Expo involves weighing the balance of ease of use against the need for direct control over the native environment. While Expo offers a streamlined, managed experience with quick setup and easy updates, a bare React setup provides complete freedom to integrate any native module, customise build configurations, and optimise the app to the finest detail.
As you consider your project’s requirements, team skills, and timeline, use this guide to evaluate the best approach for your app development process. By understanding the trade-offs and exploring the options available, you can make an informed decision that aligns with your goals and resources.
Frequently Asked Questions
1. What is the biggest challenge of the bare workflow?
The biggest challenge is setting up and maintaining the native development environment. This requires expertise in native Android and iOS development, as well as manual management of dependencies and build configurations.
2. How does the bare workflow affect the development timeline?
While the initial setup might take longer compared to Expo’s managed workflow, the bare workflow can save time in the long run for complex projects. You avoid the limitations of Expo and can implement advanced features without having to “eject” from the managed workflow, which can be a complex and time-consuming process.
3. Can we use any third-party library with the bare workflow?
Yes. The bare workflow is the only way to access and integrate with all the native libraries available for React Native. Unlike Expo’s managed workflow, which has a curated list of supported APIs, the bare workflow gives you the freedom to choose any library that meets your project’s needs.
3. Should I choose native or hybrid app development?
If performance and access to device-specific features are critical, native development is preferable. If budget and development speed are priorities, hybrid development may be suitable.
4. What are some cost-saving strategies for app development?
Prioritising features for an MVP, utilising cross-platform development, and outsourcing to cost-effective regions are effective strategies to manage costs.
5. Why is ongoing maintenance important for my app?
Regular maintenance ensures your app remains competitive, secure, and compatible with the latest devices and operating systems.
Key advantages include native performance, access to platform-specific features, and seamless ecosystem integration.
Future developments like the Fabric architecture promise improved UI performance across platforms.
Unlocking Desktop Potential: React Native for macOS and Windows
Introduction
React Native for macOS is revolutionising desktop application development by extending the powerful capabilities of React Native beyond mobile platforms. As a leading JavaScript framework originally designed for mobile app development, React Native’s expansion into the desktop sphere encompasses both macOS and Windows, catering to a growing interest in writing versatile applications that run across multiple platforms.
As the digital landscape evolves, the demand for high-quality desktop applications is making a resurgence. For agencies and clients with an existing React Native mobile presence, extending your application to the macOS desktop offers a powerful way to expand your user base and deliver a seamless cross-platform experience. By leveraging React Native for macOS, you can empower your team to build a native macOS app from your existing codebase, providing a truly unified solution.
Furthermore, it adheres to the “learn once, write anywhere” principle, allowing developers familiar with React and React Native to expand into desktop development without needing to switch languages or tooling.
Overview of React Native for Desktop Development
The journey from mobile to desktop application development with React Native has been facilitated by community projects and significant contributions from corporations like Microsoft, making it possible to maintain a single codebase for web, iOS, Android, and now desktop platforms. Moreover, this strategic move considerably boosts development efficiency and broadens the scope of applications developers can build.
The Power of Native Desktop
React Native for macOS and Windows is not a web-based solution. These frameworks compile your JavaScript code into real, native applications that run on the operating system. This is the key to delivering a superior user experience with seamless performance and a truly native look and feel.
React Native for Windows
Official Support: Backed by Microsoft, this framework offers deep integration with the Windows ecosystem. It provides direct access to platform-specific APIs and is well-documented and maintained.
Performance: It utilises DirectComposition for rendering, which provides direct access to the GPU, making it excellent for high-performance and visually-intensive applications.
Scalability: The official support makes it highly scalable for enterprise-level applications that need to integrate with a wide array of Windows-specific services.
React Native for macOS
The react native macOS library specifically adapts React Native for the macOS environment, bringing typical React components and the JavaScript framework into the native macOS application domain. Additionally, this integration allows access to macOS-specific UI controls and features directly from JavaScript.
Native Look and Feel: This framework uses Apple’s native AppKit UI components. Your application will look and feel just like a traditional macOS app, ensuring a consistent user experience.
Code Reusability: It allows you to share a substantial amount of your business logic and code between your iOS and macOS applications, accelerating development and reducing maintenance overhead.
Ecosystem: As a community-driven project, it has a robust and active community, with a growing ecosystem of tools and libraries.
Why Choose React Native for macOS?
React Native for macOS is a community-driven project that enables developers to build native desktop applications using React Native. This approach offers significant advantages for agencies:
Unmatched Code Reusability: The core value proposition is the ability to share a significant portion of your codebase between your iOS, Android, and macOS applications. This dramatically reduces development time and costs, allowing you to get a high-quality desktop app to market faster.
Truly Native Performance: Unlike web-based frameworks, a React Native macOS app is compiled into a native application. It uses Apple’s own AppKit UI components, ensuring that your app looks, feels, and performs just like a traditional macOS application. This provides a superior user experience with smooth animations and a familiar interface.
Leverage Existing Expertise: If your agency already has a skilled React Native team, they can immediately begin building for macOS. There’s no need to hire a separate native macOS (Swift/Objective-C) team, making it a highly cost-effective and efficient solution.
Current Version & Release Insights
The latest published version is 0.78.5, released just 8 days ago on npm.
Initialise and run your project using React Native command-line tools.
Advantages of Using React Native for macOS Applications
The key benefits include code reuse across mobile and desktop platforms, familiar React patterns, and achieving native app performance with deep system integration.
Reusability: Leverage your existing React components and business logic across iOS, Android, and now macOS.
Developer Experience: Enjoy features like live/hot reloading and a unified JavaScript-based workflow with npm.
Community & Support: Backed by Microsoft, it benefits from active maintenance and RFCs, while being open source under the MIT License
Windows: Windows OS, Visual Studio, react-native-windows library.
Both platforms facilitate near-native performance owing to improved bridges and threading models like React Native’s Fabric project.
Performance Comparison Between macOS VS Windows
Performance in React Native is tied to its ability to efficiently bridge JavaScript code to native UI components.
React Native for Windows: This framework is an official Microsoft project, granting it a high degree of integration with the Windows platform. It uses DirectComposition for rendering, which provides direct access to the GPU, enabling smooth animations and high-performance graphics. This deep integration makes it well-suited for demanding, visually rich applications and complex UIs.
React Native for macOS: As a community-driven project, React Native for macOS leverages Apple’s native AppKit framework. While this ensures a true native look and feel, it may not have the same level of direct-to-metal optimisation found in the Windows framework. However, it still delivers excellent performance for most standard business and consumer applications, as it compiles to a native application rather than a web-based wrapper.
Scalability Comparison Between macOS VS Windows
Scalability refers to how easily the framework can handle growing complexity and features in a large-scale application.
React Native for Windows: Due to its status as an official Microsoft project, this framework boasts a robust and well-documented API. It’s designed to seamlessly integrate with the broader Windows ecosystem, including UWP (Universal Windows Platform) and WinUI, which makes it highly scalable for enterprise-level applications that need to access a wide array of Windows-specific services and hardware. This support provides a predictable and reliable path for adding new features over time.
React Native for macOS: The community-driven nature of this project means that its scalability depends on the maturity of its codebase and available third-party libraries. While it has proven capable of building and maintaining large-scale apps, integrating with certain niche or brand-new macOS APIs may require a custom native module to be written. This can add a layer of complexity for projects with highly specific feature sets.
react native expert advice
Tools and Resources
For agencies looking to unlock desktop potential with React Native for macOS, a specific set of tools and resources is required to ensure a smooth and professional development workflow. Here is a breakdown of the essential components and where to find them.
1. Core Framework and Environment
React Native for macOS: This is the foundational framework that allows you to build native macOS apps using React and JavaScript. It’s a key part of the official React Native “Out-of-Tree Platforms” and is actively developed by Microsoft.
macOS: Development is tied to the macOS ecosystem. You will need a Mac device to build and run your applications.
Xcode: Apple’s official IDE is essential. It’s required for building, debugging, and deploying your app, as it handles the compilation of the native macOS components.
Node.js & React Native CLI: These are the core command-line tools for a standard React Native project. You’ll use the CLI to initialise your project and run your application on a macOS simulator or device.
2. UI and Component Libraries
While you can use many standard React Native libraries, some are particularly useful or have specific support for macOS.
React Native for macOS: This framework’s core components are the building blocks. You should become familiar with its specific components and APIs, as they are tailored for the macOS user interface.
React Navigation: The standard for navigation in React Native, it works seamlessly with the macOS framework to create a multi-screen desktop application.
React Native Elements & Gluestack UI: These popular UI toolkits provide a wide array of pre-built, customizable components that can help accelerate development and maintain design consistency across your desktop and mobile apps.
3. Development and Debugging Tools
Visual Studio Code (VS Code): A highly recommended code editor for React Native development. Its extensive marketplace of extensions, including “React Native Tools,” provides excellent features for code completion, debugging, and linting.
Reactotron: A powerful desktop app for inspecting your app’s state, API requests, and much more. It’s an invaluable tool for debugging and understanding the data flow in your application.
Jest: A JavaScript testing framework used for unit testing. It ensures the reliability and correctness of your application logic, which is crucial for large-scale projects.
ESLint & Prettier: These tools are used for maintaining code quality and consistency. They help enforce best practices and automatically format your code, which is essential for collaborative agency environments.
4. Key Resources and Documentation
Official GitHub Repository: The react-native-macos GitHub repository is the authoritative source for documentation, release notes, and community support.
React Native Official Docs: The official React Native documentation has a section dedicated to “Out-of-Tree Platforms” that provides specific guides for setting up and working with React Native for macOS.
Community Forums & Blogs: Engaging with the community on platforms like GitHub, Reddit, and various developer blogs can provide valuable insights and solutions to common challenges.
By leveraging these professional-grade tools and resources, your agency can efficiently build and deliver high-performance, native macOS applications that truly unlock the desktop’s potential.
Conclusion
React Native for macOS and Windows stands out as a formidable option for developers aiming to create robust, efficient, and visually appealing desktop applications. By leveraging the shared codebase approach, React Native facilitates streamlined, cross-platform development processes that cater to a modern computing environment.
Our team has proven expertise in building and deploying high-performance desktop applications with React Native for both macOS and Windows. We can help you leverage this powerful technology to expand your product’s reach and deliver a seamless experience to your users. Contact us for a free consultation today!
Call to Action
Lastly, for developers looking to dive deeper into React Native for desktop application development, exploring detailed documentation, engaging with community forums, and experimenting with tutorials are excellent next steps. Start your journey by visiting React Native Official and Microsoft Docs.
This extensive guide encapsulates the transformative capabilities of React Native, not just in mobile but in shaping the future of desktop applications, leveraging its versatile platform to innovate and push the boundaries of what’s possible in software development.
Frequently Asked Questions
1. What are the primary benefits of using React Native for desktop application development?
Using React Native for desktop allows developers to maintain a single codebase for multiple platforms, achieve native performance, and leverage React’s familiar patterns, thereby increasing development efficiency and reducing time-to-market.
2. How does React Native ensure performance parity between macOS and Windows applications?
React Native utilises optimised bridges and threading models, such as the Fabric architecture, which enhance UI performance and ensure that both macOS and Windows applications run efficiently with near-native performance.
3. What resources are recommended for developers new to React Native desktop development?
4. Is a React Native macOS app just a web app in a window?
No, absolutely not. This is a common misconception. Unlike frameworks that package a web view (like Electron), React Native for macOS renders a native UI. Your app directly uses AppKit components, resulting in superior performance and a true native look and feel.
5. What are the limitations of this approach?
While powerful, the framework is still community-maintained. This means that support for certain niche or newly released macOS APIs might not be available out of the box. For such cases, a skilled native developer can write a native module to bridge the functionality.
6. Does this save us money over a native build?
Yes. By sharing a substantial portion of the business logic and UI components with your mobile apps, you significantly reduce the amount of time and resources required for development. This is far more efficient than building and maintaining separate codebases for each platform.
7. How does a React Native macOS app compare to an Electron app?
While both can create desktop applications from a single codebase, they are fundamentally different. Electron builds a web app and embeds it in a native shell. React Native for macOS compiles to a truly native app that runs directly on the OS, giving you better performance, a smaller memory footprint, and a more seamless user experience.