Category: react native app development

React Native Development Services For iOS and android

Our React Native development services help businesses build stunning, high-performance mobile apps that work seamlessly on both iOS and Android. Instead of developing two separate applications, we leverage React Native’s single codebase to create efficient, cost-effective, and powerful solutions.

Why Choose React Native?

React Native is an open-source framework created by Facebook, a global tech leader. Furthermore, It uses the popular JavaScript library React, which web developers already know, to build truly native mobile applications. Moreover,  this means the user interfaces are rendered using platform-specific components, delivering a user experience that’s virtually indistinguishable from an app built with native languages like Swift or Kotlin.

Our React Native Services

We offer a comprehensive suite of services to meet your specific needs:

  •  Custom App Development: We create tailor-made mobile applications from scratch, focusing on your unique business requirements and user goals.
  • API Integration: We seamlessly integrate your app with third-party services and APIs to enhance functionality.
  • UI/UX Design: Our design team crafts intuitive, beautiful interfaces that ensure a smooth and engaging user experience.
  • Maintenance & Support: We provide ongoing support, updates, and maintenance to keep your app running smoothly and securely.
  • Migration Services: We help you migrate existing applications to the React Native framework, modernizing your app and improving its performance.

Indeed, We combine deep technical expertise with a collaborative approach to ensure your project is delivered on time and within budget. Whether you’re a startup looking to launch your first app or an established enterprise aiming to improve your mobile presence, our team is ready to help you achieve your goals. .

  • How To Boost Development With React Native Architecture?

    How To Boost Development With React Native Architecture?

    Key Takeaways

    • React Native Architecture is essential for building scalable and maintainable cross-platform mobile applications.
    • Understanding core components like the JavaScript Thread, Native Modules, Shadow Thread, and the Bridge enhances app performance.
    • Architectural patterns such as MVC, Flux, Redux, and MVVM play a crucial role in managing application state and structure.
    • Implementing scalability best practices, including component-based architecture and efficient state management, is vital for large applications.
    • Staying updated with future trends and emerging technologies ensures the longevity and competitiveness of React Native applications.

    Introduction

    At the heart of developing exceptional mobile applications using React Native lies its core foundation – the React Native Architecture. This architectural framework orchestrates the interactions between JavaScript and native code to yield smooth, cross-platform mobile experiences, essential for today’s diverse device ecosystem.

    React Native has transformed mobile app development by enabling developers to build cross-platform apps using a single codebase. However, to leverage its full potential, it’s essential to understand the architecture behind React Native.

    This blog post delves deep into the essential components of React Native architecture, its evolution, and covers best practices in scalability and performance optimisation. We also touch on architectural patterns and look forward to the emerging trends that will shape its future.

    Overview of React Native

    History and Evolution of React Native

    Introduced by Facebook in 2015, React Native has rapidly evolved into a robust framework for cross-platform mobile app development. It enables developers to write code once and deploy it across multiple platforms, saving time and resources.

    • Timeline Highlights:
      • 2015: React Native was launched by Facebook.
      • 2016-2018: Rapid adoption and community growth.
      • 2019-present: Continuous enhancements and introduction of new features.

    Don’t let complex app architecture slow you down. Get professional React Native support to optimise performance and scalability.” Start Your Project Consultation Now

    Understanding React Native Architecture

    React Native bridges the gap between JavaScript and native platforms (iOS/Android). Its architecture relies on:

    • JavaScript Layer – where application logic is written.

    • Bridge – facilitates communication between JavaScript and native modules.

    • Native Layer – platform-specific APIs (UI, camera, storage, etc.).

    Key Features of React Native

    The popularity of React Native can largely be attributed to these innovative features:

    • Write Once, Run Anywhere: Maximises developer efficiency by using a single codebase for both iOS and Android.
    • Hot Reloading: Facilitates immediate viewing of code changes, enhancing development speed.
    • Access to Native Performance: Ensures top-notch performance by utilising native components.

    The Evolution of React Native Architecture

    React Native’s architecture has evolved to enhance speed and flexibility:

    • Classic Architecture (Before Fabric & TurboModules)

      • Relied heavily on asynchronous bridging.

      • Performance bottlenecks in large, complex apps.

    • Modern Architecture (Fabric & TurboModules)

      • Fabric: New rendering system for better UI responsiveness.

      • TurboModules: Optimised way to load native modules on-demand.

      • JSI (JavaScript Interface): Enables synchronous and direct communication without performance lag.

    stratagic react native architecture

    In today’s fast-paced digital landscape, delivering high-quality mobile applications quickly and efficiently is paramount for any agency’s success. React Native has emerged as a powerful framework for building cross-platform mobile apps, offering the promise of code reuse and faster development cycles. However, simply adopting React Native isn’t enough. To truly unlock its potential and boost your agency’s development efficiency, a well-defined and strategically implemented architecture is crucial.

    Why a Solid Architecture Matters for Your React Native Projects

    Before we dive into the specifics, let’s understand why a thoughtful architecture is so critical for your agency’s React Native endeavours:

    • Increased Code Reusability: A well-structured architecture promotes the creation of modular and reusable components, not just across iOS and Android but also within different projects. This significantly reduces development time and effort for subsequent features and new applications.

    • Enhanced Maintainability: A clear separation of concerns and well-defined patterns makes the codebase easier to understand, debug, and update. This is crucial for long-term project success and reduces the cost of maintenance.

    • Improved Scalability: A robust architecture allows your applications to grow and evolve without becoming unwieldy. Adding new features and functionalities becomes less complex and less prone to introducing bugs.

    • Better Team Collaboration: A consistent and well-documented architecture provides a shared understanding for your development team, facilitating seamless collaboration and reducing integration headaches.

    • Faster Onboarding of New Developers: A clearly defined structure makes it easier for new team members to understand the codebase and contribute effectively, accelerating their onboarding process.

    • Reduced Development Time and Costs: By promoting code reuse, maintainability, and efficient collaboration, a strong architecture directly translates to faster development cycles and lower overall project costs – a significant advantage for your agency.

    • Higher Quality Applications: A well-architected application is generally more stable, performant, and less prone to errors, leading to higher client satisfaction.


    boost react native architecture

    Key Architectural Patterns and Principles for React Native Development

    Several architectural patterns and principles can significantly boost your agency’s React Native development efficiency. Here are some of the most relevant ones:

    1. Component-Based Architecture

    React Native’s fundamental building block is the component. Embrace a granular, component-based approach where you break down the UI into small, independent, and reusable components. This promotes modularity, testability, and maintainability.

    • Atomic Design: Consider adopting Atomic Design principles (Atoms, Molecules, Organisms, Templates, Pages) to create a systematic approach to component creation and organization.

    • Presentational vs. Container Components: Separate components responsible for UI rendering (presentational) from those handling data fetching and state management (container). This separation of concerns enhances reusability and testability.

    2. State Management Solutions

    Effective state management is crucial for building complex React Native applications. Choose a state management solution that aligns with your project’s scale and complexity:

    • React Hooks (useState, useContext, useReducer): For smaller to medium-sized applications, React’s built-in hooks can provide a simple and efficient way to manage local and global state. It useContext is particularly useful for prop drilling avoidance. useReducer can help manage more complex state transitions.

    • Redux: A popular and mature state management library with a centralised store, actions, and reducers. It offers predictability and maintainability for larger applications, but can introduce more boilerplate code. Consider tools like Redux Toolkit to simplify its usage.

    • MobX: A state management library that utilises observable data and automatic dependency tracking. It offers a more intuitive and less verbose approach compared to Redux, making it a good choice for developers who prefer a more reactive paradigm.

    • Recoil: An experimental state management library from Facebook that focuses on atoms (pieces of state) and selectors (derived state). It aims to provide a more granular and performant approach to state management.

    For diverse client projects, having expertise in multiple state management solutions (like React Hooks and either Redux or MobX) can provide flexibility and allow you to choose the best tool for each project’s specific needs.

    3. Navigation Architecture

    A well-structured navigation flow is essential for a positive user experience. React Navigation is the most popular library for handling navigation in React Native apps.

    • Choose the Right Navigator: React Navigation offers different types of navigators (Stack, Tab, Drawer). Select the ones that best suit your app’s navigation patterns.

    • Centralised Navigation Logic: Consider creating a dedicated module or service to handle navigation logic, making it easier to manage and update navigation flows across the application.

    • Deep Linking: Implement deep linking to allow users to navigate directly to specific content within your app from external sources.

    4. Data Fetching and Management

    Efficiently fetching and managing data from APIs is critical for most mobile applications.

    • Axios or Fetch API: Choose a reliable HTTP client for making API requests. Axios is a popular choice due to its features like interceptors and automatic JSON data transformation.

    • Data Caching: Implement data caching mechanisms (either in-memory or using libraries like react-query or swr) to improve performance and reduce unnecessary API calls.

    • Error Handling: Implement robust error handling mechanisms to gracefully handle API failures and provide informative feedback to the user.

    • GraphQL: For complex data requirements, consider using GraphQL, which allows clients to request only the specific data they need, reducing over-fetching and improving performance. Libraries like Apollo Client and Relay provide excellent GraphQL integration with React Native.

    Establish best practices for data fetching and error handling across your projects to ensure consistency and reliability. Explore the benefits of GraphQL for projects with intricate data dependencies.

    5. Styling and Theming

    Consistent and maintainable styling is crucial for branding and user experience.

    • Styled Components or StyleSheet API: React Native provides its own StyleSheet API, which offers performance benefits. Styled Components is a popular CSS-in-JS library that allows you to write CSS directly within your JavaScript components, promoting component-level styling.

    • Theming: Implement a theming system to easily manage and update the app’s visual appearance, including colours, fonts, and spacing. Libraries like styled-components and react-native-paper offer built-in theming capabilities.

    Standardise a styling approach across your projects to ensure visual consistency and simplify maintenance. Consider creating a reusable component library with pre-styled elements.

    6. Folder Structure and Code Organisation

    A clear and consistent folder structure is essential for maintainability and team collaboration. While there’s no single “right” way, here’s a common and recommended structure:

    • src/: Contains all your application code.

      • components/: Reusable UI components.

      • screens/: Application screens or views.

      • navigation/: Navigation-related code.

      • services/: API clients and data fetching logic.

      • store/: State management related code (e.g., Redux store, actions, reducers, or MobX stores).

      • hooks/: Custom React Hooks.

      • utils/: Utility functions.

      • assets/: Images, fonts, and other static assets.

      • theme/: Styling and theming configurations.

    • android/: Native Android project.

    • ios/: Native iOS project.

    Adopt a consistent folder structure across all your React Native projects to promote predictability and ease of navigation for your development teams.

    7. Testing and Quality Assurance

    Thorough testing is crucial for delivering stable and reliable applications.

    • Unit Testing: Test individual components and functions in isolation using frameworks like Jest and React Native Testing Library.

    • Integration Testing: Test the interaction between different components and modules.

    • End-to-End (E2E) Testing: Test the complete user flow of the application using tools like Detox or Appium.

    • Code Linting and Formatting: Use tools like ESLint and Prettier to enforce code style consistency and identify potential issues early in the development process.

     Implement a comprehensive testing strategy that covers different levels of testing. Integrate linting and formatting tools into your development workflow.

    8. Continuous Integration and Continuous Deployment (CI/CD)

    Automating the build, test, and deployment process can significantly accelerate your development workflow.

    • CI/CD Platforms: Utilise platforms like Jenkins, GitLab CI, GitHub Actions, or Bitrise to automate your CI/CD pipelines.

    • Automated Builds and Testing: Configure your CI/CD pipeline to automatically build your app and run tests whenever code changes are pushed.

    • Automated Deployments: Automate the deployment process to app stores (Google Play Store and Apple App Store) to streamline releases.

    Invest in setting up robust CI/CD pipelines for your React Native projects to improve efficiency and reduce the risk of manual errors during deployments.

    React Native application Agency

    Statistical Insights and Case Studies

    • According to React Native.dev, with over 2 million downloads each week and support from a large community of hundreds of thousands of developers, React Native is a widely utilised technology. 
    • Cross-platform development is the foundation for 99% of React Native’s work, according to Git Hub. 
    • React Native received 14.51 per cent of the vote in the Stack Overflow Developers Survey 2021, placing it fifth.
    • According to a survey regarding the state of JS, 16% of respondents indicated that they had used React Native, while less than 5% of respondents indicated that they had used NativeScript.
    • Currently, the number of React Native contributors on StackOverflow is 10 times more than the number of NativeScript contributors.
    • In April 2019, NativeScript had 145 GitHub contributors and 5,699 commits compared to React Native’s 1990 contributors and 17,625 commits.
    • For cross-platform development, around 35% of software developers worldwide use React Native, Statista reports.
    • According to a survey by StackOverflow in 2019, Flutter has a popularity of 75.4% while React Native has a popularity of 62.5%. This survey sought to determine the most loved framework by developers.

    Benefits of Modern React Native Architecture

    • Improved performance with reduced bridge overhead.

    • Smooth UI rendering using Fabric.

    • Faster startup times with Hermes.

    • Scalable code structure for enterprise apps.

    • True cross-platform consistency for iOS and Android.

    Future Trends in React Native Architecture

    The React Native ecosystem is evolving rapidly, and staying ahead of the curve is crucial for agencies looking to provide future-proof services. Based on the latest trends and predictions, here are the key architectural trends that will shape React Native in the coming years, with a focus on how they impact agencies and their clients.

    1. The New Architecture: A Foundational Shift

    The most significant trend is the full adoption of React Native’s “New Architecture,” a fundamental rewrite of the framework’s core. This is not just an update; it’s a complete reimagining that addresses long-standing performance and interoperability challenges.

    • Fabric Renderer: This new UI rendering system enables a more efficient, synchronous layout. For agencies, this means delivering smoother animations and more responsive user interfaces, which is critical for high-quality, high-performance client apps.

    • TurboModules: This new system for native modules allows them to be loaded lazily and more efficiently. This translates to faster app startup times and improved memory management, a key selling point for clients with complex applications.

    • JavaScript Interface (JSI): Replacing the old asynchronous bridge, JSI provides a direct, synchronous connection between JavaScript and native code. This eliminates a major performance bottleneck, allowing for real-time data processing and more seamless integration with native features.

    Impact on Agencies: Agencies that adopt the New Architecture for new projects will be able to build more performant and scalable apps. For existing projects, they should plan for an incremental migration to leverage these benefits and future-proof their clients’ applications.

    2. The Rise of TypeScript

    TypeScript, a superset of JavaScript that adds static typing, is no longer a “nice-to-have” but a standard. Its adoption is being accelerated by the New Architecture, which is built with type safety in mind.

    Impact on Agencies: By making TypeScript the default for new projects, agencies can:

    • Improve Code Reliability: Catch errors early in the development process, reducing bugs and debugging time.

    • Enhance Team Collaboration: TypeScript’s type definitions provide a clear contract for how different parts of the codebase interact, making it easier for teams to work together on large-scale projects.

    • Lower Maintenance Costs: A more stable and readable codebase means less time and money spent on long-term maintenance.

    3. Expansion Beyond Mobile (Universal Apps)

    React Native is no longer just for iOS and Android. With continuous improvements to React Native for Web and the official support for React Native for Windows and macOS, the framework is becoming a true cross-platform solution.

    Impact on Agencies: This trend offers agencies a powerful new value proposition for clients:

    • Single Codebase, Multiple Platforms: Agencies can use a single codebase to build an app for mobile, web, and desktop, drastically reducing development time and costs for clients.

    • Faster Time-to-Market: Launching a web MVP and then expanding to native mobile apps from the same codebase allows agencies to get a product to market faster and gather user feedback.

    • Consistent User Experience: A unified codebase ensures a consistent look and feel across all devices, enhancing brand identity and user satisfaction.

    4. Expo as a Complete Development Platform

    Expo has evolved from a simple prototyping tool into a robust, enterprise-grade development platform. With services like Expo Application Services (EAS), it is now a viable long-term solution for complex, production-ready applications.

    Impact on Agencies: For agencies, Expo simplifies the entire development and deployment lifecycle, offering:

    • Streamlined CI/CD: EAS automates the build and deployment process to app stores, reducing manual overhead and risk.

    • Over-the-Air (OTA) Updates: Agencies can push bug fixes and new features to their clients’ apps instantly without waiting for App Store or Google Play Store approval.

    • Simplified Native Integration: The Expo Modules API makes it easier to integrate native code and libraries without the complexities of “ejecting” from the Expo workflow.

    5. Increased Focus on Developer Experience (DX)

    The React Native ecosystem is prioritising a smoother and more efficient developer experience. This includes:

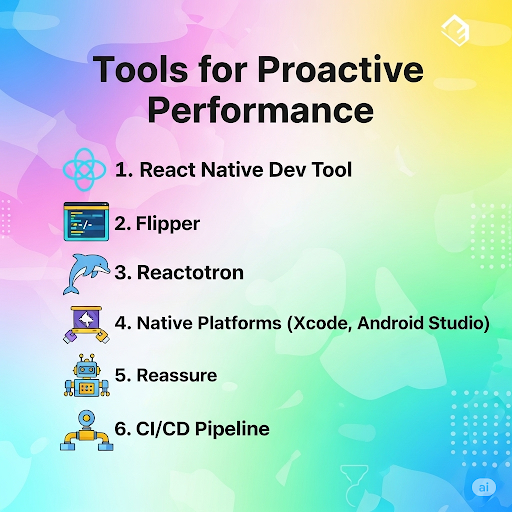
    • Enhanced Tooling: Improved debugging tools like Flipper, faster build times with the Hermes engine and Metro bundler, and better command-line interfaces.

    • Modular Architecture: A move towards micro-frontends and modular architecture allows large teams to work on separate features independently, boosting scalability and maintainability.

    • Advanced Libraries: The community continues to release high-quality, performance-optimised libraries for animations (e.g., Reanimated) and UI design systems (e.g., Tamagui), providing agencies with powerful tools to build sophisticated apps.

    Impact on Agencies: These improvements lead to faster development cycles, fewer bugs, and more efficient collaboration, directly translating to a better return on investment for your clients.

    The Agency Advantage

    For agencies, understanding and embracing these trends is a matter of staying competitive. By moving towards the New Architecture, adopting TypeScript, leveraging the universal app capabilities, and streamlining workflows with tools like Expo, your agency can offer:

    • Higher Quality Apps: More performant, stable, and scalable applications.

    • Greater Efficiency: Faster development, streamlined collaboration, and lower costs.

    • Strategic Partnership: Positioning your agency as a forward-thinking partner that is prepared to build future-proof solutions.

    Conclusion

    By strategically adopting React Native architecture, your agency can position itself as a leader in mobile app development, offering efficient, high-quality, and innovative solutions to your clients, ultimately driving your business growth and success.

    Ready to elevate your React Native projects? Implement the discussed architectural best practices and set your applications up for future success with us!

    Frequently Asked Questions

    1. How does React Native Architecture ensure app scalability?

    Through robust architectural patterns and best practices, which facilitate easy scaling and maintenance.

    2. What are the key components of React Native Architecture?

    Core components include the JavaScript Thread, Native Modules, Shadow Thread, and the Bridge.

    3. Why is state management crucial in React Native Architecture?

    Efficient state management systems bolster app performance and scalability by providing predictable and manageable state control.

    4. What are the future trends in React Native Architecture?

    Advances such as JSI and TurboModules are setting the stage for more integrated and efficient architectures.

    5. How can I optimise performance in my React Native app?

    Techniques like code splitting, lazy loading, and efficient state management are pivotal.

    “`

  • How To Boost App Efficiency With React Native App VS Code?

    How To Boost App Efficiency With React Native App VS Code?

    Key Takeaways

    • React Native enables efficient cross-platform mobile app development using a single JavaScript codebase.
    • Visual Studio Code (VS Code) offers a lightweight, highly customizable environment tailored for React Native development.
    • Key benefits of React Native include code reusability, native-like experience, live & hot reloading, and lower maintenance costs.
    • VS Code enhances productivity with features like rich extensions, built-in Git support, and IntelliSense.
    • Proper setup and configuration of VS Code are crucial for optimising the React Native development workflow.

    Introduction

    In the competitive world of mobile app development, efficiency and productivity are everything. Agencies and businesses want high-quality apps built faster, without compromising on performance.

    React Native, combined with Visual Studio Code (VS Code), has become the go-to development setup that empowers teams to deliver powerful apps at speed.

    This guide explores how React Native and VS Code work together to streamline workflows, improve collaboration, and maximise productivity.

    Why Choose React Native for App Development?

    React Native is an industry-leading framework that enables the creation of cross-platform mobile applications using JavaScript and React.

    This approach allows developers to perform iOS and Android app development simultaneously using a single codebase, which significantly enhances efficiency (PagePro).

    In the competitive software development market, the choice of development environment is crucial as it affects productivity, workflow smoothness, and code quality. This blog focuses on “React Native App VS Code,” detailing the advantages of using Visual Studio Code (VS Code) for React Native development.

    It provides insights into setup procedures, best practices, advanced tips, and comparative analysis with other Integrated Development Environments (IDEs).

    Overview of React Native

    React Native simplifies mobile app development, allowing for a single codebase for both Android and iOS platforms. This not only cuts down development time but also reduces costs significantly (PagePro).

    Key Benefits of React Native

    • Code Reusability: Up to 95% of the code can be used across different platforms, providing swift deliveries and cost efficiency (Grazitti).
    • Native-like Experience: React Native incorporates native UI components to deliver a responsive and immersive user experience (PagePro).
    • Live & Hot Reloading: Immediate feedback on code alterations speeds up the development process (Grazitti).
    • Lower Maintenance Costs: Simplified updates and bug fixes due to a unified codebase lead to reduced maintenance efforts (PagePro).
    • Smaller Team Requirements: A streamlined team can efficiently handle development for both iOS and Android platforms (Cleart).
    • Faster Time-to-Market: Reusable code saves time, reducing development cycles.
    • Strong Ecosystem: A vast collection of libraries and third-party integrations.

    • Scalability: Apps can grow with your business needs.

    • Cross-Platform Power: Write once in JavaScript, deploy on both iOS and Android.

    Introduction to Visual Studio Code (VS Code)


    react native VS Code service provider


    Overview of VS Code

    Visual Studio Code is a lightweight, open-source editor by Microsoft, extensively used in web and mobile app development due to its versatility and powerful features.

    When it comes to React Native app development, choosing the right IDE (Integrated Development Environment) can make or break your workflow. While there are several editors out there, Visual Studio Code (VS Code) has emerged as the most popular and developer-friendly choice in 2025.

    Packed with extensions, integrations, and productivity hacks, VS Code helps developers code faster, debug better, and build apps more efficiently..

    Key Features of VS Code

    • Rich Extension Ecosystem: VS Code supports a myriad of programming languages and frameworks through its extensive extensions.
    • Built-in Git Support: Simplifies source control management, enriching developer productivity.
    • IntelliSense: Offers advanced code completion, syntax highlighting, and intelligent suggestions (VS Code).
    • Customizability: Users can modify settings, themes, and configure the workspace according to their workflow.

    Why VS Code is the Best Choice for React Native Development

    Visual Studio Code is lightweight, customizable, and packed with extensions tailored for React Native. It helps agencies improve efficiency by:

    1. Seamless React Native Extensions

      • React Native Tools: Debugging, IntelliSense, and quick commands.

      • React Developer Tools: Inspect component hierarchies and props in real time.

    2. Integrated Debugging
      No need for multiple setups—debug code, view logs, and run simulators all within VS Code.

    3. Customisation for Teams
      Agencies can define shared settings, snippets, and workspace configurations to maintain consistency across projects.

    4. Git Integration
      Built-in source control makes collaboration smooth and transparent.

    Why React Native + VS Code Outperform Other Setups

    1. Massive Efficiency via Cross-Platform Development

    As per MoldStud data,

    • React Native allows a single codebase for both iOS and Android, cutting development time by 30–50% compared to building separate native apps.

    • Teams using a shared codebase report up to 50% faster development, 70% faster release cycles, and 60% improved testing efficiency.

    • This translates into about 35% faster time-to-market, delivering apps more rapidly.

    2. Hot Reloading = Instant Feedback

    • MoldStud says that React Native’s hot reloading feature slashes development cycles by up to 50%, letting developers see code changes instantly—without requiring full rebuilds.

    3. Broad Ecosystem & Reusable Components

    • According to MoldStudBrilworks, with code-sharing across platforms typically exceeding 90%, React Native reduces duplication and supports reusable component libraries that cut development time by up to 50%.

    • Supportive plugin ecosystems—fronted by hundreds of UI libraries, integrations, and tools—can reduce development effort for common features by up to 60%, according to IQud.

    4. Cost Savings That Matter

    • As per MoldStudBrilworks, agencies can save 30–40% on development time and costs compared to native builds.

    •  Brilworks says thatSome large-scale implementations, like those by Discord, reported cost reductions of 30% and achieved a 99% crash-free experience.”

    5. Impressive Adoption and Brand Trust

    • As per Brilworks data, React Native ranked as the second most popular development tool in Stack Overflow’s 2024 survey—favoured by 55%+ of developers.

    • According to Appinventiv, Major brands like Walmart, Facebook, SoundCloud, and Bloomberg use it to modernise their apps and speed up development. Walmart reused 96% of their codebase across platforms. Further, Wix even claims a 300% acceleration in development workflow after switching to React Native.

    How VS Code Amplifies These Benefits

    • Dedicated Extensions: Tools like React Native Tools and React Developer Tools enhance IntelliSense, debugging, and component inspection.

    • Integrated Debugging & Git Support: Everything from logs to breakpoints and version control is seamlessly available inside VS Code.

    • Productivity Boosts: Shared settings, snippets, and workspace configs streamline collaboration across teams.

    • Live Collaboration: Extensions like Live Share elevate teamwork by enabling real-time code editing and debugging sessions.

    Boosting Productivity with React Native + VS Code

    Feature Benefit for Agencies
    Hot Reloading Test changes instantly without rebuilding entire apps.
    Task Automation Extensions handle repetitive tasks like linting, formatting, and testing.
    Remote Collaboration Integrations with Live Share allow real-time teamwork.
    Debugging Tools Faster issue resolution, reducing project delays.

    Challenges Of VS Code

    • Performance Bottlenecks: Optimise with VS Code profiling tools and React Native performance libraries.
    • Complex Integrations: Use VS Code extensions to manage APIs, databases, and native modules effectively.

    • Team Onboarding: Shared VS Code configurations shorten the learning curve for new developers. 

    Trends to Watch in React Native + VS Code Development

    • AI-powered extensions for code suggestions and bug detection.

    • Deeper integration with cloud services for CI/CD pipelines.

    • Enhanced mobile debugging with VS Code’s evolving tools.

    Agencies that adopt these trends stay ahead of the competition by delivering apps faster and smarter.

    Conclusion

    React Native and VS Code together form a powerful combination for agencies that want to maximise development efficiency. From cross-platform deployment to faster debugging and collaboration, this setup ensures smooth workflows and high-quality results.

    By embracing this stack, agencies not only save time and resources but also position themselves as reliable partners for clients seeking scalable, future-ready mobile apps.VS Code, armed with robust tools and a supportive ecosystem, offers a superior development environment for React Native applications.

    It empowers developers with efficiency, versatility, and powerful tooling, making it an optimal choice for those seeking to enhance their productivity and code quality in React Native app development. Embrace the prowess of VS Code and supercharge your development capabilities today. Dive into the React Native Documentation and the VS Code Official Documentation for more comprehensive guidance and start enhancing your React Native projects in VS Code now!

    Boost your React Native productivity with VS Code the smart way. Talk to our experts today

    Frequently Asked Questions

    1. What is React Native?

    React Native is a framework developed by Facebook that allows developers to create mobile applications using JavaScript and React, enabling cross-platform development for both iOS and Android.

    2. Why should I use VS Code for React Native development?

    VS Code offers a lightweight, highly customizable environment with powerful features like rich extensions, built-in Git support, and IntelliSense, which streamline the development process and enhance productivity.

    3. How does code reusability in React Native benefit my project?

    Code reusability allows up to 95% of your code to be used across different platforms, significantly reducing development time and costs while maintaining consistency across your application.

    4. What are the essential extensions for React Native development in VS Code?

    Essential extensions include React Native Tools for debugging, ESLint for code quality, Prettier for code formatting, and GitLens for advanced Git functionalities.

    5. How can I optimise my React Native workflow in VS Code?

    Optimising your workflow can be achieved by configuring VS Code settings for auto-save, setting up proper formatting rules, utilising keyboard shortcuts, and integrating necessary extensions that support your development needs.

    react native+VS code service
  • Which Are Must Know React Native Libraries in 2025?

    Which Are Must Know React Native Libraries in 2025?

    Top React Native Libraries for 2025: Enhance Your Mobile Development

    Key Takeaways

    • React Native libraries significantly accelerate mobile app development by providing reusable components and advanced functionalities.
    • Utilising React Native plugins enables deeper integration with device-specific features, thereby enhancing app capabilities.
    • Top libraries, such as React NavigationReact Native Reanimated, and Tamagui, are essential for building high-performance applications in 2024.
    • Integrating these libraries and plugins can lead to increased development speed, higher code quality, and reduced costs.
    • Staying updated with the latest React Native tools is crucial for maintaining and scaling mobile applications effectively.

    Overview

    In the dynamic world of mobile app development, staying ahead means constantly evolving your toolkit. For agencies specializing in React Native, knowing the essential libraries isn’t just about coding; it’s about boosting productivity, ensuring top-tier performance, and delivering future-proof solutions that keep your clients competitive.

    As we move into 2025, the React Native ecosystem continues to mature, especially with the widespread adoption of the New Architecture (Fabric, TurboModules, JSI). This shift impacts how libraries are built and consumed, making it more crucial than ever to identify the must-know tools.

    This guide outlines the indispensable React Native libraries for agencies in 2025, grouped by their core functionality, along with why each one is critical for your agency’s success.

    What are React Native Libraries?

    React Native libraries are pre-built code modules designed to simplify and expedite the development of mobile apps by offering reusable components, utilities, APIs, and integrations specific to React Native. Here are several benefits of using these libraries:

    • Increased Development Speed: Libraries help avoid repetitive boilerplate code, thus speeding up the development process.
    • Higher Code Quality and Consistency: These libraries are well-tested, community-reviewed solutions that foster better code quality.
    • Access to Advanced Features: They allow developers to quickly implement animations, navigation, state management, and other sophisticated functions.
    • Reduced Development Costs: They facilitate cross-platform compatibility, thus reducing both development and maintenance costs.

    For more insights on getting started with React Native development, check out How to Build a React Native App: A Comprehensive Guide

    1.UI Component Libraries: Building Blocks for Beautiful Apps 

    UI component react native library

    These libraries provide pre-built, customizable UI components that significantly accelerate development and ensure design consistency across platforms.

    • React Native Paper:

      • Why it’s essential: A comprehensive, Material Design-based library developed by Callstack. It offers production-ready components, extensive theming support (including dark mode), and good web support via React Native Web.

      • Agency Advantage: Speeds up UI development, ensures a consistent, polished look (familiar to Material Design users), and reduces the need for custom component creation. Great for enterprise apps prioritising a consistent aesthetic.

    • gluestack UI (formerly NativeBase):

      • Why it’s essential: Evolved into a performance-optimised UI library, gluestack UI offers a rich set of accessible, customizable components. It emphasises efficiency and consistency.

      • Agency Advantage: Accelerates development with robust, production-ready components. Its focus on accessibility helps agencies deliver inclusive apps, meeting a critical client requirement.

    • Tamagui:

      • Why it’s essential: A high-performance UI library and styling solution designed for both React Native and Web. It focuses on compile-time style optimisation for faster rendering.

      • Agency Advantage: Ideal for agencies building truly universal apps (mobile + web) from a single codebase, offering superior performance and design system capabilities.

    • React Native Elements:

      • Why it’s essential: A general-purpose, highly customizable UI toolkit. It’s easy to use and provides a wide array of components like buttons, forms, and icons.

      • Agency Advantage: A flexible choice for projects needing quick UI setup and customization without strict adherence to a specific design language.

    2. State Management Solutions: The Heartbeat of Your App 

    Sate management Library for react native

    Efficiently managing application state is paramount for complex apps.

    • React Hooks (useState, useContext, useReducer):

      • Why it’s essential: React’s built-in hooks are fundamental for managing local component state (useState) and sharing state across a component tree without prop-drilling (useContext, useReducer).

      • Agency Advantage: Reduces boilerplate for simpler state needs, keeps code within React’s paradigm, and is a baseline skill for all React Native developers.

    • Redux Toolkit:

      • Why it’s essential: The official, opinionated way to use Redux. It significantly simplifies Redux development by reducing boilerplate and offering built-in utilities for common tasks (e.g., creating reducers, handling asynchronous logic).

      • Agency Advantage: Provides a predictable and scalable state management solution for large, complex enterprise applications, making collaboration easier and long-term maintenance more manageable.

    • Zustand / Recoil / Jotai:

      • Why it’s essential: These are lightweight, modern alternatives to Redux, offering simpler APIs and often less boilerplate for global state management. Zustand is known for its minimalism, Recoil for its atom-based approach from Facebook, and Jotai for its atomic state model.

      • Agency Advantage: Provides agencies with flexible options for projects where Redux might be overkill, allowing for quicker implementation and potentially better performance for certain use cases.

    3. Navigation Architecture: Guiding User Journeys 

    navigation Library for react native (1)

    A smooth and intuitive navigation experience is crucial for user retention.

    • React Navigation:

      • Why it’s essential: The most popular and feature-rich navigation library for React Native. It offers various navigators (Stack, Tab, Drawer), deep linking support, and highly customizable options.

      • Agency Advantage: Provides a robust and flexible solution for structuring complex app navigation, ensuring a consistent and intuitive user flow across iOS and Android. Essential for virtually all multi-screen apps.

    4. Data Fetching and Caching: Performance at Scale 

    Fetching Library for react native

    Efficiently retrieving and managing data is critical for responsive applications.

    • React Query (TanStack Query) / SWR:

      • Why it’s essential: These libraries simplify data fetching, caching, synchronisation, and server-state management. They provide automatic caching, background revalidation, and intelligent refetching.

      • Agency Advantage: Drastically improves perceived performance and responsiveness by handling complex data fetching patterns, reducing loading states, and ensuring data is always fresh. Reduces boilerplate for API calls and enhances user experience.

    5. Animations & Gestures: Bringing Apps to Life

    Animation Library for react native

    Smooth animations and responsive gestures make an app feel premium.

    • React Native Reanimated:

      • Why it’s essential: A powerful and flexible animation library that allows for running animations on the UI thread, leading to buttery-smooth 60 FPS performance, even during complex interactions. It works seamlessly with react-native-gesture-handler.

      • Agency Advantage: Enables agencies to create highly interactive and visually engaging apps with fluid animations, pushing the boundaries of what’s possible with React Native. Crucial for apps with rich UIs.

    • Lottie for React Native:

      • Why it’s essential: Renders animations exported from Adobe After Effects (as JSON) directly in native apps. It’s lightweight and delivers high-quality vector animations.

      • Agency Advantage: Easily integrates complex, designer-created animations into apps, adding a polished, professional touch without extensive coding.

    • React Native Gesture Handler:

      • Why it’s essential: Provides native-driven gesture management, offering a more robust and responsive solution than React Native’s built-in gesture system.

      • Agency Advantage: Ensures precise and performant handling of user gestures (swipes, pinches, drags), leading to a much smoother and more reliable user experience.

    6. Utility & Integration Libraries: Expanding Capabilities 

    Utility & integration Library for react native

    These libraries handle common functionalities and device integrations.

    • React Native Vector Icons:

      • Why it’s essential: A highly customizable icon library that provides thousands of icons from various popular icon sets (Font Awesome, Material Icons, etc.).

      • Agency Advantage: Simplifies icon integration, ensures consistent iconography, and is a staple for almost every React Native project.

    • React Native Maps:

      • Why it’s essential: Provides map components for both iOS (Apple Maps) and Android (Google Maps), with extensive customisation options.

      • Agency Advantage: Essential for location-based services, ride-sharing, or any app requiring map functionalities, offering native map experiences.

    • Firebase / Amplify / Supabase (BaaS Integration):

      • Why it’s essential: These Backend-as-a-Service (BaaS) platforms provide ready-to-use services for authentication, databases, storage, and more, significantly reducing the need for custom backend development.

      • Agency Advantage: Accelerates development of MVPs and full-scale apps by offloading backend complexities, allowing agencies to focus on the front-end and core business logic.

    7. Testing & Quality Assurance: Ensuring Reliability 

    Testing Library for react native

    Robust testing is non-negotiable for delivering high-quality apps.

    • Jest & React Native Testing Library:

      • Why it’s essential: Jest is a popular JavaScript testing framework, while React Native Testing Library focuses on testing components from the user’s perspective.

      • Agency Advantage: Empowers agencies to write effective unit and integration tests, ensuring component reliability and a strong test-driven development (TDD) approach.

    • Detox:

      • Why it’s essential: A powerful end-to-end (E2E) testing framework that simulates real user interactions on a device or simulator.

      • Agency Advantage: Guarantees the entire user flow works as expected, catching critical bugs before deployment and providing confidence in the app’s stability.

    Conclusion

    The right React Native libraries and plugins are pivotal in developing efficient, scalable, and high-quality mobile applications. They unlock advanced features and streamline both development and maintenance processes, allowing developers to focus more on creating value. Staying updated with the latest advancements in React Native libraries and plugins is highly recommended for optimising app development and achieving operational excellence.

    Stay tuned for more updates on React Native and mobile development trends by subscribing to our blog! For more resources, visit the React Navigation Documentation and React Native Firebase Documentation.

    In 2025, the React Native ecosystem is stronger than ever, offering a wide range of libraries and plugins to streamline development and improve app quality. Whether it’s animations, navigation, state management, or performance optimisation, the right tools can elevate your mobile app development journey.

    By strategically adopting these libraries, developers can save time, reduce bugs, and deliver superior user experiences.

    Let’s enhance your mobile app development with these top React Native libraries and plugins now! Contact Us 

    Frequently Asked Questions

    1. What are the essential React Native libraries for 2025?

    The essential libraries include React Navigation for navigation, React Native Reanimated for animations, and Tamagui for cross-platform UI components. These libraries enhance development speed, code quality, and app performance.

    2. How do React Native plugins differ from libraries?

    While libraries provide reusable JavaScript or TypeScript modules, React Native plugins often wrap native code to offer deeper integration with device-specific functionalities like hardware features or third-party services.

    3. How can I integrate Firebase into my React Native app?

    You can integrate Firebase using the react-native-firebase plugin, which offers seamless integration with Firebase services such as authentication, analytics, and real-time databases. Ensure you follow the configuration steps in the React Native Firebase Documentation.

    4. What is the best way to handle navigation in React Native?

    The best way is to use React Navigation, a flexible and extensible navigation library that supports stacks, tabs, and drawers, making it suitable for both simple and complex navigation structures.

    5. How do I optimise the performance of animations in my React Native app?

    Using React Native Reanimated can significantly optimise animation performance by offloading animations to the native thread, ensuring smoother and more responsive user interactions.

  • What Are The Best React Native Testing Strategies In 2025?

    What Are The Best React Native Testing Strategies In 2025?

    Key Takeaways

    • Comprehensive Strategies: Implementing unit, integration, and end-to-end testing ensures robust React Native applications.
    • Tool Selection: Utilising tools like Jest, React Native Testing Library, Detox, and Appium enhances testing efficiency.
    • Quality Assurance: Integrating QA practices goes beyond testing to ensure performance and user experience.
    • Best Practices: Maintaining tests and setting up a proper testing environment are crucial for ongoing app quality.
    • Continuous Improvement: Adopting systematic testing strategies reduces bugs and increases user satisfaction.

    Introduction

    For agencies building mobile applications, delivering apps that are bug-free, stable, and reliable is just as important as delivering them on time. In 2025, clients expect more than just functioning apps—they expect high-quality digital experiences that work seamlessly across both iOS and Android.

    That’s where a strong testing strategy for React Native projects comes in. By implementing the right mix of testing approaches, agencies can reduce costly production bugs, improve client satisfaction, and scale development efficiently.

    Testing is a pivotal phase in the development of mobile apps, critical for ensuring that applications are robust, user-friendly, and reliable. In-depth testing strategies help minimise production bugs, thus significantly enhancing user satisfaction and trust in the application. This is particularly true when testing React Native apps, where quality assurance plays a central role in an app’s success.

    Why Testing Matters for Agencies

    You wouldn’t hand over the keys without ensuring the foundation is solid, the plumbing works, and the roof doesn’t leak. Mobile apps are no different. Clients expect perfection, and with good reason.

    • Protects Brand Reputation: Poorly tested apps lead to crashes, bad reviews, and client dissatisfaction.

    • Saves Time & Cost: Fixing bugs in production can cost up to 10x more than fixing them during development.

    • Ensures Cross-Platform Consistency: Testing guarantees consistent behaviour on iOS and Android devices.

    • Boosts Client Confidence: Demonstrating a clear testing process reassures clients about project quality.

    • Client Trust & Retention: Delivering bug-free, stable apps builds deep trust, fostering long-term partnerships.

    • Reduced Rework & Costs: Catching issues early in the development cycle is vastly cheaper than fixing them post-launch. Testing prevents costly rework and reputational damage.

    • Enhanced User Experience (UX): A well-tested app ensures a smooth, intuitive, and enjoyable experience, leading to higher user engagement and retention.

    • Competitive Edge: Agencies known for delivering high-quality applications stand out in a crowded market.

    • Faster Release Cycles: Automated and efficient testing allows for quicker iterations and confident deployments.

    react native tailored testing strategies

    Key React Native Testing Strategies


    A comprehensive testing approach involves multiple layers, each designed to catch different types of bugs. We advocate for a “Test Pyramid” strategy, focusing on a broad base of fast, isolated tests, tapering up to fewer, more complex end-to-end tests.

    1. Unit Testing: The Foundation of Reliability

    Unit tests verify the smallest, isolated parts of your code – individual functions, pure components (components without side effects or complex logic), or utility methods. They ensure each “unit” works exactly as intended.

    Why it’s important for agencies:

    • Early Bug Detection: Catches bugs right where they happen, preventing them from propagating.

    • Code Documentation: Acts as living documentation for how individual pieces of code should behave.

    • Faster Feedback: Unit tests run incredibly fast, providing immediate feedback to developers.

    Essential Tools:

    • Jest: The go-to JavaScript testing framework, widely adopted in the React and React Native ecosystem. It’s fast, flexible, and provides powerful assertion capabilities.

    2. Component Testing: Validating Your UI Blocks

    Component tests focus on individual React Native components, ensuring they render correctly, respond to props, and handle user interactions as expected, often in isolation from the full application.

    Why it’s important for agencies:

    • UI Stability: Ensures that your reusable UI components are robust and consistent, no matter where they’re used.

    • Isolation: Tests components without needing a full app environment, making them faster and more reliable than E2E tests for UI logic.

    • Designer-Developer Alignment: Verifies that components match design specifications.

    Essential Tools:

    • React Native Testing Library (RNTL): Built on top of Jest, RNTL encourages testing components from the user’s perspective, focusing on what the user sees and interacts with, rather than internal implementation details.

    3. Integration Testing: How Pieces Fit Together

    Integration tests verify that different units or components interact correctly with each other. This could be two components communicating, a component interacting with a Redux store or a service layer integrating with an API mock.

    Why it’s important for agencies:

    • Inter-Module Confidence: Ensures that when you combine tested units, their interactions don’t break.

    • Realistic Scenarios: Simulate more realistic application flows than isolated unit tests.

    Essential Tools:

    • Often, Jest and React Native Testing Library can be combined for integration tests by mounting multiple connected components or mocking API calls. For more complex scenarios, E2E tools can be adapted.

    react native flawless app

    4. End-to-End (E2E) Testing: The Full User Journey

    E2E tests simulate a full user journey through your application, interacting with the UI, navigating between screens, and verifying the entire flow from start to finish on a real device or emulator/simulator.

    Why it’s important for agencies:

    • Comprehensive Validation: Catches bugs that might only appear when all parts of the app are working together.

    • User Confidence: Ensures critical user flows (e.g., login, checkout, data submission) are flawless.

    • Business Logic Validation: Verifies that the app’s core functionalities align with business requirements.

    Essential Tools:

    • Detox: A popular and powerful E2E testing framework specifically designed for React Native. It runs tests on actual devices/simulators, synchronising with the app’s UI to avoid flakiness.

    • Appium: A versatile open-source test automation framework for native, hybrid, and mobile web apps. It supports iOS, Android, and Windows platforms, allowing the same test cases to run across multiple environments.

    5. UI / Snapshot Testing: Guarding Against Visual Regressions

    Snapshot tests capture the rendered output of a component (e.g., its JSX structure or a visual image) and save it as a “snapshot.” Future test runs compare the current output to the saved snapshot, alerting you to any unexpected UI changes.

    Why it’s important for agencies:

    • Preventing Visual Bugs: Catches unintended UI changes, which can be critical for brand consistency and user experience.

    • Faster UI Review: Quickly identifies if a code change has suddenly altered the UI.

    Essential Tools:

    • Jest Snapshot Testing: Integrated directly with Jest, making it easy to create and manage snapshots.

    6. Performance Testing: The Need for Speed (and Smoothness)

    Performance testing measures an app’s speed, responsiveness, stability, and resource usage under various loads. This includes startup time, frame rates, memory consumption, and network efficiency.

    Why it’s important for agencies:

    • User Satisfaction & Retention: Slow apps drive users away. Performance testing ensures your apps are fast and fluid.

    • Resource Efficiency: Identifies memory leaks and CPU hogs, leading to better battery life and device compatibility.

    • Competitive Edge: Delivering highly performant apps is a key differentiator.

    Essential Tools:

    • Flipper: Provides powerful performance tracking, including CPU and memory usage, network monitoring, and a layout viewer.

    • Native Profilers (Xcode Instruments for iOS, Android Studio Profiler for Android): For deep dives into platform-specific performance bottlenecks.

    • React Native Performance Monitor: A built-in React Native tool to track frame rates and UI performance.

    • Reassure: An open-source library that helps detect UI performance regressions at the component level.

    7. Accessibility Testing: Inclusivity by Design

    Accessibility testing ensures that your app is usable by people with disabilities, including those with visual, auditory, cognitive, or motor impairments. This involves proper semantic HTML (for web), screen reader labels, keyboard navigation, and adequate contrast ratios.

    Why it’s important for agencies:

    • Broader Audience Reach: Ensures your clients’ apps are accessible to everyone, expanding their potential user base.

    • Legal Compliance: Meets accessibility standards (e.g., WCAG), reducing legal risks for clients.

    • Ethical Design: Demonstrates a commitment to inclusive design principles.

    Essential Tools:

    • Native Accessibility Tools: iOS Accessibility Inspector, Android Accessibility Scanner.

    • Manual Testing: Crucial for understanding real user experiences with screen readers and other assistive technologies.

    • ESLint Plugins: Can enforce certain accessibility rules in code.

    Benefits of Strong Testing Strategies for Agencies

    • Higher Client Retention: Clients trust agencies that deliver stable apps.

    • Reduced Risk: Minimise costly production bugs and app store rejections.

    • Scalable Growth: A repeatable testing framework means faster onboarding of new developers.

    • Upsell Opportunity: Offer Testing-as-a-Service to existing development clients.

    cross platform react native agency

    Conclusion

    In conclusion, a meticulous approach to React Native testing strategies is crucial for developing robust, efficient, and user-pleasing mobile applications. By integrating comprehensive testing protocols, from unit and integration testing to E2E scenarios, and aligning them with effective QA practices, teams can ensure that they deliver high-quality applications. Embracing these practices not only enhances the product quality but also optimises development workflows, ultimately leading to successful project outcomes and satisfied users. Final Thoughts

    For further insights and detailed guides on React Native testing and QA, refer to the provided official documentation and additional resources.

     Let’s Build Your React Native App

    Frequently Asked Questions

    1. What are the best practices for React Native testing?

    Best practices include writing comprehensive unit tests, integrating continuous testing in the CI/CD pipeline, using appropriate testing libraries, and maintaining clear and modular test cases.

    2. How does integration testing differ from unit testing in React Native?

    Unit testing focuses on individual components or functions to ensure they work correctly in isolation, whereas integration testing verifies that different parts of the application work together seamlessly.

    3. Why is E2E testing important for mobile apps?

    E2E testing ensures that the entire application flow works as intended from the user’s perspective, catching issues that might not be evident in isolated tests.

    4. What tools are recommended for E2E testing in React Native?

    Popular tools for E2E testing in React Native include Detox and Appium, which automate testing on real devices and emulators.

    5. How can continuous integration improve React Native testing?

    Continuous integration automates the testing process, ensuring that tests are run consistently with every code change, which helps in early detection of issues and maintains code quality.


    React Native App company agency
  • How To Optimiz React Native Performance in 2025?

    How To Optimiz React Native Performance in 2025?

    Key Takeaways

    • Understand the core factors affecting React Native performance.
    • Implement optimisation techniques like memoisation and efficient list handling.
    • Utilise debugging tools to maintain and enhance app performance.
    • Stay updated with the latest React Native updates for continued improvement.
    • Design responsive UIs that do not compromise on performance.

    Introduction

    React Native has become the go-to framework for cross-platform mobile development.

    In 2025, with growing user expectations for lightning-fast, smooth, and scalable mobile apps, agencies must go beyond simply building apps — they must optimise performance. Whether your clients are startups, enterprises, or consumer-facing brands, react native performance optimisation directly impacts user experience, retention, and revenue.

    This guide covers the latest strategies, tools, and best practices to ensure React native performance optimisation performs at its peak

    Why Performance Optimisation Matters in 2025?

    Optimisation is a necessary step for efficiency, scalability, and seamless user experience. According to  Lemosys Blog,  Heavy or poorly optimised native modules can slow down your app, making it imperative to optimise or replace them with more efficient alternatives. To avoid common pitfalls in app development, refer to Mistakes to Avoid When Developing an App: A Comprehensive Guide.`Think of performance as the silent hero of your app. When it’s great, users don’t notice it – they just have a seamless experience. When it’s poor, they notice immediately.

    • User Retention & Satisfaction: Fast apps lead to happier users who stick around longer. Agencies that deliver performant apps build lasting client relationships.

    • Reduced Development & Maintenance Costs: Optimised code is easier to maintain and debug. Proactive performance work minimises costly post-launch fixes.

    • Stronger Brand Reputation: Delivering high-quality, responsive applications enhances your agency’s reputation and attracts more clients.

    • SEO & App Store Visibility: App store algorithms often favour well-performing apps, leading to better visibility and organic downloads.

    • Future-Proofing: An optimised architecture is better prepared for future features, scalability, and evolving user demands.

    Key Optimisation Strategies for React Native Performance Optimization in 2025

    1. Efficient Rendering with Fabric and JSI

    • Leverage React Native’s Fabric architecture for faster UI rendering.

    • Use the JavaScript Interface (JSI) for smoother communication between JS and native modules.

    • Reduce unnecessary re-renders by using React. memo, useCallback, and PureComponent.

    • Refer to zignuts for more details.

    2. Minimising Bridge Overhead

    • Avoid heavy data transfer between JavaScript and native threads.

    • Use native modules sparingly and rely on JSI for high-frequency operations.

    3. Image and Asset Optimisation

    • Serve responsive images based on device resolution.

    • Use WebP format for compressed yet high-quality visuals.

    • Implement lazy loading for heavy assets.

    4. Code Splitting and Lazy Loading

    • Split large bundles into smaller chunks.

    • Load modules on-demand instead of at app start-up.

    • Apply Hermes Engine for faster app start times.

    5. Memory & State Management

    • Optimise with Redux Toolkit or Recoil for minimal re-renders.

    • Use FlatList with proper getItemLayout and keyExtractor for handling large datasets.

    • Monitor memory leaks with Flipper and Android Profiler.

    6. Animation Optimisation

    • Use Reanimated 3 for fluid 60 FPS animations.

    • Move heavy animation work to the UI thread for smooth transitions.

    7. Network & API Optimisation

    • Implement request caching and pagination.

    • Compress network payloads (e.g., Gzip, Brotli).

    • Use GraphQL with Apollo/Relay for efficient data fetching.

    8. Build Optimisation

    • Enable ProGuard (Android) and Bitcode (iOS) for smaller builds.

    • Remove unused dependencies and assets.

    • Use CI/CD pipelines to automate performance checks.

    For the latest architectural improvements in React Native, which aid in performance optimisation, refer to the Callstack eBook and YouTube Video. Besides choosing the right database is vital for performance.

    Tools to Measure and Monitor Performance (2025)

    Tool / Platform Key Features Best Use Case Link
    Built-In Profiler & Performance Monitor JS & UI thread timings, FPS tracking, rendering insights Quick performance checks during development Docs
    Flipper + RN Performance Plugins Frame rate monitoring, app startup analysis, re-render tracking, Flipper UI charts Deep real-time profiling and debugging Flipper
    Shopify React Native Performance Suite Render durations, navigation metrics, bundle size tracking, and Flipper integration In-depth performance audits for dev + production Shopify RN Performance
    Firebase Performance Monitoring App startup times, screen rendering, network call monitoring, and custom traces Post-launch monitoring and tracking real-world performance Firebase
    Sentry Crash reporting, performance tracing, and context logs support Fabric & TurboModules Error + performance tracking with full-stack visibility Sentry
    UXCam Session replay, heatmaps, freeze detection, conversion funnel tracking User behaviour + performance insights combined UXCam
    LogRocket Session replay, Redux/React Navigation integration, ML-driven issue prioritisation Holistic monitoring: performance + usability issues LogRocket

    Benefits for Agencies Offering Performance Optimisation

    • Upsell services: Beyond app development, agencies can charge for ongoing optimisation retainers.

    • Stronger client relationships: Delivering smooth apps ensures repeat business.

    • Market differentiation: Few agencies offer deep React Native performance expertise.

    Staying Updated with React Native Updates

    Keeping up with the latest React Native updates is key to performance improvements. It is advised to subscribe to official changelogs, community discussions, and reputable blogs for timely information. Details on integrating new features without compromising performance can be seen in this Callstack eBook and YouTube Video. For deployment best practices, consult: Optimise Deploy React Native App. Read more about balancing aesthetic design with performance in both the Zignuts Blog and the Netguru Blog.

    react native performance improve

    Why Performance Optimisation is Your Agency’s Competitive Edge

    Think of performance as the silent hero of your app. When it’s great, users don’t notice it – they just have a seamless experience. When it’s poor, they notice immediately.

    • User Retention & Satisfaction: Fast apps lead to happier users who stick around longer. Agencies that deliver performant apps build lasting client relationships.

    • Reduced Development & Maintenance Costs: Optimised code is easier to maintain and debug. Proactive performance work minimises costly post-launch fixes.

    • Stronger Brand Reputation: Delivering high-quality, responsive applications enhances your agency’s reputation and attracts more clients.

    • SEO & App Store Visibility: App store algorithms often favour well-performing apps, leading to better visibility and organic downloads.

    • Future-Proofing: An optimised architecture is better prepared for future features, scalability, and evolving user demands.

    The New Architecture: A Performance Powerhouse for 2025

    In the competitive world of mobile applications, performance isn’t just a feature; it’s a fundamental user expectation. A slow, laggy app leads to frustrated users, poor reviews, and ultimately, uninstalls. For agencies, delivering high-performing React Native applications isn’t just about technical excellence; it’s about securing client satisfaction, building a strong reputation, and ensuring the long-term success of every project.

    As we step into 2025, the React Native ecosystem is more powerful and complex than ever, driven by the rollout of the New Architecture. This guide will equip your agency with the essential knowledge and strategies to not only identify but also proactively eliminate performance bottlenecks, ensuring your React Native apps are fast, fluid, and a delight for users.

    The most significant shift impacting React Native performance in 2025 is the widespread adoption of the New Architecture, comprising Fabric, TurboModules, and JSI. This is a game-changer for agencies:

    1. Fabric (The New Renderer):

      • Benefit: Enables concurrent rendering and synchronous layout reading. This means the UI can update more smoothly, even when the JavaScript thread is busy, and complex animations feel truly native.

      • Agency Advantage: Delivers visually fluid and responsive UIs, reducing “jank” and providing a premium user experience that rivals fully native apps.

    2. TurboModules (Improved Native Module System):

      • Benefit: Allows native modules to be lazy-loaded (only when needed), reducing the app’s startup time and memory footprint.

      • Agency Advantage: Faster app launch times and better resource management, especially critical for apps with many native integrations or limited device resources.

    3. JavaScript Interface (JSI):

      • Benefit: Replaces the old asynchronous “bridge” with a direct, synchronous connection between JavaScript and native code. This eliminates serialisation overhead.

      • Agency Advantage: Boosts performance for data-intensive operations and real-time interactions, making complex features (like high-frame-rate camera processing or complex data visualisations) significantly more performant.

    Agency Strategy: Prioritise migrating existing apps to the New Architecture (incrementally, if necessary) and building new projects on it. This foundational change offers the biggest leap in performance.

    Key Optimisation Strategies for Your React Native Apps

    react native cost reduce
    1. Efficient Component Rendering (Memoisation):

      • Challenge: Unnecessary re-renders are a primary cause of performance bottlenecks.
      • Solution: Use React.memo for functional components and shouldComponentUpdate /or extend React.PureComponent) for class components. These prevent components from re-rendering if their props or state haven’t actually changed. Also, use useCallback and useMemo for memoising functions and expensive calculations.

      • Agency Advantage: Reduces CPU usage, conserves battery, and ensures UI updates only when necessary, leading to a smoother user experience.

    2. Virtualised Lists for Large Data Sets:

      • Challenge: Rendering long lists of items with ScrollView can consume excessive memory and lead to sluggish performance.

      • Solution: Always use FlatList or SectionList. These components render only the items currently visible on screen, dramatically optimising memory usage and rendering speed. Use getItemLayout for fixed-height items and keyExtractor for efficient list updates.

      • Agency Advantage: Delivers fluid scrolling experiences even with thousands of items, essential for social feeds, e-commerce product lists, and large data displays.

    3. Image Optimisation:

      • Challenge: Large, unoptimized images are a common culprit for high memory consumption, slow loading, and increased app bundle size.

      • Solution:

        • Resize and Compress: Always serve images at the required dimensions and compress them (e.g., using tools like TinyPNG or ImageOptim).

        • Efficient Formats: Prefer modern formats like .webp for better compression and quality.

        • Caching Libraries: Use react-native-fast-image for efficient image caching and loading.

      • Agency Advantage: Reduces app size, speeds up load times, prevents out-of-memory crashes, and improves overall visual responsiveness.

    4. Optimising Animations:

      • Challenge: JavaScript-driven animations can easily cause jank, especially on lower-end devices.

      • Solution: Leverage react-native-reanimated (v2 or v3) and react-native-gesture-handler. These libraries allow animations and gestures to run on the UI thread (native side), completely offloading them from the JavaScript thread.

      • Agency Advantage: Delivers truly fluid and smooth animations that feel native, elevating the perceived quality and polish of the application.

    5. Bundle Size Reduction:

      • Challenge: A bloated app bundle leads to slower download times and increased storage usage on the user’s device.

      • Solution:

        • Enable Hermes: This lightweight JavaScript engine significantly reduces bundle size and startup time on both Android and iOS.

        • Remove Unused Code & Assets: Regularly audit your code package.json for unused libraries and remove unnecessary images, fonts, and code (tree shaking).

        • Code Splitting & Lazy Loading: Use dynamic imports or React.lazy() with Suspense to load components only when they are needed.

        • Android App Bundles (.aab): For Android, always use .aab files instead of .apk delivering optimised app versions for different device configurations.

        • Proguard/R8 (Android): Enable these tools to shrink, optimise, and obfuscate Java bytecode.

      • Agency Advantage: Faster app downloads, quicker installations, and a more pleasant experience for users, especially in regions with limited bandwidth or older devices.

    6. Effective State Management:

      • Challenge: Overly complex or inefficient state management can lead to excessive re-renders and memory overhead.

      • Solution: Choose the right state management tool for the job (React Hooks for simpler needs, Redux Toolkit for complex global state, or lightweight alternatives like Zustand/Jotai). Ensure immutable data structures are used to simplify change detection.

      • Agency Advantage: Creates a more predictable and debuggable codebase, reducing bugs related to state and enhancing the overall stability of the application.

    7. Minimise Bridge Interactions:

      • Challenge: In the legacy architecture, frequent communication across the JavaScript bridge could be a bottleneck.

      • Solution: While JSI (part of the New Architecture) largely mitigates this, in existing legacy projects, agencies should still batch bridge calls and use native modules for performance-critical tasks where appropriate.

      • Agency Advantage: Ensures responsiveness in interactions that require significant JavaScript-native communication.

    Tools for Proactive Performance Management 

    Agencies need a strategic approach to performance, not just reactive firefighting. These tools are indispensable:

    tools for proactive performance

    • React Native DevTools: The official debugging tool (now often replacing Flipper as default) offers UI inspection, component tree analysis, and performance profiling to identify slow components and unnecessary re-renders.

    • Flipper: (Still highly valuable, especially for plugins) An all-in-one debugging platform with plugins for network inspection, layout viewing, database browsing (SQLite, AsyncStorage), and performance tracking (CPU, memory, frames).

    • Reactotron: Excellent for debugging state management (Redux, MobX), API calls, and AsyncStorage data with a clean, centralised interface.

    • Native Platform Tools:

      • Xcode Instruments (iOS): For deep profiling of CPU, memory, network, and GPU usage on iOS.

      • Android Studio Profiler: Provides similar capabilities for Android, helping identify native-side bottlenecks and memory leaks.

    • Reassure (by Callstack): An open-source performance testing library for React Native that helps detect UI regressions at the component level by comparing render durations between versions.

    • CI/CD Pipelines (e.g., Bitrise, GitHub Actions): Integrate performance checks (like bundle size analysis or basic startup time tests) into your Continuous Integration/Continuous Deployment pipeline to catch regressions early.

    The Compelling Data: Why Performance Optimisation Matters

    Here’s statistical evidence highlighting the crucial role of performance optimisation:

    • User Abandonment Due to Slowness:

      • Approximately 53% of mobile users abandon apps if loading takes longer than three seconds. (Source: MoldStud, VWO)

      • Some studies indicate that this number can be as high as 70% of users abandoning an app that takes too long to load. (Source: Moon Technolabs)

      • 40% of users would prefer a better alternative if they didn’t like an app’s performance. (Source: Moon Technolabs)

    • Impact on User Engagement and Conversion Rates:

      • Even a one-second delay in app load time can lead to a 7% reduction in user engagement and an 11% reduction in conversions. (Source: Medium – Adi Mizrahi, Ranksol)

      • Platforms with loading speeds below three seconds see an increase in user retention by up to 30%. (Source: MoldStud)

      • Apps maintaining 60 frames per second (FPS) have 52% better user engagement. (Source: VWO)

      • Responsive UI elements can improve user interaction metrics by up to 37%. (Source: VWO)

    • User Retention and Churn:

      • On average, an app loses 77% of its daily active users (DAUs) within the first 3 days after install, and this jumps to 90% within 30 days. (Source: Netguru, Business of Apps) While this drop-off is normal, slow performance is a key driver for this churn.

      • A 1-second delay can lead to a 16% decrease in user satisfaction and a 4.1% decrease in daily active users. (Source: Medium – Adi Mizrahi)

      • 90% of users abandon apps due to poor performance. (Source: UXCam)

    • Business Outcomes:

      • It is five to seven times more expensive to acquire a new customer than to retain an existing one. (Source: Netguru) Performance plays a critical role in retention.

      • Well-optimised apps often achieve higher rankings in app stores, leading to increased visibility and more organic downloads. (Source: UXCam)

      • One case study showed a platform reducing its loading duration from 8 seconds to 3, resulting in a remarkable 20% boost in conversion rates. (Source: MoldStud)

    These statistics clearly underscore that investing in performance optimisation for React Native apps isn’t just a technical nicety, but a strategic business imperative that directly impacts user satisfaction, engagement, retention, and ultimately, revenue

    Conclusion: Empower Your Agency with Peak Performance

    In 2025, React Native offers an unparalleled opportunity to build powerful, cross-platform mobile apps. But the true competitive advantage for agencies lies in mastering their performance optimisation. By proactively implementing the New Architecture, adhering to best practices, and leveraging the right tools, your agency can:

    • Deliver apps that consistently exceed user expectations.

    • Minimise development headaches and maximise team efficiency.

    • Build a reputation for technical excellence and reliable solutions.

    Invest in performance optimisation, and transform your React Native services from good to truly exceptional.

    Additional Resources

    For further learning, consider the following resources:

    Follow these links for tutorials on profiling, DevTools, and the latest features of new React Native releases.

    Frequently Asked Questions

    Q1: What is the biggest impact of the New Architecture on performance?

    The New Architecture, particularly Fabric and JSI, fundamentally improves how JavaScript communicates with native code and how the UI renders. This eliminates the “bridge bottleneck” and enables truly synchronous layouts and smoother animations, leading to significantly better perceived performance and responsiveness, especially for complex UIs.

    Q2: How often should an agency perform performance audits?

    It’s recommended to perform performance audits at key milestones (e.g., after major feature releases, before launch) and periodically (e.g., quarterly) for mature applications. Integrating performance checks into your CI/CD pipeline ensures continuous monitoring for regressions.

    Q3: Is optimising bundle size still relevant with faster internet speeds?

    Absolutely. While internet speeds have improved, a smaller bundle size still leads to faster initial download times, quicker installations, and reduced storage consumption on the user’s device. This is particularly important for users in areas with limited connectivity or those with older devices.

    Q4: Can performance optimisation negatively impact development speed?

    While initial setup (like configuring react-native-reanimated or a testing framework) might take time, but good architectural practices and performance considerations ultimately boost development speed. By preventing bugs, reducing re-renders, and making code more maintainable, you save significant time in the long run.

    Q5: What are the common signs of a React Native app with performance issues?

     Common signs include slow startup times, “janky” or choppy animations, unresponsive UI (delays after tapping buttons), excessive battery drain, high CPU or memory usage (checked via native profilers), and ultimately, negative user reviews complaining about speed or crashes.

    Q6. Why does my React Native app feel slow even after launch?

     This often happens due to large bundle sizes, inefficient state management, or unoptimized assets. A performance audit identifies these bottlenecks.

    Q7. Is performance in React Native as good as native apps in 2025?

     With Fabric, JSI, and Hermes, React Native apps can now match (and sometimes surpass) native performance — provided optimisation best practices are applied.

    Q8. Do agencies need separate teams for optimisation?

    Not necessarily. With the right tools and training, your existing React Native team can adopt performance optimisation workflows. Agencies may also partner with specialists for complex projects.

    Q9. How often should we optimise an app?

    Ideally, after major updates or every 6–12 months, especially as user traffic grows and dependencies evolve.

    Q10. Can performance optimisation reduce app costs?

    Yes. Faster apps mean lower server usage, fewer crash reports, and higher retention — all contributing to long-term cost savings.


  • How To Authorise Your React Native App Auth?

    How To Authorise Your React Native App Auth?

    Key Takeaways

    • Authentication is crucial for securing user data in React Native apps.
    • Various methods, such as biometric authentication and Two-Factor Authentication (2FA), enhance security.
    • Implementing reliable libraries such as Firebase Authentication and react-native-app-auth is essential.
    • Ensuring secure storage and management of tokens helps maintain app integrity.
    • Comparing different authentication solutions helps you select the best fit for your project.

    Introduction: Navigating React Native App Authentication

    Authorisation is not just a technical step—it’s a critical layer of security, compliance, and trust. Clients rely on agencies to ensure that their apps are not only functional but also protected from unauthorised access, data breaches, and misuse.

    Authentication is one of the most critical aspects of mobile app development. For React Native apps, implementing secure and user-friendly authentication ensures that only authorised users access sensitive features and data.

    In the ensuing sections, we’ll delve into various facets of authentication, including methodology, implementation guidance, solid security practices, solution comparisons, troubleshooting, and tips to enhance the user experience. This guide explains the best practices, methods, and tools agencies can use to authorise React Native apps effectively.

    Understanding Authentication in React Native

    Authentication in React Native, typically manifested through login and signup procedures, is essential for verifying user identities. Here’s a breakdown of the prevalent methods:

    • Username/password: This traditional approach requires users to create and maintain unique credentials.
    • Social logins: These allow users to leverage existing credentials from services like Google, Facebook, and Apple for a streamlined authentication process.
    • Biometric authentication: Modern apps enhance security with biometric options such as Face ID and Touch ID.
    • Two-Factor Authentication (2FA): This method adds a layer of security by combining passwords with a secondary verification factor, such as a text message or app notification. Learn more.

    The importance of a secure React Native login cannot be overstated, as it is fundamental in maintaining user trust and preserving the integrity of application data. Read more.

    Why Authorisation Matters for Agencies?

    • Security & Compliance: Safeguards sensitive user data (e.g., payments, personal info).

    • Client Trust: Well-implemented authorisation enhances app credibility.

    • Scalability: A proper system supports future growth and feature expansion.

    • Reduced Liability: Protects agencies and clients from costly data breaches.

    Authentication vs. Authorisation: A Clear Distinction

    Before diving in, it’s crucial to understand the difference:

    • Authentication (AuthN): Verifies the identity of a user. It answers the question: “Who are you?” (e.g., logging in with email/password, Face ID, Google).

    • Authorisation (AuthZ): Determines what an authenticated user is permitted to do. It answers the question: “What are you allowed to do?” (e.g., a standard user can view their profile, an admin can manage all users).

    Agencies must implement both effectively to build secure and functional applications.

    Authentication Needs by Business Type (with Cost)

    Business Type Needs Recommended Authentication Options Why Approx. Cost
    Small Businesses & Startups Simple, quick setup, cost-effective Email/Password login, Social Logins (Google, Facebook, Apple), Firebase Authentication Fast to market, low cost, easy to maintain Low – Free to ~$50/month (Firebase free tier covers 10k users; pay-as-you-go later)
    E-Commerce & Consumer Apps Secure + convenient login JWT-based login, Social Logins, OTP (SMS/Email) for transactions Balances user convenience with security Medium – Free for JWT, but SMS OTPs cost ($0.01–$0.05 per OTP via Twilio/Firebase)
    Enterprises & SaaS Platforms Advanced control, scalability, and compliance Role-Based Access Control (RBAC), Single Sign-On (SSO: Okta, Azure AD), Multi-Factor Authentication (MFA) Supports large teams, sensitive data, and regulatory needs High – $2–$6 per active user/month (Okta/Auth0); enterprise pricing scales higher
    Financial & Healthcare Apps High-security, regulatory compliance Biometric Login (Face ID, Fingerprint), MFA (OTP/Hardware Keys), Device-Based Authentication Meets strict compliance (HIPAA, PCI-DSS, GDPR) High – Custom dev for biometrics ($10k+ one-time) + MFA service costs ($0.05 per OTP or $2–$4/user/month for Auth0/Authy)
    Community / Content Apps Easy onboarding, moderate security Social Logins, Basic JWT, Firebase Authentication Frictionless signup to attract more users Low–Medium – Free to $25/month, depending on Firebase/social login API usage

    Benefits for Agencies Offering Authorisation Services

    • Upsell Opportunities: Offer App Security Packages beyond development.

    • Client Differentiation: Few agencies specialise in secure React Native authorisation.

    • Long-Term Engagement: Agencies can retain clients with ongoing security monitoring & compliance services.

    Core Authentication Strategies for React Native

    Choosing the right authentication method depends on the app’s requirements, target audience, and security needs.

    1. Email and Password Authentication:

      • Description: The most common method. Users register with an email and create a password.

      • Implementation: Requires a backend (custom API, Firebase Auth, Auth0, Supabase) to handle user registration, password hashing, and login validation.

      • Security Best Practices:

        • Strong Password Policies: Enforce minimum length, special characters, etc.

        • Hashing: Always hash passwords on the server-side (e.g., bcrypt) – NEVER store plain text passwords.

        • Two-Factor Authentication (2FA/MFA): Add an extra layer of security (e.g., SMS code, authenticator app).

        • Rate Limiting: Prevent brute-force attacks by limiting login attempts.

    2. Social Logins (Google, Facebook, Apple, etc.):

      • Description: Allows users to sign in using their existing social media accounts. This greatly simplifies the onboarding process.

      • Implementation: Typically involves using platform-specific SDKs (e.g., @react-native-google-signin/google-signin, react-native-fbsdk-next, @react-native-apple-authentication) or BaaS providers (Firebase, Auth0) that abstract these integrations.

      • Security Best Practices:

        • OAuth 2.0 and OpenID Connect (OIDC): Understand these protocols for secure delegation of authentication.

        • PKCE (Proof Key for Code Exchange): Crucial for native apps to prevent authorization code interception. Many modern SDKs (react-native-app-auth) support this.

        • Retrieve Minimal Data: Only request necessary user information from social providers.

    3. Token-Based Authentication (JWT):

      • Description: After successful authentication (via email/password or social login), the server issues a JSON Web Token (JWT). This token is stored securely on the client (React Native app) and sent with every subsequent request to access protected resources.

      • Implementation: Your backend generates and signs JWTs. The React Native app uses libraries like axios or the native fetch API to send the token in the Authorization header.

      • Security Best Practices:

        • Secure Storage: NEVER store JWTs or sensitive tokens in AsyncStorage directly. Use secure storage mechanisms like expo-secure-store (for Expo projects) or native Keychain (iOS) and Keystore (Android) services.

        • Short-Lived Access Tokens, Long-Lived Refresh Tokens: Access tokens should expire quickly (e.g., 15-60 minutes). A refresh token (stored even more securely) can be used to obtain new access tokens without requiring the user to re-login.

        • HTTPS Only: Always communicate with your backend over HTTPS to encrypt data in transit.

        • Token Revocation: Implement mechanisms on the server to revoke tokens (e.g., when a user logs out or changes their password).

    4. Biometric Authentication (Face ID, Fingerprint):

      • Description: Uses device-specific biometric sensors for quick and convenient re-authentication.

      • Implementation: Libraries like react-native-biometrics or expo-local-authentication Provide APIs to access these features.

      • Security Best Practices:

        • Not a Primary Authentication: Biometrics should typically be used as a secondary authentication factor or for re-authenticating an already logged-in user (e.g., to confirm a payment) after initial login with a stronger method. Biometric data should not be used as the sole identifier for initial authentication.

        • Device-Specific: Biometric data is stored securely on the device, not transmitted to your server.


    Implementing Authorisation Strategies

    Once a user is authenticated, authorisation determines their access levels.

    1. Role-Based Access Control (RBAC):

      • Description: Users are assigned roles (e.g., “admin,” “editor,” “standard user”), and permissions are attached to these roles.

      • Implementation:

        • Backend: Your backend API checks the user’s role (usually decoded from their JWT) for every protected endpoint request.

        • Frontend (React Native): The app can conditionally render UI elements or enable/disable features based on the user’s role, but always relies on backend validation for true security.

      • Agency Advantage: Simple to implement and manage for many common scenarios.

    2. Permission-Based Access Control:

      • Description: Users (or roles) are granted specific, granular permissions.

      • Implementation: More complex, often involving a dedicated authorisation service or library on the backend that checks individual permissions for each action.

      • Agency Advantage: Provides highly granular control for complex enterprise applications with diverse user types and actions.

    Tools & Services Agencies Can Leverage

    • Auth0: Enterprise-grade authentication + authorisation.

    • Firebase Authentication: Easy integration with social logins, OTP, and email/password.

    • AWS Cognito: Scalable, secure identity and access management.

    • Okta: Ideal for B2B/enterprise identity management.

    Best Practices for Agencies: Building Secure Projects

    1. “Never Trust the Client”: Always implement both client-side and server-side validation for all authentication and authorisation checks. The client-side (React Native app) can provide a good user experience, but the backend is the ultimate arbiter of security.

    2. HTTPS Everywhere: Ensure all communication between your React Native app and your backend is encrypted using HTTPS.

    3. Secure Token Handling: Store tokens (especially refresh tokens) in native secure storage (expo-secure-store, Keychain/Keystore), not AsyncStorage.

    4. Least Privilege Principle: Grant users (and app components) only the minimum necessary permissions to perform their tasks.

    5. Error Handling & User Feedback: Provide clear, user-friendly error messages without revealing sensitive information (e.g., “Invalid credentials” instead of “User not found”).

    6. Regular Security Audits: Conduct periodic security audits and penetration testing, especially for apps handling sensitive data.

    7. Stay Updated: Keep all authentication libraries, SDKs, and React Native versions updated to patch known vulnerabilities.

    8. Session Management: Implement proper session expiration and refresh token mechanisms to maintain security without constantly inconveniencing users.

    9. Privacy by Design: Incorporate privacy considerations from the initial design phase, minimising data collection and ensuring compliance with regulations like GDPR and CCPA.

    Conclusion: Your Agency’s Gateway to Secure Mobile Experiences


    Implementing robust authentication and authorisation is fundamental to the success of any React Native project. For agencies, this expertise is a powerful differentiator, demonstrating a commitment to security, reliability, and ultimately, client satisfaction. By mastering these strategies and leveraging the right tools, your agency can deliver mobile applications that are not only functional and user-friendly but also inherently secure and trustworthy.

    Frequently Asked Questions

    1. What’s the benefit of using an Identity-as-a-Service (IDaaS) provider like Auth0 or Okta?


    IDaaS providers abstract away much of the complexity and security overhead of authentication and authorisation. They handle user management, password hashing, 2FA, social logins, and compliance automatically. For agencies, this means faster development, reduced security risks, and more time to focus on core app features, especially beneficial for enterprise clients with complex identity requirements.

    2. Should agencies use Firebase, Auth0, or build custom authorisation?

    • For startups → Firebase (fast, cost-effective).

    • For enterprises → Auth0 / AWS Cognito (scalable & feature-rich).

    • For highly custom apps → Build your own with JWT/OAuth 2.0.

    3. How do we secure tokens in React Native?

    Use Secure Storage (react-native-keychain) instead of AsyncStorage.

    4 . Is role-based access control necessary for every app?

    Not always. RBAC is best for apps with multiple user types (admins, staff, customers).

    5. How do I handle token expiration and refreshing in React Native?

     The standard practice is to use short-lived access tokens and long-lived refresh tokens. When an access token expires, your app should use the refresh token (stored securely) to request a new access token from your server. This process should happen transparently to the user, ensuring a continuous session without frequent re-logins.


    Authentication method in React Native App


    1.1 Traditional Authentication

    • Email & Password: Users register/log in using credentials stored in your backend.

    • Username & Password: Less common now, usually replaced by email/phone.

    1.2 Token-Based Authentication

    • JWT (JSON Web Token): Stateless, widely used for APIs.

    • Access & Refresh Tokens: Helps maintain sessions securely.

    1.3 Social Authentication (OAuth)

    • Google, Facebook, Apple Sign-In, Twitter, LinkedIn.

    • Reduces friction as users don’t need to remember credentials.

    1.4 Biometric Authentication

    • Fingerprint / FaceID: Enhances user convenience and security.

    • Supported via libraries like react-native-keychain or expo-local-authentication.

    1.5 Passwordless Authentication

    • Magic Links or OTPs (Email/SMS): No password needed, increasing ease of use.

    Implementing React Native App Auth

    Implementing a React Native app auth involves selecting reliable libraries and tools, alongside proper setup. Here’s a guide to help you get started:

    • Choose Authentication Libraries and Tools:
      • Firebase Authentication: Supports a variety of authentication methods, including email/password and social logins. Discover Firebase.
      • Auth0: Provides broad protocol support through a hosted service.
      • react-native-app-auth: An SDK supporting OAuth 2.0 and OpenID Connect with PKCE. More details.

    Set up Example with Firebase Authentication:

    import auth from '@react-native-firebase/auth';
    // Email/password sign-in
    auth().signInWithEmailAndPassword(email, password)
      .then(userCredential => {
        // User is signed in
      })
      .catch(error => {
        // Handle errors
      });

    OAuth Implementation Example with react-native-app-auth:

    import {authorize} from 'react-native-app-auth';
    const config = {
      issuer: 'https://accounts.google.com',
      clientId: 'YOUR_CLIENT_ID',
      redirectUrl: 'com.yourapp:/oauthredirect',
      scopes: ['openid', 'profile'],
    };
    const authState = await authorize(config);

    Ensuring Secure React Native Login

    To safeguard the authentication process, consider these security measures:

    • Use HTTPS Exclusively: All network requests should employ HTTPS to protect data in transit. Learn more.
    • Secure Storage of Tokens: Use solutions like Expo Secure Store or react-native-keychain for encrypting and storing authentication tokens safely. Discover secure storage options.
    • Token Management: Implement secure token formats like JWTs, regularly rotate them, and enforce session expiration protocols. Read about token management.

    Comparing Authentication Solutions for React Native

    • Assess various secure React Native login solutions to determine which best fits your project’s needs.
    • Consider the pros, cons, and optimal scenarios for each solution stated in the comparison table within the detailed plan.
    • Compare various solutions.
    • Recommendations and guidelines for choosing an authentication method suited to your project scale and security requirements can aid in your selection process.

    Troubleshooting Common Authentication Issues

    Address typical challenges in authentication in React Native, such as token expiration, network failures, and social login discrepancies. Providing effective troubleshooting strategies and highlighting available resources like StackOverflow or GitHub can assist developers in quickly resolving issues. Get troubleshooting tips.

    Enhancing User Experience with Seamless Auth

    Improving user experience involves balancing seamless authentication processes with robust security measures. Techniques such as implementing biometric options, utilising social logins, and streamlining login processes can significantly enhance user satisfaction and app security. Explore seamless auth solutions.

    Best Practices for React Native Authentication

    Security Best Practices

    • Never store tokens in plain AsyncStorage → Use SecureStore (Expo), Keychain (iOS), or Keystore (Android).

    • Implement a token refresh mechanism (short-lived access tokens + refresh tokens).

    • Always use HTTPS to encrypt data in transit.

    • Avoid embedding secrets in app code → Use environment variables or remote config.

    UX Best Practices

    •  Keep the login/signup process fast and simple.

    •  Offer multiple login options (social + traditional).

    • Provide clear error messages for failed logins.

    •  Use progress indicators during authentication.

    Code Organisation Best Practices

    • Maintain a dedicated AuthContext with React Context API.

    • Use React Navigation guards for protected routes.

    • Abstract API calls into a separate authService.js.

    • Recommended Libraries

      • Firebase Auth@react-native-firebase/auth

      • JWT Storageexpo-secure-store / react-native-keychain

      • Social Login@react-native-google-signin/google-signin, react-native-fbsdk-next, @invertase/react-native-apple-authentication

      • Biometricsexpo-local-authentication / react-native-touch-id

    Conclusion

    Authentication in React Native can be implemented in many ways—whether you choose Firebase for ease, JWT for flexibility, or biometrics for modern security. The key is balancing security, user experience, and scalability.

    React Native app auth plays a crucial role in protecting user data. By integrating advanced authentication methods and adhering to recommended practices, developers can create secure and user-friendly mobile applications.

    Additional Resources

    Consult additional resources for deeper insights into authentication in React Native:

    • Official documentation and comprehensive guides on securing React Native apps are available through the provided links.
    • Engage with the development community via forums and discussions to share insights and seek assistance on specific issues related to React Native authentication.

    At Solution Squares, we help startups and enterprises implement seamless authentication systems—from Firebase and JWT to social logins and biometrics. Get in touch with us today

    Frequently Asked Questions

    1. What are the best practices for securing authentication in React Native?

    Best practices include using HTTPS for all network requests, securely storing tokens with solutions like Expo Secure Store or react-native-keychain, implementing Two-Factor Authentication (2FA), and regularly updating and rotating tokens.

    2. How can I implement social login in my React Native app?

    You can implement social login by integrating libraries like Firebase Authentication, Auth0, or react-native-app-auth, which support various social providers such as Google, Facebook, and Apple.

    3. What libraries are recommended for implementing OAuth in React Native?

    Libraries such as react-native-app-auth are recommended for implementing OAuth 2.0 and OpenID Connect in React Native applications.

    4. How do I handle token expiration in my React Native app?

    Handling token expiration involves implementing token refresh mechanisms, setting appropriate expiration times, and ensuring the app gracefully prompts users to re-authenticate when necessary.

    5. What are common mistakes to avoid when implementing authentication in React Native?

    Common mistakes include not using secure storage for tokens, overlooking HTTPS for network requests, improper handling of token expiration, and failing to implement multi-factor authentication where necessary.


    React Native App company agency

    Add Your Heading Text Here

  • How  to Setup React Native?

    How to Setup React Native?

    Comprehensive Guide to Setting Up React Native:

    • Learn how to install React Native using both CLI and Expo.
    • Configure the development environment for both Android and iOS platforms.
    • Discover best practices for maintaining and troubleshooting your React Native setup.

    Introduction

    React Native is a powerful open-source framework that enables developers to build high-quality, cross-platform mobile applications using JavaScript and React. Properly setting up React Native is crucial for a smooth development experience, ensuring reliability and leveraging platform-specific features effectively. In this comprehensive guide, we will walk you through how to set up React Native, install React Native tools, and configure your React Native environment for both Android and iOS development.

    React Native allows developers to build high-quality, cross-platform mobile applications using JavaScript and React. Setting it up properly is crucial for smooth development, efficient debugging, and faster builds. This guide will walk you through the installation and configuration process step-by-step.

    Why Agencies Choose React Native Setup Services

    • Faster Development – Build for iOS and Android simultaneously.
    • Cost-Effective – One codebase reduces resource and budget requirements.
    • Scalability – Easily integrate with APIs, databases, and third-party tools.
    • Future-Ready – Stay aligned with the latest mobile development trends.


    React native services benefits

    Our React Native Setup Services for Agencies

    • Environment Configuration (Node, npm, Watchman, Android Studio, Xcode setup)

    • Project Initialisation with best practices

    • Folder Structure Optimisation for scalability

    • Third-Party Library Integration (UI kits, APIs, databases)

    • Testing & Debugging Tools Setup

    • Version Control Integration (GitHub/GitLab/Bitbucket)

    • CI/CD Pipeline Setup for seamless deployment

    Prerequisites for Setting Up React Native

    prerequisites for React Native development

    Before you dive into the React Native setup, ensuring you have the correct software and tools is essential. This section outlines everything you need to prepare. Learn more.

    Required Software and Tools

    • Node.js and npm/yarn: Node.js is a JavaScript runtime, essential for running JavaScript outside the browser, while npm and Yarn are popular package managers for managing JavaScript projects. Make sure to install the latest LTS version of Node.js along with npm or Yarn.
    • Java Development Kit (JDK): The JDK is crucial for compiling Android applications. Download and install the JDK to facilitate Android app development.
    • Watchman: Especially recommended for macOS users, Watchman is a tool developed by Meta for watching file changes, which can significantly speed up the development process by efficiently managing file changes.
    • Android Studio: This is the official IDE for Android development, necessary for both developing and emulating Android applications.
    • Xcode (macOS only): If you plan to develop for iOS, installing Xcode is necessary as it provides the necessary tools and environment to build iOS applications.

    System Requirements by Operating System

    • Windows: Supports only Android development. It’s not possible to develop iOS applications on Windows.
    • macOS: Supports both Android and iOS development, offering a more flexible development environment.
    • Linux: Like Windows, it supports only Android development.

    For more details on setting up your environment, refer to detailed resources and tutorials here and here.

    Installing React Native

    You have two main paths to install React Native: using the React Native CLI for a more traditional native experience, or using Expo for a simplified, abstracted setup.

    Step-by-Step Guide to Installing React Native CLI

    1. Install Node.js: Download the LTS version of Node.js from the official website and verify the installation by executing node -v and npm -v in your terminal.
    2. Global Installation of React Native CLI (Optional): Though not necessary due to npx, you can install the React Native CLI globally using:
      npm install -g react-native-cli

      Alternatively, use npx to run CLI commands without a global installation. For more details, refer to the guide here.

    Alternative: Using Expo for Faster Setup

    For beginners or those looking for a quick start, Expo provides an alternative way of setting up React Native. Initialise your project using:

    npx create-expo-app@latest

    Expo simplifies the setup process by managing native configurations behind the scenes. Learn more about using Expo in this video tutorial.

    Verifying the Installation

    • For React Native CLI: Check the installation with react-native --version.
    • For Expo: After initialising, start your project with npm start or npx expo start, which will launch the project in Expo Go, as demonstrated in this tutorial.

    React Native Environment Setup

    Setting up your development environment properly is essential for both Android and iOS platforms to ensure that everything runs smoothly.

    Configuring the Development Environment for Android

    • Install Android Studio and Android SDK: Available on the official website, these tools are essential for Android app development.
    • Set Up Emulator: Use the AVD Manager in Android Studio to create a virtual Android device.
    • Set Environment Variables: Configure your machine to recognise the Android SDK by setting the ANDROID_HOME and updating your PATH. For detailed guidance, see the documentation here.

    iOS Setup (macOS Only)

    • Install Xcode: Available via the Mac App Store, required for iOS app development.
    • Configure iOS Simulator: This can be done inside Xcode by downloading components for your desired iOS versions. Learn more.

    Creating Your First React Native Project

    Whether you choose the React Native CLI or Expo, starting your first project is straightforward. Find out how.

    Using React Native CLI

    To start a new project, run:

    npx react-native init MyNewProject

    Replace MyNewProject with your desired project name.

    Using Expo

    Expo can be used for quicker setup:

    npx create-expo-app@latest MyNewProject

    This command creates a new project with all required dependencies and directories.

    Common Setup Issues and Troubleshooting

    Setting up a development environment can sometimes lead to issues, such as the wrong Node.js version, JDK issues, or improperly set environment variables. Always ensure your setup aligns with the official React Native environment setup documentation. For more complex issues, the React Native community on platforms like Stack Overflow and GitHub can provide invaluable help. Additionally, refer to our comprehensive Troubleshooting Guide.

    Best Practices for Maintaining Your React Native Setup

    Build High Performance Mobile APP

    Keep all dependencies up-to-date and use environment-specific configurations to manage different stages of development. Regularly cleaning your project and managing dependencies efficiently can avoid common problems and performance issues.

    Conclusion

    By following this guide, you’ve learned how to set up React Native, install necessary tools, and troubleshoot common issues. With your environment ready, you can now start building robust, cross-platform applications using React Native. Dive deeper into its features, explore third-party libraries, and start building amazing applications!

    For further reading and resources, check the React Native documentation and keep engaging with the community to enhance your development skills.

    Frequently Asked Questions

    1. Do all agencies need the same React Native setup?


    No. Each agency has unique requirements depending on client industries, integrations, and scale. We provide a customised setup based on your workflow.

    Q2. How long does it take to set up React Native for a new project?


    Typically, 2–5 days depending on integrations, CI/CD requirements, and team size.

    Q3. Will you also provide documentation after setup?


    Yes. We deliver step-by-step documentation so your team can easily continue development.

    Q4. Can you integrate third-party tools like Firebase or Stripe during setup?


    Absolutely. We configure popular services and APIs during the setup phase to save time later.

    Q5. What if my agency has ongoing projects?

    We can audit and optimise your existing React Native setup to improve performance, scalability, and maintainability.

    Q6. What kind of ongoing support do you provide after the app is launched?

    We provide comprehensive post-launch support and maintenance services, including bug fixes, performance monitoring, security updates, and feature enhancements. We ensure your clients’ apps remain secure, up-to-date, and performant in the long term.

    Q 7. How do you handle client communication and project transparency?

    We believe in a collaborative and transparent approach. Our clients get access to our project management dashboards, where they can track progress, review deliverables, and provide feedback in real time. We also schedule regular meetings to discuss project status and next steps.

  • How To Boost Website Speed Optimization?

    How To Boost Website Speed Optimization?

    Essential Website Speed Optimisation Tips for Superior SEO Rankings

    Website speed optimisation is crucial for enhancing user experience and improving search engine rankings. Faster websites lead to better user engagement, lower bounce rates, and higher retention.

    Introduction

    In the digital age, the speed of your website is a pivotal factor affecting user experience and search engine rankings. Website speed optimisation not only enhances user engagement but also boosts your presence in search results.  A slow, poorly optimised website can lead to higher bounce rates, lower rankings on search engines, and ultimately lost revenue opportunities. For companies looking to scale and succeed online, website optimisation is no longer optional — it’s essential.  Further Reading

    A high-performing website is the engine of a modern business. It’s not just a digital brochure; it’s a lead-generation machine, a trust-builder, and a key driver of revenue. For businesses seeking to grow, website optimisation isn’t a “nice-to-have”—it’s a necessity. We help businesses transform their websites from static pages into powerful assets.

    Why Website Optimisation Matters?

    Without ongoing optimisation, a website can become a liability—slow, difficult to find, and ineffective at converting visitors into customers. Optimising your website is a strategic, continuous process that directly impacts your bottom line. Here’s a detailed look at why it’s essential for every business:

    • Improved User Experience – Fast-loading, mobile-friendly websites keep visitors engaged.
    • Higher Search Rankings – Google rewards optimised websites with better visibility.
    • Competitive Advantage – Stay ahead of competitors who neglect optimisation
    • Improved Search Rankings: Optimisation helps your website appear higher in search results, making it easier for potential customers to find you.

    • Reduced Marketing Costs: When you rank organically, you don’t have to spend as much on paid ads to get noticed.

    • Better User Experience (UX): A fast, easy-to-navigate website keeps visitors engaged and encourages them to explore your content.

    • Higher Conversion Rates: Optimisation guides users toward specific actions—like making a purchase or filling out a form—which directly boosts your revenue.

    • Faster Loading Speeds: A fast website reduces frustration and bounce rates, ensuring visitors stay long enough to convert.

    • Looks Professional: A polished, modern, and bug-free website reflects professionalism and reliability.

    • Enhanced Security: Using HTTPS encryption protects user data, which is a major factor in building trust with your audience.

    • Greater Accessibility: Optimising your site for accessibility shows that your business is inclusive and committed to a positive user experience for everyone.

    • Increased Brand Trust: A visible, high-ranking website establishes your business as a credible leader in your industry.

    Key Strategies to Boost Website Optimisation

    transform website optimisation

    1. Improve Website Speed

    • Compress images without losing quality.

    • Use a Content Delivery Network (CDN).

    • Minify CSS, JavaScript, and HTML files.

    2. Mobile-First Optimization

    • Ensure responsive design.

    • Test across multiple devices.

    • Implement accelerated mobile pages (AMP) if required.

    3. Enhance SEO Performance

    • Optimise metadata (titles, descriptions, alt text).

    • Improve internal linking structure.

    • Use schema markup for better indexing.

    4. Streamline Website Architecture

    • Clear navigation and hierarchy.

    • Reduce unnecessary redirects.

    • Create user-friendly URL structures.

    5. Leverage Analytics & Testing

    • Use Google Analytics & Search Console for performance insights.

    • Implement A/B testing for key landing pages.

    • Monitor Core Web Vitals regularly.

    Essential Website Speed Optimisation Tips

    Optimising your website’s speed should never be overlooked. Here are some actionable tips to help boost your site’s performance:

    • Compress and Optimise Images and Videos

    Large media files can slow down your site. Utilise tools like Adobe Photoshop or TinyPNG to minimise file sizes without losing quality, ensuring faster loading times. Read more

    • Use a Content Delivery Network (CDN)

    A CDN can significantly reduce load times by storing cached copies of your content in multiple geographic locations. Providers like Cloudflare and Akamai optimize content delivery, making your site quick and responsive. Explore

    • Minimise HTTP Requests

    Limit scripts, plugins, and third-party integrations that add extra HTTP requests to your site. Simplify your site’s design by combining CSS and JavaScript files where possible.

    • Leverage Browser Caching

    Implement caching to allow users to store certain parts of your site on their browsers, reducing loading times for repeat visitors. Tools like WP Super Cache for WordPress can assist with this. Learn how

    • Optimise Server Response Time

    Choose a reliable hosting provider and periodically optimise your database. Server-side caching solutions like Redis can also improve performance. Web Development Services by Solution Squares

    • Continuous Performance Monitoring

    Regularly check your site’s speed using tools like Google PageSpeed Insights and WebPageTest to stay updated with your website’s performance. Check here

    How Website Performance Affects SEO

    • The Impact of Speed on Rankings

    Fast-loading sites are favoured in Google’s ranking algorithm. Improving your site’s speed is crucial for SEO success and should be a key component of your strategy. Details Additional info

    • User Experience

    Enhancements in website speed have been shown to improve user satisfaction, reduce bounce rates, and increase time on site. Google’s user-centric metrics, such as LCP and CLS, are part of these considerations. Web Design Solution

    Best SEO Practices for Web Development

    Building a visually appealing website is important, but without proper SEO (Search Engine Optimisation), your site may never reach its full potential. SEO ensures that your website is discoverable, user-friendly, and capable of ranking higher in search engine results. For businesses, integrating SEO directly into web development ensures long-term success by combining great design with high visibility.

    Optimise Website Structure

    • Use a clear URL hierarchy (example.com/services/web-design).

    • Implement breadcrumb navigation for user-friendly browsing.

    • Keep code clean and lightweight to reduce load times.

    2. Mobile-First Design

    • Ensure responsive design across all devices.

    • Test on different screen sizes and operating systems.

    • Follow Google’s mobile-first indexing guidelines.

    3. Improve Page Speed

    • Compress images and use modern formats (WebP, AVIF).

    • Enable browser caching and server-side compression (Gzip/Brotli).

    • Minify CSS, JavaScript, and HTML files.

    4. SEO-Friendly URLs & Metadata

    • Use short, descriptive URLs with keywords.

    • Write unique title tags and meta descriptions for every page.

    • Add alt text to images for accessibility and indexing.

    5. Structured Data & Schema Markup

    • Implement schema markup for products, reviews, FAQs, and events.

    • Help search engines better understand and display your content.

    6. Secure the Website (HTTPS)

    • Use SSL certificates for secure connections.

    • Google prioritizes HTTPS websites in search results.

    7. Internal Linking & Navigation

    • Link related pages for better crawlability.

    • Create an XML sitemap and submit it to search engines.

    • Avoid broken links to enhance user experience.

    8. Content Optimisation

    • Use relevant keywords naturally in headings and body text.

    • Structure content with H1, H2, H3 tags.

    • Keep content unique, valuable, and engaging.

    9. Core Web Vitals Compliance

    • Focus on Largest Contentful Paint (LCP) – fast loading.

    • Optimise First Input Delay (FID) – smooth interactivity.

    • Ensure Cumulative Layout Shift (CLS) – stable visuals.

    10. Analytics & Tracking Setup

    • Integrate Google Analytics and Google Search Console.

    • Track page performance, visitor behaviour, and conversions.

    • Use insights to continuously optimise.

    SEO is not just about keywords — it starts with strong web development practices. By implementing these SEO-friendly strategies during development, businesses can ensure their websites are built for performance, visibility, and long-term growth.


    website speed otimisation

    Conclusion

    Implementing the website speed optimisation tips discussed can have a profound impact on your SEO and overall digital success. Start optimising today to enhance user experience and climb the SEO ladder. Ready to enhance your site’s performance? Contact us for professional optimisation services or subscribe for more actionable tips.

    Visuals and Further Engagement

    • Charts and Graphs: Visualise the beneficial impact of speed optimisations on your SEO results.
    • Case Studies: Learn from real-life examples of websites that improved performance after optimisation.
    • Interactive Tools and Simulations: Test your page speed and visualise potential improvements with interactive online tools.

    Frequently Asked Questions

    1. How does website speed affect SEO rankings?

    Website speed is a critical ranking factor for search engines like Google. Faster websites provide better user experience, leading to higher engagement and lower bounce rates, which positively influence SEO rankings.

    2. What tools can I use to test my website’s speed?

    You can use tools like Google PageSpeed Insights, WebPageTest, and GTmetrix to analyse your website’s performance and receive optimisation suggestions.

    3. What is a Content Delivery Network (CDN), and how does it help?

    A CDN is a network of servers distributed globally that store cached versions of your website’s content. By delivering content from a server closest to the user, it significantly reduces latency and improves load times.

    4. How often should I optimise my website’s speed?

    Website optimisation should be an ongoing process. Regularly monitor your site’s performance, especially after making significant changes or updates, to ensure it maintains optimal speed.

    5. Can optimising images make a significant difference?

    Yes, optimising images can greatly reduce page load times. Large image files are one of the most common causes of slow websites. Properly compressed and formatted images improve speed without compromising quality.

  • What is Best React Native vs Kotlin?

    What is Best React Native vs Kotlin?

    Key Takeaways

    • React Native offers a cross-platform solution, enabling faster development for both iOS and Android.
    • Kotlin provides native Android development with superior performance and direct access to APIs.
    • Choosing between cross-platform and native depends on project requirements, performance needs, and budget.
    • Both frameworks have robust communities and comprehensive support, ensuring sustainable development and maintenance.

    React Native vs Kotlin: Deciding the Best Mobile App Development Strategy

    Introduction

    When it comes to mobile app development, one fundamental choice looms large: should you use a cross-platform framework like React Native, or should you go fully native with Kotlin on Android? Both approaches have their merits and pitfalls, influencing everything from performance and development speed to cost and scalability. Both technologies are powerful, but they serve different business needs. To choose the right strategy, agencies must weigh factors like performance, cost, scalability, and time-to-market. Let’s explore the pros and cons of each.

    This blog post aims to dissect the crucial differences between React Native vs Kotlin in an effort to guide you to the right decision for your specific needs, highlighting why understanding cross-platform vs native Android development is pivotal.

    Understanding React Native

    React Native is a framework based on JavaScript and React, enabling developers to craft mobile applications for both iOS and Android from a single codebase. This cross-platform solution reduces the duplication of effort, potentially speeding up the development process and lessening maintenance demands.

    Key Features and Advantages

    • Single Codebase: One project can cover both major platforms (iOS and Android), significantly simplifying updates and bug fixes.
    • Rapid Development: Features like Hot Reload empower developers to see code changes in real time, accelerating the development cycle.
    • Ecosystem and Community: With a robust suite of tools, including CLI tools, Expo, and numerous libraries, React Native encourages a smoother development journey.

    Common Use Cases

    React Native is particularly effective for projects that need to hit the market quickly and where budget constraints are evident. It’s well-suited for applications requiring moderate complexity without intense reliance on custom native features.

    Understanding Kotlin for Android Development

    Kotlin serves as the officially endorsed language for native Android development. Being statically typed and designed to run on the Java Virtual Machine (JVM), it offers robustness and performance benefits that are hard to overlook for intensive and platform-specific applications.

    Key Features and Advantages

    • Direct Access to APIs: A fully native approach allows developers to exploit the full spectrum of Android’s powerful features without constraints.
    • Optimal Performance: Apps built in Kotlin are compiled to bytecode, which means they run natively on the device, offering the best possible performance and response times. Read more

    Common Use Cases

    Kotlin is ideal where performance is non-negotiable: high-graphics gaming, real-time data applications, or complex utilities that leverage deep Android-centric functionalities.

    react native or kotlin cross platform
    react native or kotlin cross platform

    Cross-Platform vs Native Android Development

    Understanding the conceptual differences between cross-platform and native development is crucial for making an informed choice.

    Cross-Platform Development

    Advantages:

    • Efficiency and Speed: Develop once and deploy over multiple platforms, cutting down on time and resources. Explore cost details
    • Reduced Costs: Maintaining a single codebase is generally cheaper than managing two separate ones for iOS and Android.

    Drawbacks:

    • Performance Constraints: May not deliver the same fluid experience as native apps, with occasional lags or delays, particularly in more complex scenarios.

    Native Android Development

    Advantages:

    • Best-in-Class Performance: Leveraging Kotlin and native APIs, these apps are fast and efficient.
    • Deeper Feature Integration: Allows developers to implement sophisticated functionalities inherent to the Android ecosystem.

    Drawbacks:

    • Resource Intensive: Requires more time and expertise, particularly if a parallel iOS version is also needed.


    Comparing React Native and Kotlin

    Performance

    While React Native continues to improve with updates such as Fabric and TurboModules, Kotlin’s native solution still leads, especially in scenarios demanding high performance.

    Development Speed

    React Native potentially accelerates development timelines due to shared codebases and features like hot reload. Kotlin, while potent, often requires more time, particularly when parallel development for iOS is factored in.

    Community and Support

    React Native benefits from a broad JavaScript/React community, while Kotlin enjoys comprehensive support from Android’s ecosystem.

    Learning Curve

    React Native tends to be more accessible for developers familiar with JavaScript, whereas Kotlin appeals to those with a background in Java and Android development.

    Cost Efficiency

    React Native can be more cost-effective for startups or companies looking to deploy on both iOS and Android simultaneously. However, Kotlin might entail higher costs but rewards you with unmatched performance and robustness. Detailed cost analysis

    Decision-Making Factors

    Selecting between React Native and Kotlin often boils down to specific project needs:

    • Product Scope: Do you need support for multiple platforms or just one?
    • Performance Requirements: Are you building a high-performance application where speed and responsiveness are paramount?
    • Timeline and Budget: Is rapid development and cost-effectiveness a priority?
    • Team Skills: What expertise does your development team have?

    React Native vs Kotlin: Quick Comparison

    Both React Native and Kotlin have their merits and can be the best choice under different circumstances. By considering the factors outlined above, businesses and developers can make informed decisions that align well with their project requirements and long-term goals.

    Feature React Native Kotlin
    Platform Support iOS + Android (cross-platform) Primarily Android (with Kotlin Multiplatform for iOS)
    Development Speed Faster (single codebase) Slower (separate codebases unless using KMP)
    Cost Efficiency High (one team for both platforms) Moderate (more resources needed for iOS & Android separately)
    Performance Near-native True native (Android)
    UI/UX Almost native Native Android experience
    Best For MVPs, startups, cross-platform apps Enterprise apps, Android-first solutions, feature-rich apps
    • Choose React Native if your client needs a cross-platform solution that balances cost, speed, and functionality.

    • Choose Kotlin if your client needs a high-performance Android app, or if they’re building a complex, enterprise-level solution.

    react native or kotlin cross platform

    Conclusion

    React Native and Kotlin serve different developer needs, and choosing between them depends largely on the project scope, performance needs, budget constraints, and team expertise. While React Native offers a fast and cost-effective solution for cross-platform applications, Kotlin remains unbeatable in performance metrics, making it ideal for high-end, platform-specific applications.

    Successful mobile app development is contingent on making informed choices, and understanding the distinctions between React Native vs Kotlin is a pivotal step in that journey. We encourage developers and businesses to weigh their options carefully to pick a technology stack that not only addresses their immediate needs but also aligns with their strategic business outcomes.

    Further reading and resources are available on React Native Documentation and Kotlin Documentation.

    These sources will provide more detailed guidance and insights to help refine your development strategy and ensure your mobile app meets its intended market with efficacy and grace.

    Frequently Asked Questions

    1. Which is more cost-effective: React Native or Kotlin?

    React Native is generally more cost-effective because you only need one team and one codebase for both platforms. Kotlin often requires separate teams for Android and iOS (unless using Kotlin Multiplatform), which can increase costs.

    2. Can Kotlin be used for iOS apps as well?
     

    Yes, with Kotlin Multiplatform, agencies can share business logic across iOS and Android. However, UI still needs to be developed separately for each platform, unlike React Native, which handles both with one codebase.

    3. Which framework is better for performance?

    Kotlin delivers true native performance on Android since it directly uses platform APIs. React Native apps perform very well but may lag slightly behind in extremely complex or resource-intensive apps.

    4. Which is faster to develop with—React Native or Kotlin?

    React Native is faster for cross-platform apps because it uses a single codebase for iOS and Android. Kotlin takes more time unless it’s an Android-only project.

    5. Is React Native suitable for enterprise-level apps?

    Yes, but with some limitations. React Native is great for MVPs, startups, and apps that need quick cross-platform deployment. For very large, complex apps (especially Android-first), Kotlin is often more reliable.

    6. Do both React Native and Kotlin have strong community support?

    Yes. React Native has a large global community and ecosystem of libraries, while Kotlin is officially supported by Google and has rapidly growing adoption.

    7. Can an app built in React Native be migrated to Kotlin later?

    Yes, agencies can start with React Native to validate an idea and later migrate parts or the whole app to Kotlin for better performance and scalability.

    8. Which agencies should recommend for startups?

    React Native is usually the better choice for startups—it’s faster, cheaper, and allows launching on both platforms quickly.

    9. Which agencies should agencies recommend for enterprise clients?

    Kotlin is often better for enterprises building Android-first or performance-heavy apps, especially if advanced native features are required.

  • What is Best React Native vs Swift?

    What is Best React Native vs Swift?

    Key Takeaways

    • Performance and Integration: Swift offers unmatched native performance and deep integration with iOS features, while React Native provides adequate performance for most applications.
    • Development Speed and Cost: React Native enables faster and more cost-effective development across multiple platforms using a single codebase.
    • Community and Ecosystem: Both frameworks have robust communities, with React Native benefiting from the extensive JavaScript ecosystem, and Swift being closely tied to Apple’s ecosystem.
    • Scalability and Flexibility: Swift is ideal for large-scale projects requiring high performance, whereas React Native offers flexibility for dynamic and multi-platform applications.
    • Long-term Maintainability: Swift minimises external dependencies, enhancing app security and maintainability, while React Native leverages widespread JavaScript support for resource availability.

    React Native vs Swift: Choosing the Best Framework for iOS App Development

    When it comes to iOS app development, agencies often face a key question: Should we build with React Native or Swift? Both have their strengths, but the right choice depends on your project goals, budget, and scalability needs. Let’s break it down.

    Choosing the right framework for iOS app development is crucial as it affects app performance, development speed, costs, access to iOS features, and long-term maintainability. In this detailed guide, we delve into the comparison of “React Native vs Swift,” examining these two powerful iOS app development frameworks to help you make an informed decision tailored to your project’s needs.

    React Native for iOS Development

    What It Is:
    React Native is a cross-platform framework by Meta that allows developers to build apps for both iOS and Android using JavaScript and a single codebase.

    Benefits for Agencies:

    • Faster Development: Shared codebase reduces time to market.

    • Cost-Effective: One team can handle both iOS and Android.

    • Large Ecosystem: Pre-built components and community support.

    • Hot Reloading: Makes testing and iteration quicker.

    Best For:

    • Startups or businesses needing both iOS & Android apps quickly.

    • Projects where budget efficiency is important.

    • Apps that don’t require heavy native integrations.

    iOS development solution

    Introduction to React Native vs Swift

    When it comes to developing iOS applications, selecting the right framework can make a significant difference. The comparison between React Native and Swift is essential for developers and businesses aiming to optimise app quality, speed, and efficiency. This post will cover overviews of both frameworks, detailed comparisons on various aspects, including performance, productivity, ecosystem support, and more, to guide your framework choice.

    Overview of React Native

    Definition and Origin:

    React Native, pioneered by Meta, is a cross-platform framework that uses JavaScript to enable the development of both iOS and Android applications from a single codebase. It interfaces with native platform APIs through a dynamic bridge.

    Key Features:

    • Cross-Platform Code Sharing: A Write once, run anywhere approach significantly reduces development time and effort.
    • JavaScript/React Paradigm: Employs known technologies from web development, enhancing developer accessibility.
    • Bridge Modules: These allow for the utilisation of native components, ensuring flexible integration of native functionalities.

    Benefits for iOS Development:

    • Cost Efficiency and Speed: Multi-platform targeting without the need for separate codebases streamlines development and cuts costs.
    • Wide Developer Base: Leverages the extensive JavaScript community, facilitating resource availability and support.
    • Near-Native Experience: Achieves a user experience that rivals native applications in many scenarios.

    Overview of Swift

    Definition and Role:

    Swift is Apple’s intuitive programming language for building, offering rich integration with iOS system components through direct API access.

    Key Features:

    • Native Performance: Swift applications run directly on iOS hardware, maximising performance and efficiency.
    • First-Party UI Frameworks: Direct access to SwiftUI and UIKit simplifies the creation of engaging user interfaces.
    • Longevity and Stability: Ideally suited for complex applications requiring robust stability over time.

    Benefits for iOS Development:

    • Optimised Performance: Provides superior processing speed and smoother user experiences.
    • Deep iOS Integration: Offers comprehensive control over device features like cameras, GPS, and biometrics.
    • Reduced Dependencies: Minimises external dependencies, enhancing app security and maintainability.

    When to Choose Swift

    • You want top performance and the smoothest native experience.

    • You’re building iOS-only or deeply integrated Apple apps (e.g., heavy ARKit, HealthKit, Apple Pay).

    • You have experienced iOS developers.

    When to Choose React Native

    • You want one app for iOS and Android from a single codebase.

    • You need faster MVP delivery.

    • Your team knows JavaScript and prefers flexibility.

    Comparing React Native and Swift

    Performance:

    • Swift’s direct access to hardware and APIs facilitates top-tier performance, particularly for resource-intensive applications. React Native, while capable, may experience delays due to its bridge-based interaction model. Crustlab Solutionsquares
    Real-world application performance varies; simple applications might not exhibit significant disparity, but the difference becomes apparent in more demanding scenarios. Webandcrafts Solutionsquares

    Development Productivity:

    • React Native’s alignment with JavaScript and existing web technologies can accelerate development, especially when targeting multiple platforms simultaneously.
    • Swift, designed specifically for Apple’s ecosystem, offers a streamlined environment optimised for iOS development.

    Ecosystem and Community Support:

    • Both frameworks boast robust communities. React Native benefits from the widespread JavaScript community, while Swift developers are deeply integrated with Apple’s continuous innovations.

    Cost Effectiveness:

    • React Native can be more cost-effective for developing applications across multiple platforms due to its cross-platform nature.
    • Swift could entail higher costs if parallel development for other platforms is necessary.

    Flexibility and Scalability:

    • Swift excels in scenarios requiring high performance and deep integration with iOS features, making it ideal for large-scale, long-term projects.
    • React Native offers considerable flexibility in managing diverse and dynamic application features across platforms.

    Platform Scope

    • Swift → Apple’s native programming language for iOS, iPadOS, macOS, watchOS, and tvOS. Best for purely Apple ecosystem apps.

    • React Native → Cross-platform framework (JavaScript/TypeScript) for iOS + Android from a single codebase. Best for multi-platform development.

    Development Speed

    • Swift

      • Slower if you also need Android (you’d need a separate Java/Kotlin app).

      • Great for teams familiar with Apple tools (Xcode, SwiftUI).

    • React Native

      • Faster for cross-platform projects — one codebase for iOS & Android.

      • Hot Reload speeds up testing UI changes.

    Feature React Native Swift
    Development Speed Faster (cross-platform codebase) Slower (iOS-only)
    Cost Efficiency More affordable (shared resources) Higher (iOS-focused team)
    Performance Good, but slightly behind native Excellent (native-level)
    User Experience Near-native True native
    Maintenance Easier (one codebase for iOS & Android) Requires separate handling
    Best For Cross-platform apps, MVPs, cost-sensitive projects High-performance, iOS-only, feature-rich apps

    iOS development consultation solution

    Conclusion: Making the Right Choice

    React Native vs Swift Recap:

    Swift is unmatched in performance for iOS-specific applications, offering stability and full feature access. React Native stands out in multi-platform application development, providing speed and efficiency with adequate performance.

    Bottom Line:

    • Swift = Best for pure iOS, performance-heavy, or highly Apple-integrated apps.

    • React Native = Best for cross-platform apps, rapid development, and smaller teams.

    Framework Selection Guidance:

    • Opt for Swift for maximum performance, acute iOS feature integration, and applications where long-term stability is vital.
    • Choose React Native for rapid, cost-effective development across iOS and Android, leveraging existing JavaScript/React skills.
    Selecting between React Native and Swift depends significantly on specific project needs—whether prioritising speed and cost efficiency across multiple platforms with React Native or seeking the highest level of performance and integration for iOS applications with Swift. Consider all aspects to align the choice of framework with your strategic goals.

    Frequently Asked Questions

    1. Can React Native apps perform as well as Swift apps?


    React Native apps deliver near-native performance, but for highly complex or graphics-intensive apps, Swift provides superior speed and optimisation.

    2. When should agencies recommend Swift over React Native?

    Swift is the better choice when:

    • The client targets only iOS users.

    • The app needs advanced iOS features like ARKit or CoreML.

    • Performance and scalability are top priorities.

    3. Can an app start with React Native and later switch to Swift?


    Yes. Many businesses begin with React Native to validate their idea quickly, then transition critical features or the full app to Swift as they scale.

    4. How do agencies decide which framework is right for their clients?


    The decision depends on factors like budget, timeline, target audience (iOS-only vs. cross-platform), required features, and long-term scalability.

    5. Does Apple recommend Swift over React Native?


    Apple officially supports Swift, but React Native is widely accepted in the industry. Agencies often choose based on client needs rather than platform preference.

    6. How long does it take to develop an iOS app with React Native vs. Swift?

    • React Native: Faster, especially for cross-platform apps.

    • Swift: Takes longer but offers deeper native customisation.

    7. Which option is better for startups?

    React Native is usually better for startups as it allows launching on both iOS and Android quickly with a smaller budget.